LED strip lighting is a popular lighting solution that offers versatility and adaptability for different lighting needs. In this article, we will discuss how to cut and resume the LED strip light as needed.
Function of the LED light strip
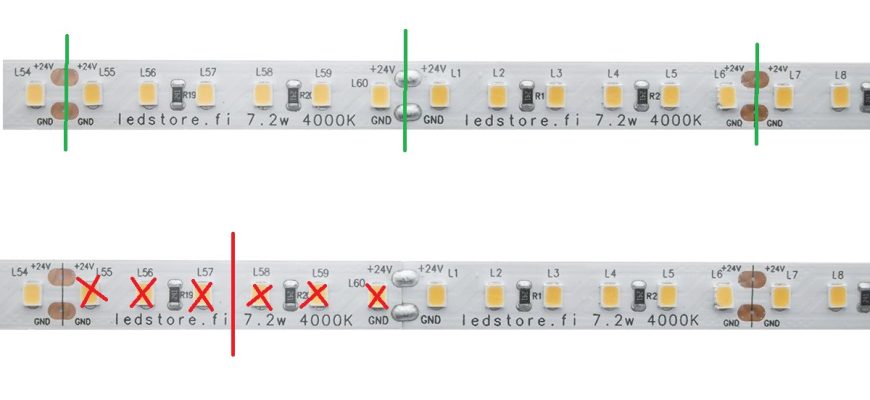
The LED strip consists of small LED lights connected together to form a strip. The led strip is divided into modules with cut-off points at the end. The modules are electrically paralleled in the led strip, allowing the led strip to be cut and resumed.
So if you cut anywhere other than where you cut, the whole cut part of the series will be dark.
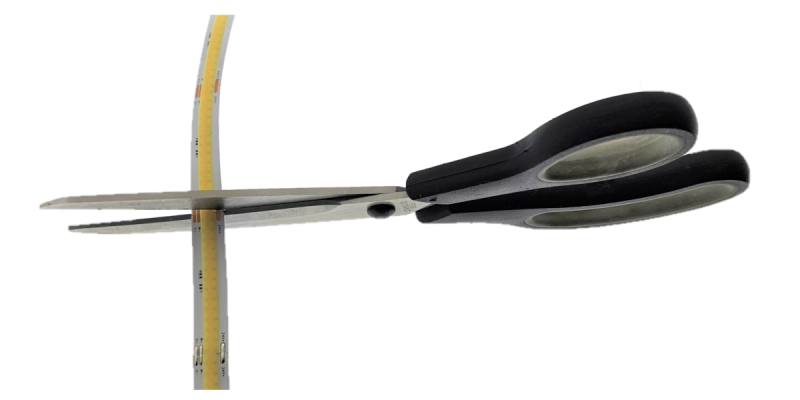
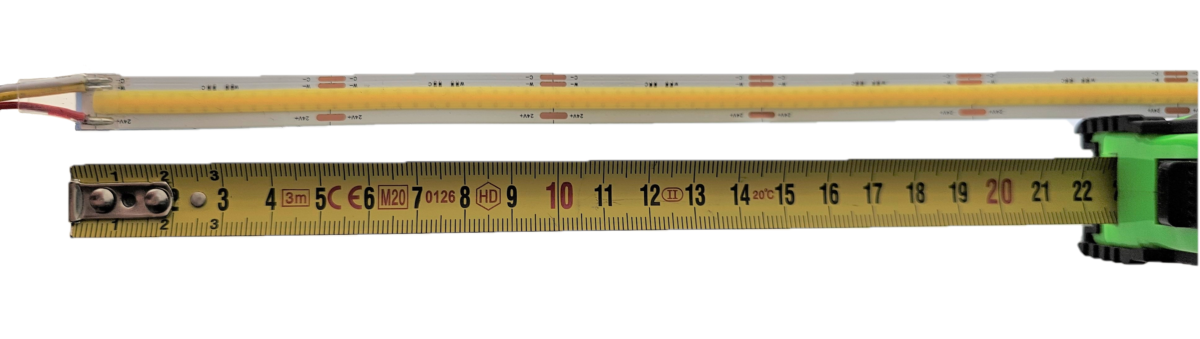
This applies to traditional SMD LED strip lighting and dots-free COB LED strip lighting.

The need for cutting the LED strip
LED strip lighting can be cut off for a number of reasons. Most commonly, cutting is done when you want to shorten the led strip or when you want to use the led strip in several different places. The cut-off also allows the strip to be adapted to different spaces and lighting needs.
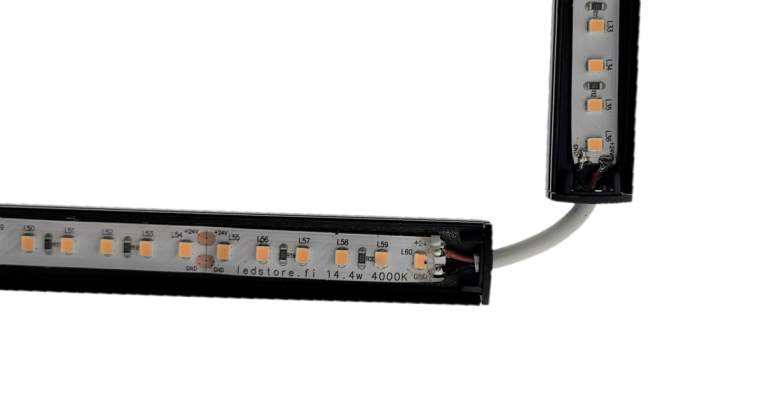
The most common need for cutting comes at corners. The LED strip light does not bend 90° to the side. It should be cut and make a small splice with a soldering iron and cross the bend that way.
Basics of LED strip lighting disconnection
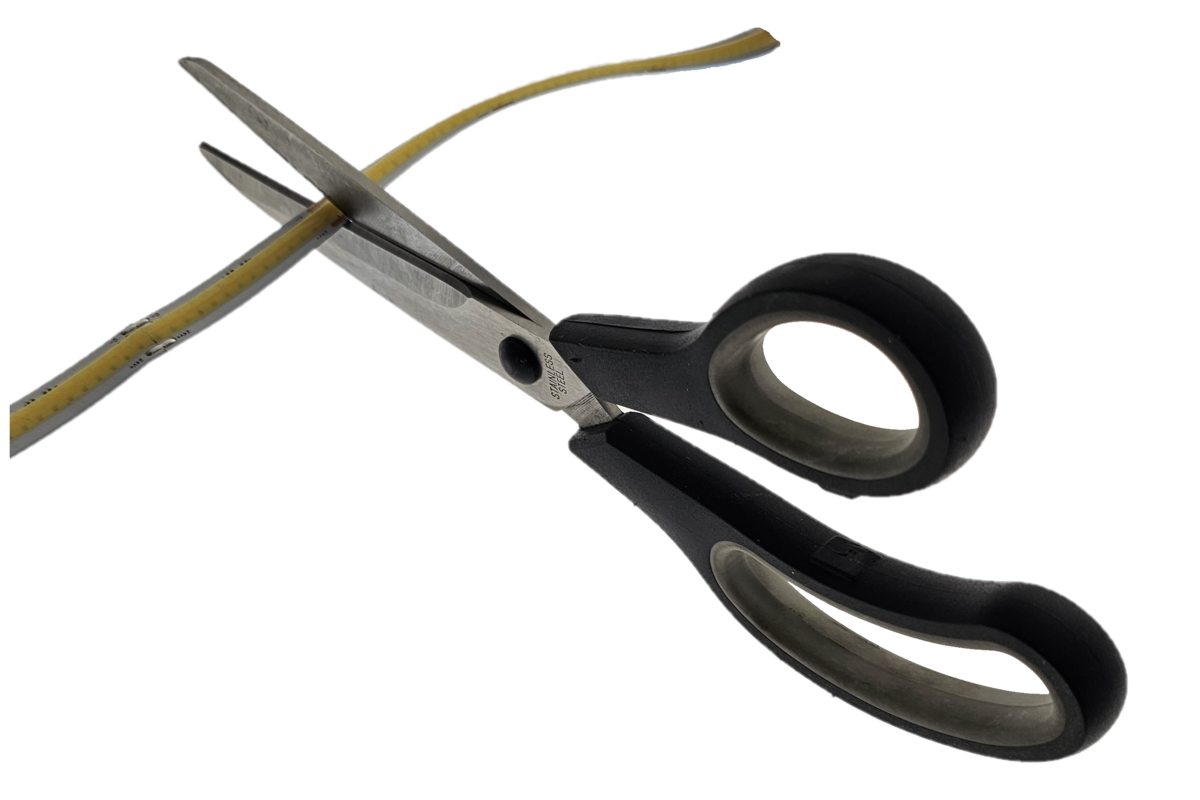
Only a few accessories are needed to cut the LED strip light. The most important tool is a pair of sharp scissors that allow you to cut smoothly and neatly. It is important that the strip does not get twisted at the point of the cut to ensure the most successful cut.
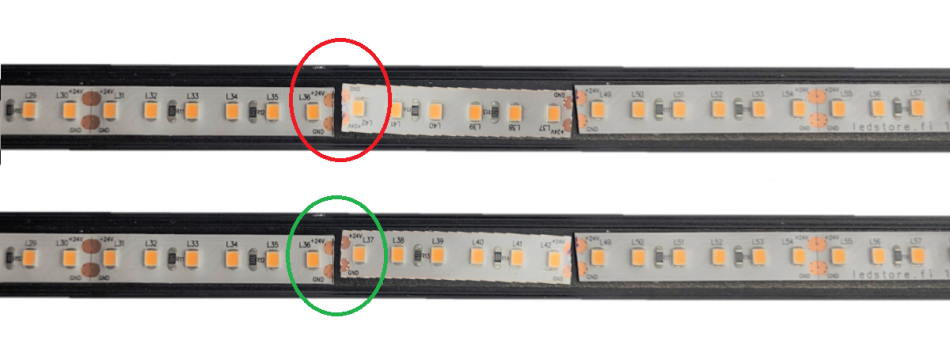
By cutting the mark in the middle, you’re left with good solder points for reusing the led strip.
Steps to cutting the LED strip
The LED strip can usually be cut every 3 or 6 LEDs. The led strip is usually marked with small pictures of scissors at the cut-off points. The following steps will help you cut the LED strip light:
- Measuring the LED strip – Measure the strip and mark where you want to cut the strip.

Led strip light measurement - Marking the LED strip – Mark the strip at the cut-off point.

Marking the cut-off point of the Led strip light - Cutting the LED strip – Cut the strip at the relevant point using sharp scissors.
Cutting the Led strip light with scissors - Handling of LED strip ends – If necessary, handle the cut strip ends (IP65) by adding glue, silicone or shrink sleeve. This is necessary for outdoor installations.
Reconnecting the LED strip
For LED strips, there are connectors that allow the strip to be continued after it has been cut. Connectors sound easy, but from years of experience I can say that the only sustainable way to reconnect an LED strip light is soldering. The connectors become loose, dust and grease get in between and they are difficult to find. How then do I reconnect the light strips?
Put the cut ends of the LED strip together (make sure the + is against the +!) and solder the ends together.
Another problem with off-the-shelf connectors is the versatility of LED strip lights, as there are many LED strip lights on the market and each one can have solder points at different points and the width of the LED strip light itself varies.
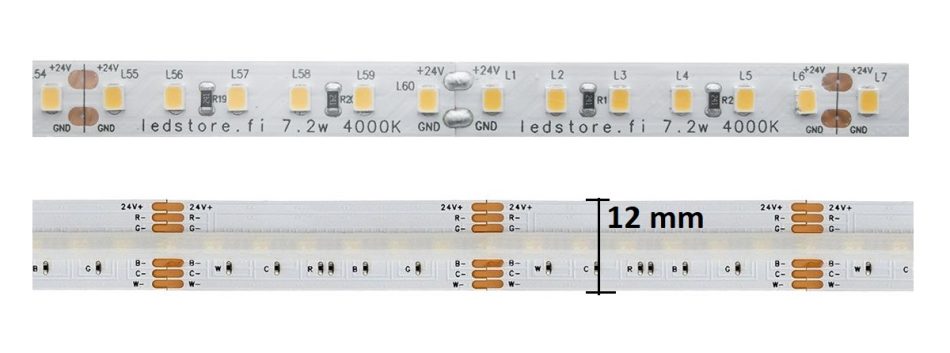
If you want to use the cut strip in several different places or if you want to adapt the length of the strip to different lighting needs you will have to solder them with soldering irons. On the other hand, learning the skill is useful and not impossibly difficult for basic LED strip lighting. RGBW and RGBCCT, on the other hand, cause difficulties because there are 5-6 small solder points at the junction.
Common mistakes and how to avoid them
Some common errors may occur when cutting the LED strip. One of the most common mistakes is cutting the led strip in the wrong place. It is important to cut the strip at the marked cut-off points to avoid damaging the strip and to allow it to be reattached.
Another common mistake is incorrect handling of the led strip after cutting. It is important to handle the ends of the cut led strip correctly so that they are not damaged and the strip works properly. This applies to IP65 LED strips that are installed outside. An unprotected cutting head will collect moisture and damage the LED strip.
Summary
LED strip cutting is a simple process that requires only a few tools and basic knowledge of LED strip lighting. Switching allows the strip to be adapted to different lighting needs and spaces, making the LED strip a very versatile lighting solution.
Hopefully this article will help you understand how to disconnect and reconnect the LED strip light.
Led strip light installation guides
- Parallel connection of a Led strip light – We will discuss the principle of parallel connection and give an example.
- Led strip light does not light – Why does led strip light not light, we go through the reasons
- Led strip light flashing – Why does a led strip light flash? There are many reasons and we will go through them all.
- Led strip light lifetime – What affects lifetime and why do other strips last longer?
- Led strip light mounting – How do I mount a led strip light indoors or outdoors? What needs to be taken into account?
- Connecting a led strip light to a transformer – How do I connect a led strip light to different types of transformers?
- RGB Led strip light connection – How do I connect an RGB led strip light to different control devices?
- Led strip light extension – How do I solder the joints? A little soldering guide for the beginner.
Led strip lighting specialist
LedStore has been an expert in LED lighting and lighting design since 2010. We have our own product design, so our products are technologically state-of-the-art. Products have quarantee for up to 7 years. We also carry out lighting maintenance.
We focus on temperature-controlled and high colour rendering lights, so they work brilliantly and last a long time. We do around 500 lighting designs for our clients’ sites in a year. Read more here or order a design. Did you know? LedStore offers lighting design from 99 euros for the whole house!
Made to measure Led strip lights
We offer a service of custom-made LED strips, i.e. custom-made LED strips in aluminium profile. Also installed.
Remember that we are always ready to offer our help to you along the way, by email (myynti@ledstore.fi) and by phone (045 251 4510). As always, feel free to share photos of your own projects on social media at ledstore.fi at Instagram and ledstore.fi at Meta. We love to see the cool things our LEDs do, and it helps to provide inspiration for those who are unsure about the power and awesomeness of LEDs.
Did you know that we already have over 3500 pictures of our LED installations in our Gallery!