The starting point for the office renovation was the need to revamp the hard, echoing surfaces of the space and make the drab, non-dimmable, mediocre colour rendering index lighting more diverse and sensory-friendly. A Lumir acoustic solution was found to be a good solution, and lighting was improved with colour temperature controlled CCT-led strip lights and recessed CCT-led spotlights. In this article, we present acoustic coating sprayed on walls and ceilings, as well as the steps and price of a lighting renovation.

Benefits of spray-on acoustic coating and recessed LED lighting
When it was decided to spray-coat the wall and ceiling with Lumir’s battery-safe, bio-based, seamless Comfort coating, it also became possible to install a recessed LED track to illuminate the corner of the long wall. The thickness of the coating on the ceiling was brought to the same level as the aluminium profile of the LED strip, i.e. 7mm, so that the LED strip strip was elegantly flush with the acoustic surface. The coating was sprayed onto the painted plasterboard surface. The coating is also suitable for spraying on many other surfaces, such as sheet metal, concrete, brick, chipboard and wallpaper.
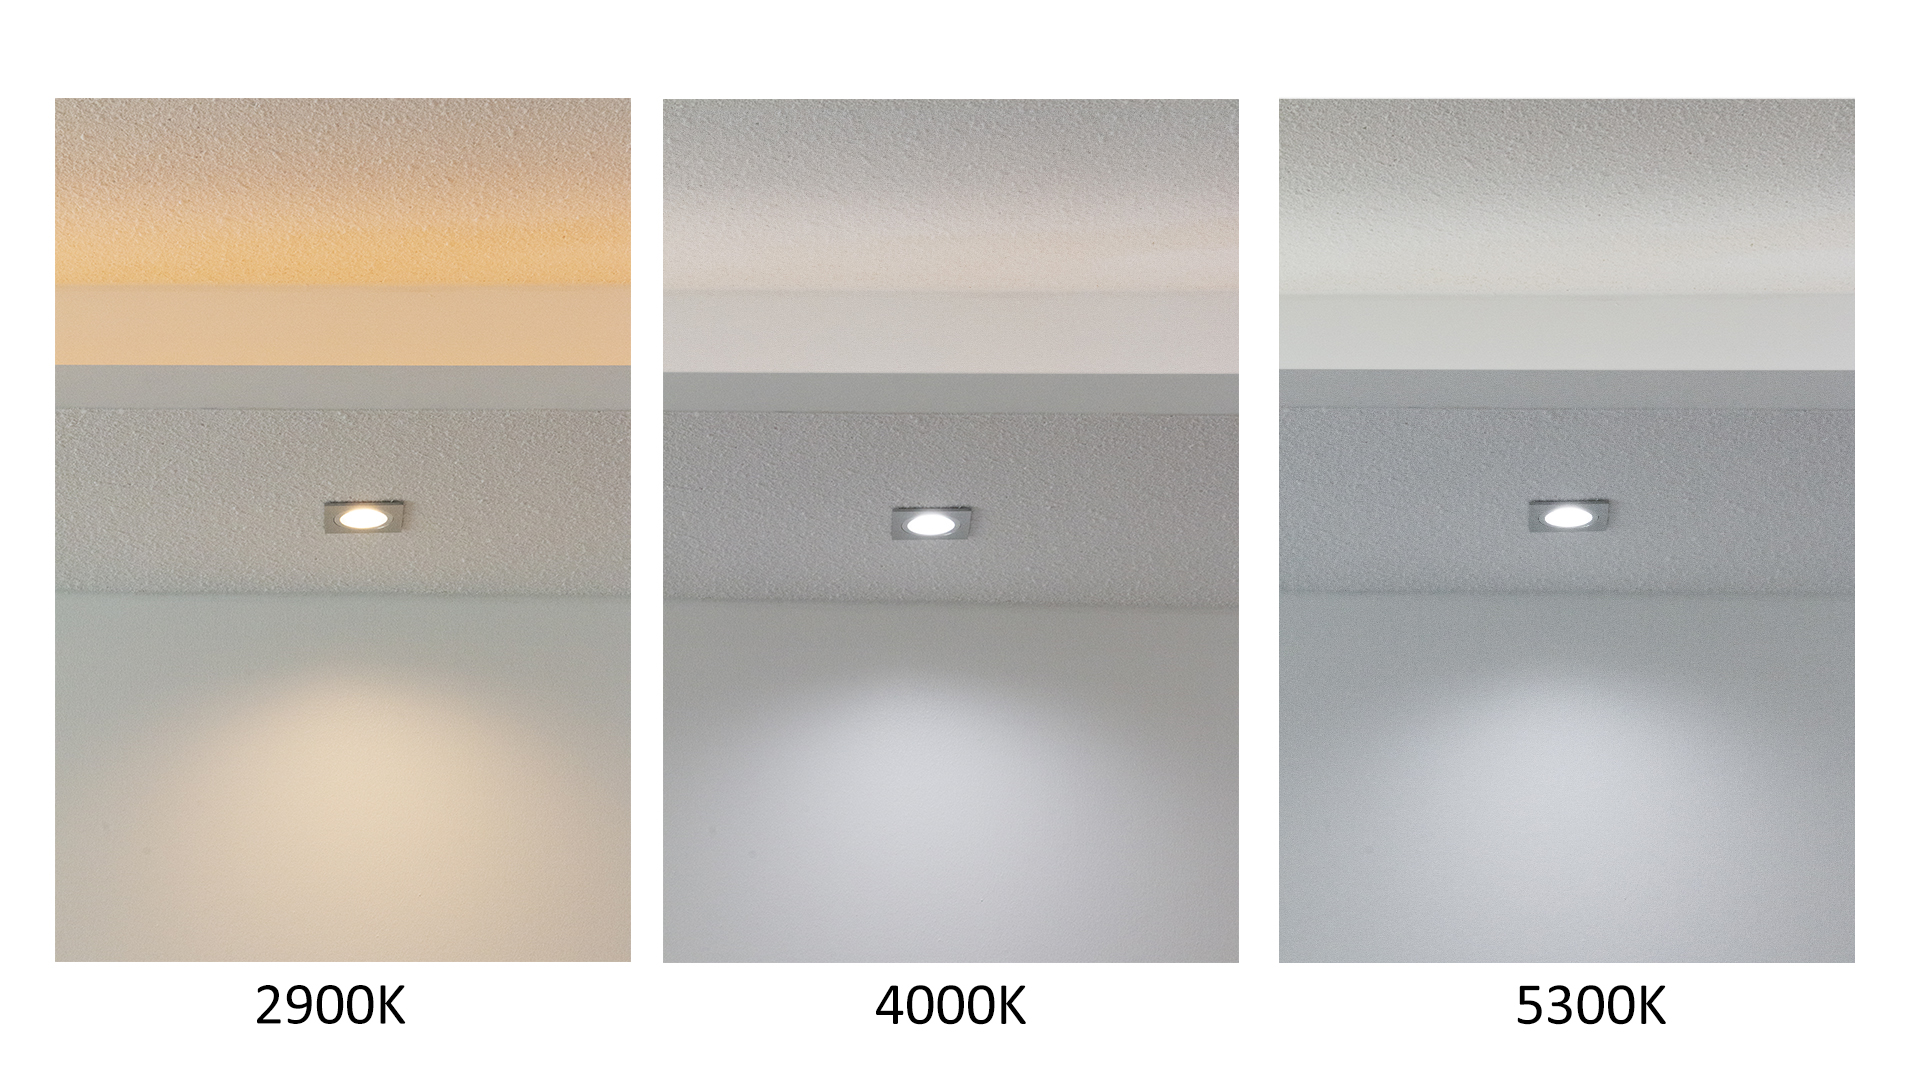
The renovation included a light trap, which was also coated on the bottom and edges. The frameless, ceiling-mounted Piilo spots, which are plastered into the ceiling in the basic installation, are ideal for acoustic spray ceilings, as the sprayable coating is an easy way to make the frames to be plastered invisible. There is no need for repeated smoothing and sanding. We have two models of Piilo spots in our range, Piilo Round and Piilo Square. You can read about the lighting renovation with these in this article. For this particular office renovation, the choice was made for recessed Led Kantti 023 brushed aluminium 9W spots, whose spotlights also open a little further into the ceiling, but not as much as the Piilo spots, and the Led Kantti spots have a larger opening angle of 45 degrees, compared to around 30 degrees for the Piilo spots. The inside of the spotlight is also a different colour in these spots, and the light output is higher in the Piilo spots, 12W. In both, the colour temperature of the light can be adjusted between warm and cool white by selecting the control that allows this, i.e. a group transformer and a colour temperature controller/dimmer.

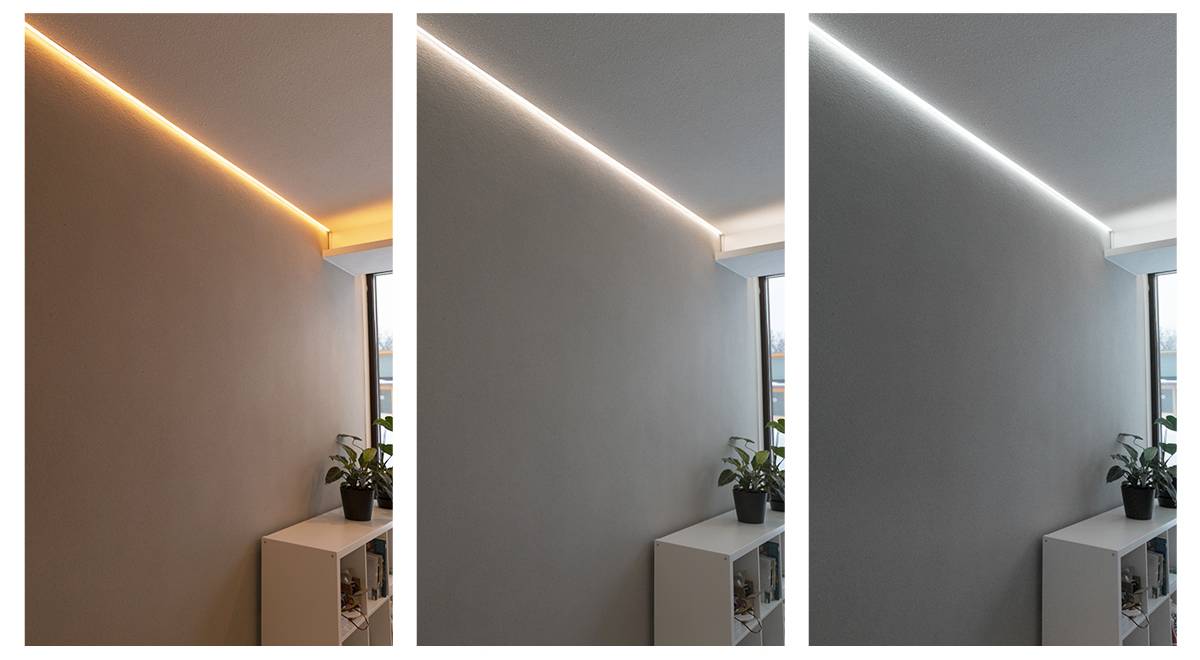
The LED strip chosen was 7.2 W/m CCT Solo ultra-flat LED strip in a low aluminium profile and was applied to the 1. to the ceiling limit of the acoustic sprayed wall, 2. a light trap to illuminate through the roof, and 3. in front of the window. The fourth group of lights consisted of LED spotlights. The control was implemented with a Zigbee colour temperature controller, which provides all four lighting groups independently. The power supplies used were Zigbee-controlled 24V 30W and 24V 75W power supplies, depending on the total power load of lights. There was a switch in the room controlling the light box, which was left in place. The lights are operated by remote control when the light switch is in the on position. If you want to turn off the lights, you can still easily do so from the wall switch, which also stops the stand-by consumption of the power supplies. Thanks to the internal memory of the power supplies, when switched on, the lights return to the brightness and colour temperature they had when they were switched off.

The stages of renovation in a nutshell
All in all, the lighting and acoustic renovation took about eight working days, including the drying time for the coating. L2-Building did an excellent job with the acoustic work. A downward clip for the lights was made on two walls before the acoustic spraying. The premises were protected and a primer was applied to the wall and ceiling to be sprayed. An acoustic coating was sprayed on the surface, dried and finished. After this, the lighting was installed.

The renovation started by making a downward slope for the lights
Thanks to the lowering, a lot of indirect lighting was brought into the space with LED strips and the spotlights could be partially illuminated through the walls, as well as focused on the workstations. For the lowering lip, 2×2″ battens and drywall were needed. From the door of the room, a 3.6 metre long sash was made on the right-hand wall, where the workstations are located, and a 2.6 metre long sash on the window wall. The width of the strip is 50 cm at the bottom, with a 15 cm shelf at the top for the LED strip lights. The edges of the batten were finished with a metal trim strip to ensure that the acoustic coating was evenly delineated from the bottom edges of the batten.
The windows could be fitted with a clip in front of them, as they are fixed. The curtains can also be illuminated with a ceiling-mounted LED strip behind the sash.

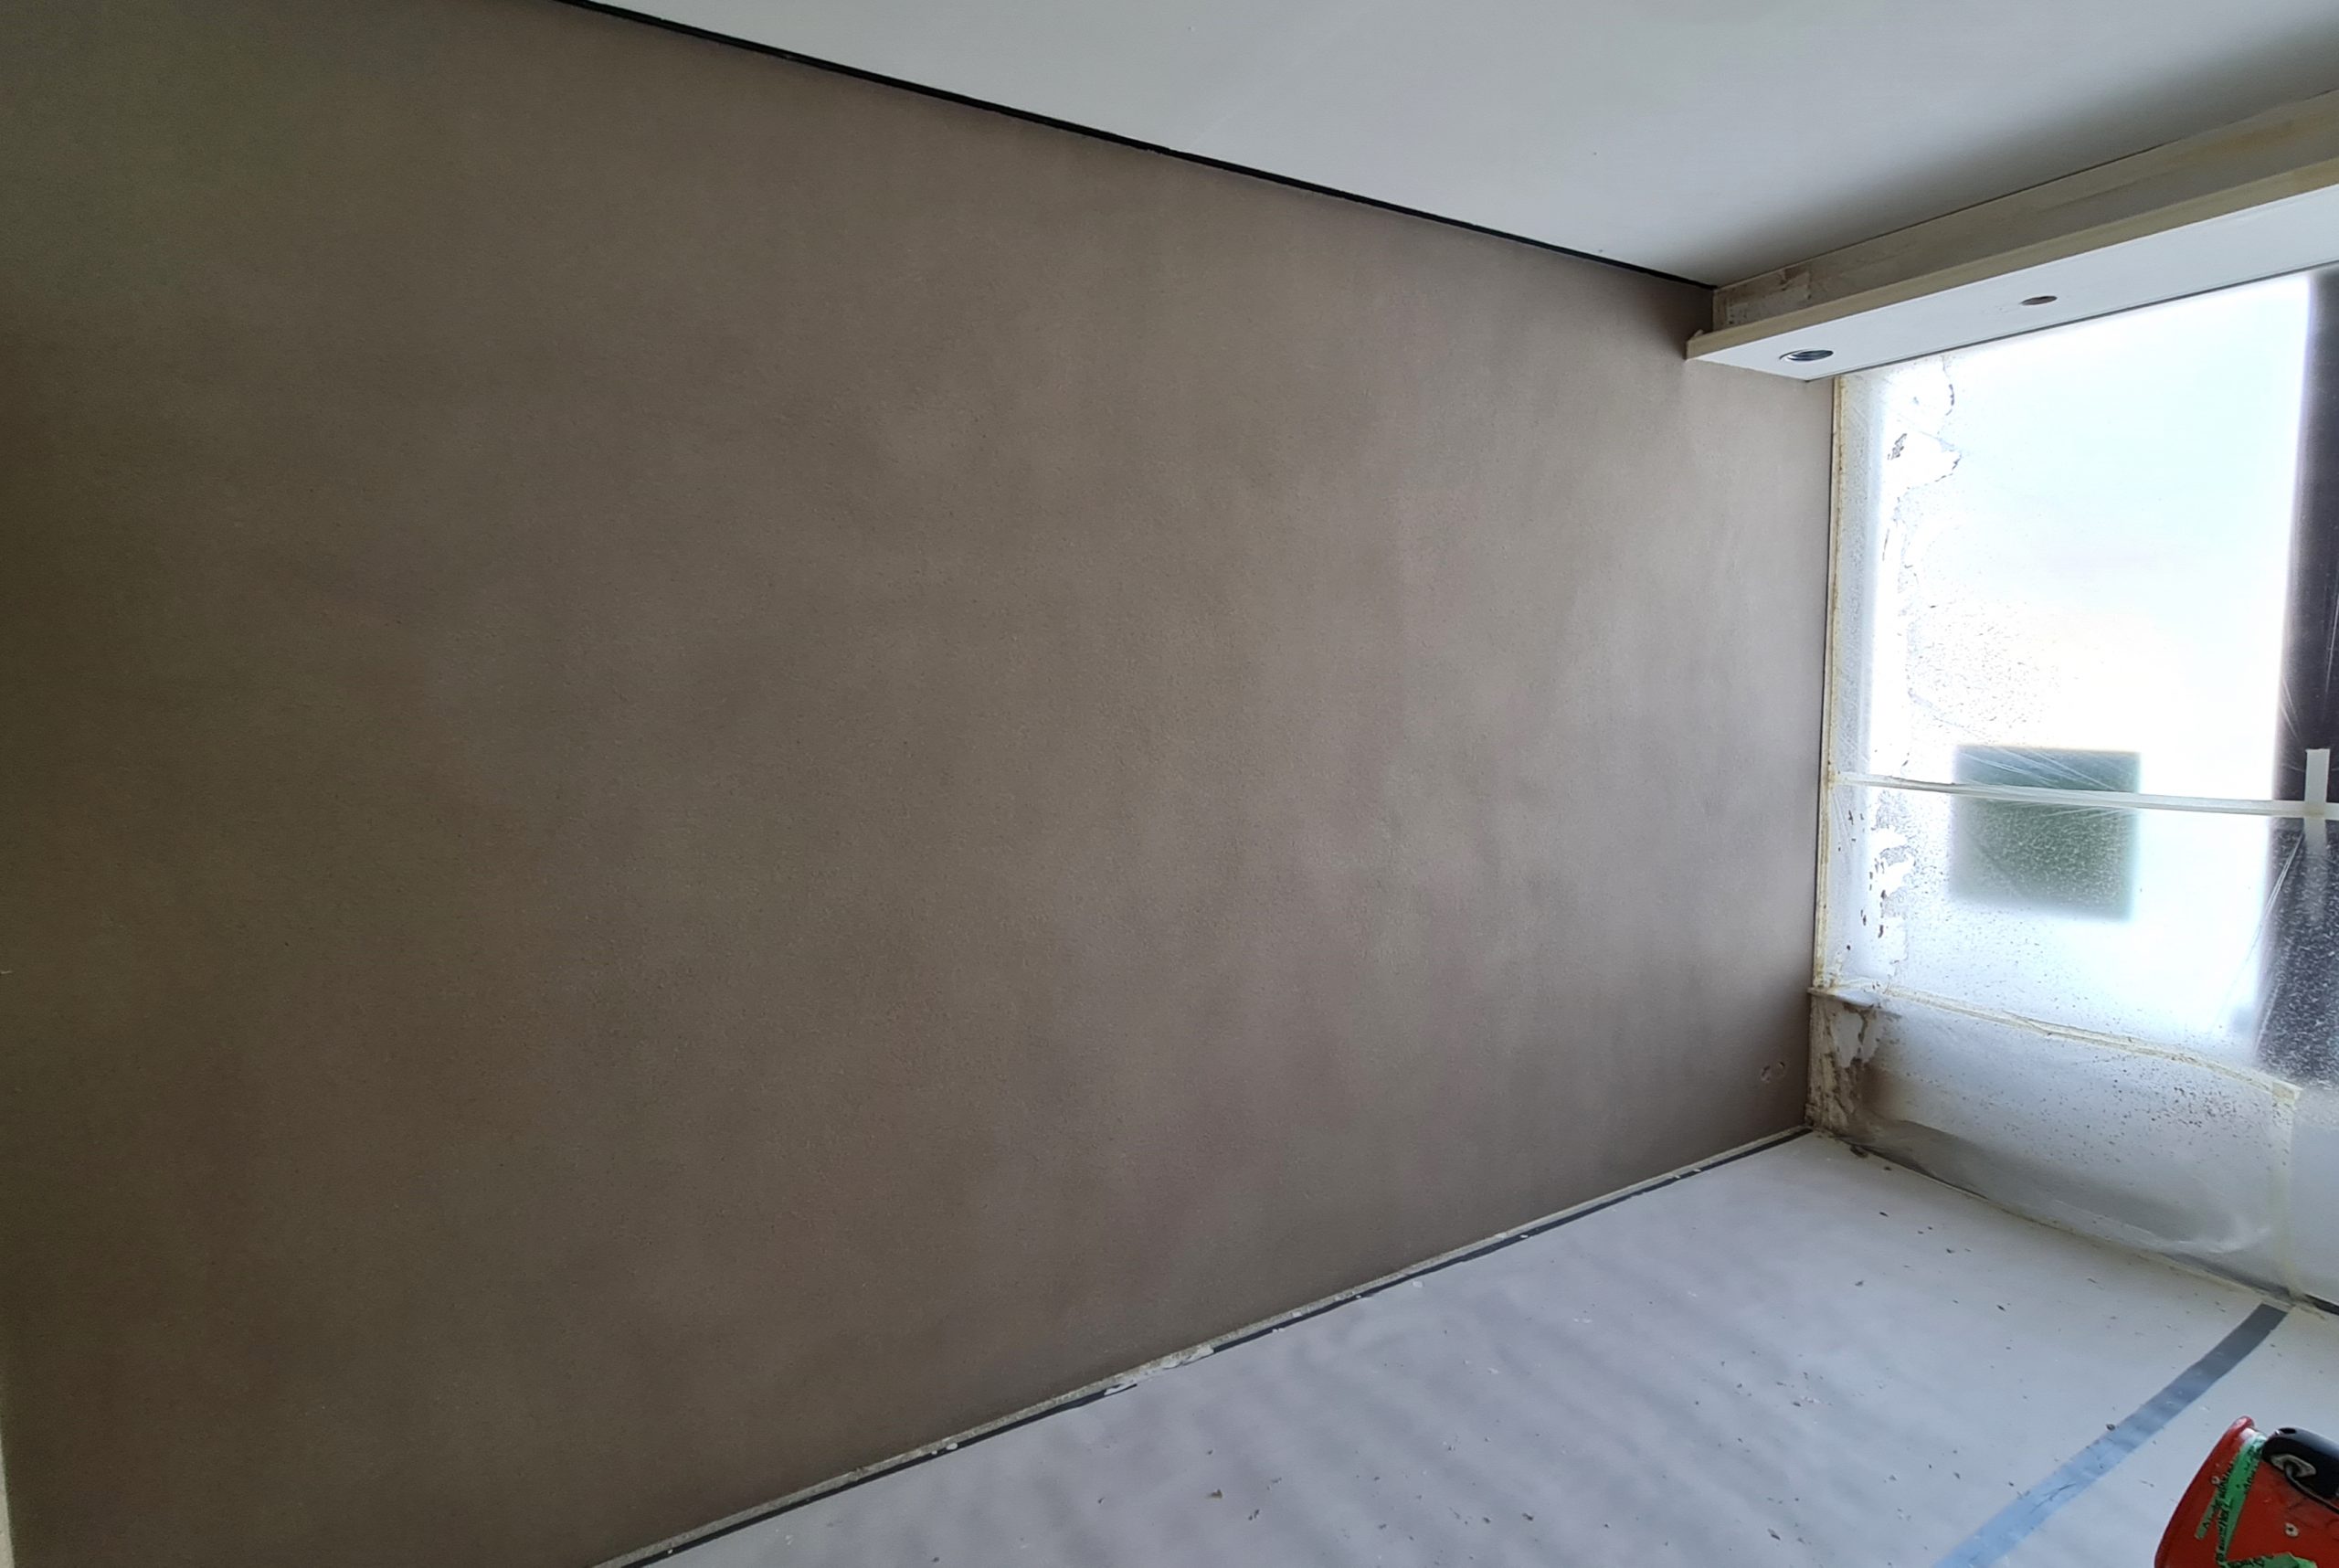
Before the spraying started, the aluminium profile of the LED strip on the left wall was also fixed in place to delimit the coating. In the picture below, the primer has been applied to the wall and ceiling and to the underside of the downspout, and the trim strips have been attached to the edge of the downspout.

For spraying, all surfaces were first protected except the left wall. After spraying and drying for a couple of days, the walls were protected to treat the roof and the drop-down frame. The acoustic mass itself is bio-based and non-toxic. It is also carbon negative in terms of life cycle emissions, which fits very well with LedStore’s approach to energy efficiency. The colour chosen for the wall is light brown, which gives the room a cosy feel, but as a large surface it does not detract from the sense of space. White was chosen for the ceiling.

Installation of luminaires on pre-accoustic surfaces
The preparatory work for the light fittings was done before the acoustic spraying, i.e. the aluminium profile was installed at the roofline, and the holes and wiring for the spotlights were made in the drop-down box. After spraying and drying, it was discovered that an opening was needed for the service hatch. The acoustic mass and plasterboard are porous materials, so the opening was also very successful afterwards.
- Group 2: The LED strip, made to the correct size, was mounted on the wall and the diffusing and anti-glare acrylic cover was fixed in place.
- group 2: The light strip towards the ceiling was mounted on the front edge of the shelf and the power supplies were placed behind it.
- Group 1: The strip strip with its rails, designed as a curtain light in front of the window, was mounted on the site with brackets, and the wiring was routed to the power supply behind the service hatch.
- group: The ends of the spot wires were waiting with their quick connectors, so installing them in the pre-made hole was simple.


Price of renovation
The price per square meter of Lumir Comfort acoustic coating made by L2-Building for such an object is about 160€ / m² (incl. VAT) The price includes delivery of shelters (the customer protects himself), material prices, pre-treatment, spraying, drying, finishing. The roof had a surface area of 16 m² and was coated white. The wall had a surface area of 10 m² and was coated in light brown. The price is also affected by the shape of the space to be coated; corners and projections, as well as the colour and pigment chosen for the coating: white is the cheapest, black the most expensive. The price for 26m² of acoustic spraying is therefore roughly EUR 4 160 (incl. VAT).
The luminaires were installed with 7.2 W/m CCT Solo LED strip and a low profile surface, which consumed 12.4 metres. The Zigbee power supplies were 2x30W and 2x75W in four different groups. Five pieces of Kantti 023 CCT spots with wiring harness to transformer, as well as luminaire remote control and LedStore’s LedTask ready for installation on LED strips, not included in the price for the installation of lights on site, total 1 647 EUR (incl. VAT).
The renovated space can be visited in the All in One store of the Led Store, Mesikukantie 16, 01300 Vantaa, Finland. Opening hours and a video presentation of the premises on the store’s website: https://ledstore.fi/ledstore-myymala