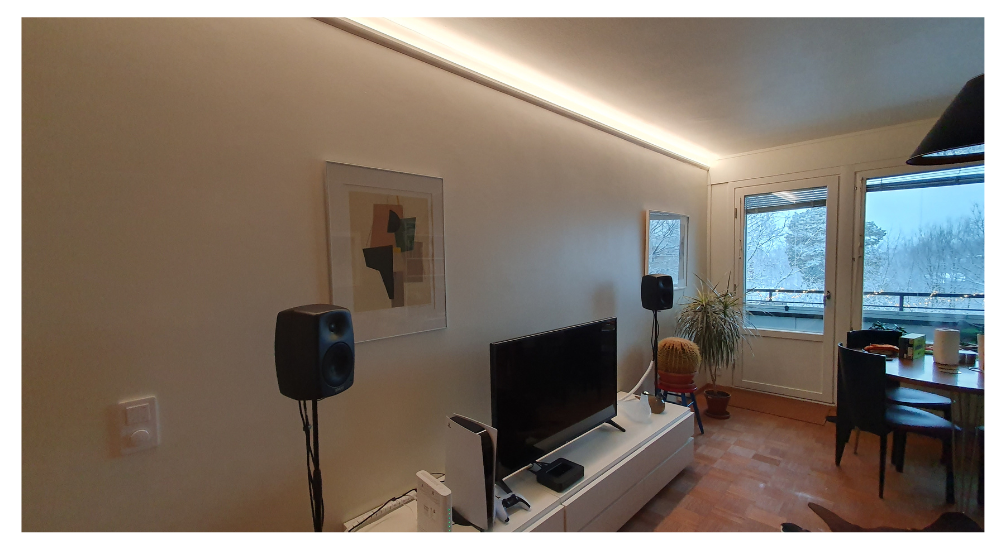
It’s dark again and the small apartment needed more light and a sense of space. The living room and the kitchen are in the same space, so we wanted to add more light to this area, and the solution was to put indirect lighting on the wall of the living room and in the kitchen. Read here the instructions on how it was made – Photos Aleksi Virtanen
Temperature-controlled light for the room
The LED strip used was a 14.4W CCT high colour rendering index (CRI) LED strip with adjustable colour temperature. The advantage of a colour temperature adjustable LED strip light is that it can provide a moody warm 3000K or a fresher neutral 5000K if the situation calls for it. The LED strip was mounted on a LED profile designed for indirect lighting.
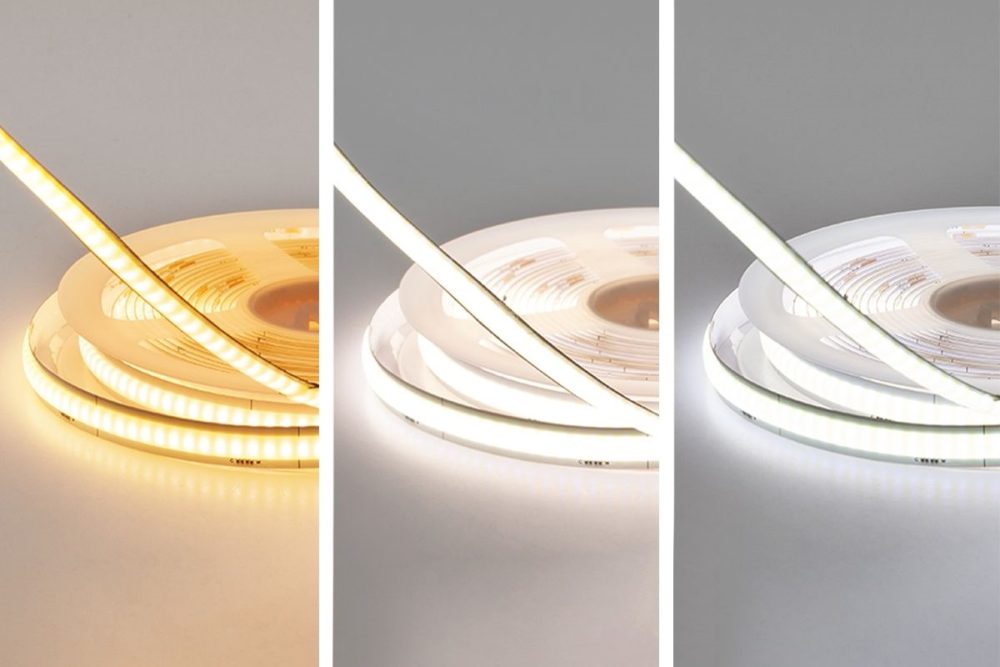
A metre of CCT 14,4 W/m led strip gives approx. 1000 lumens, so there will be enough light output to complement the lighting in the room. The light can be dimmed if the situation requires it. For darker surfaces, an even more efficient CCT 30W/metre spotless LED strip light could be chosen for the profile.
Indirect lighting on a living room wall with “LedPaja” or at home
When the idea of additional light for the living room was born, the project began with a visit to the LedStore showroom to see the options installed. The lighting could have been ordered as a fully finished, made-to-measure light profile, even installed, but in this case the assembly and installation was done by the father himself.
The steps for the installation of the Led profile were as follows:
- Cutting the indirect led profile to the right dimension
- Painting a profile for indirect lighting
- Led strip cutting occurs at the marked points
- Enlarging the opening for the cable
- Connecting wires with compression connectors or soldering irons
- Joining the profiles and gluing the LED strip – and installing the diffuser
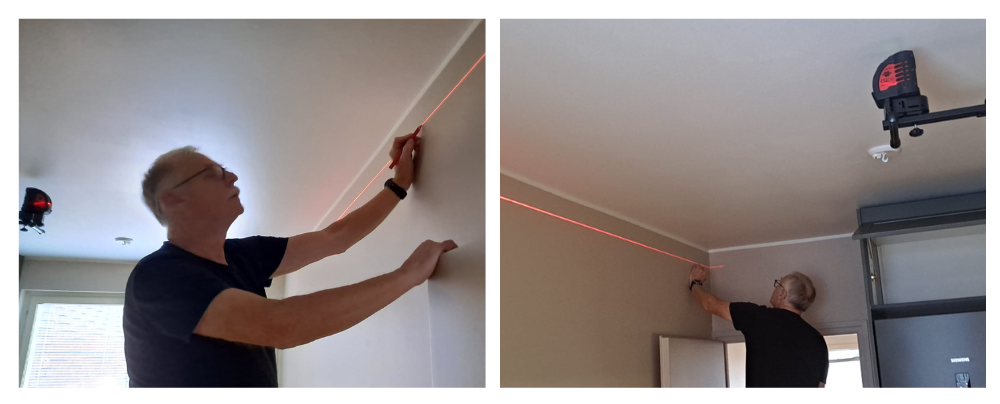
- For mounting the fasteners, markings on the wall, laser-straightened
- Drilling holes in the stone wall and screwing them in place
- The wires are brought to the corner of the drive and connected to the transformer
- A wireless control button is installed alongside the old button
- Easy button pairing to the transformer
Here are all the steps in more detail.
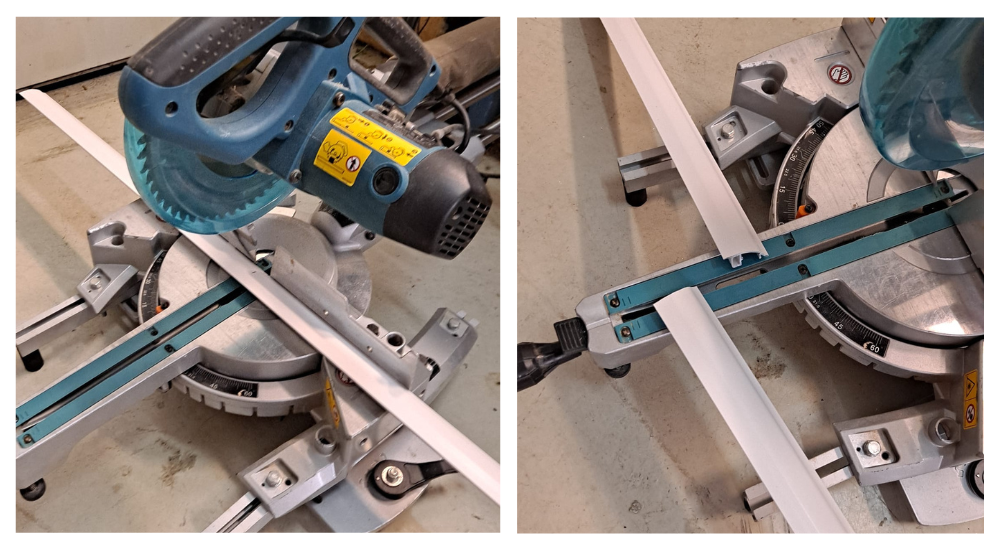
Cutting the indirect led profile to the right dimension
The first step was of course to cut the LED profiles to the correct length. In the extensions, the factory heads were used opposite each other to make the seam as unobtrusive as possible. The led profile itself is available in 2,5m length, so as the room was longer, the profiles had to be installed one after the other.
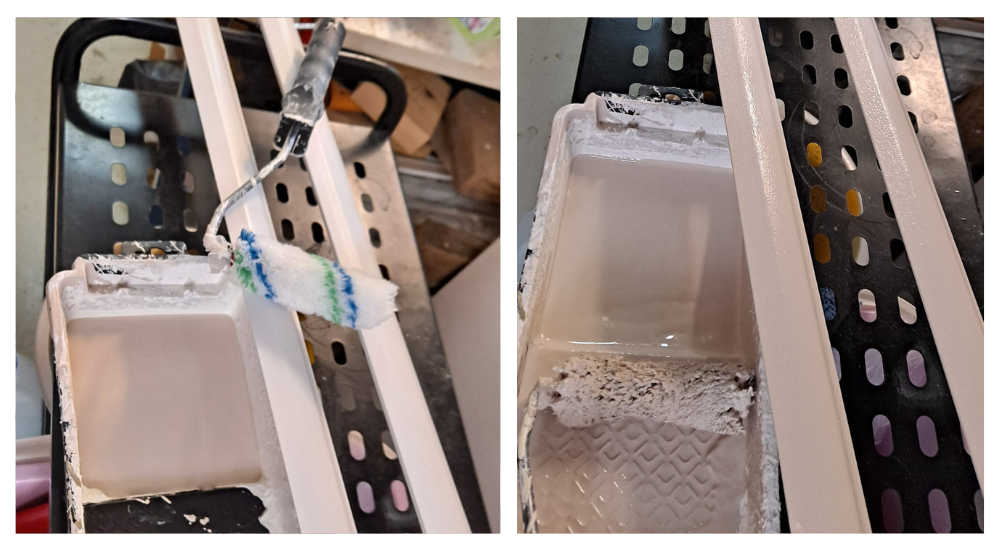
Painting a profile for indirect lighting
The next step was to paint the profiles in the same colour as the wall. The finished profile was anodised aluminium, which is very neat as it is, but the painting also allowed the seam to be made invisible. (edit. The indirect profile in one direction on the wall is available painted white)
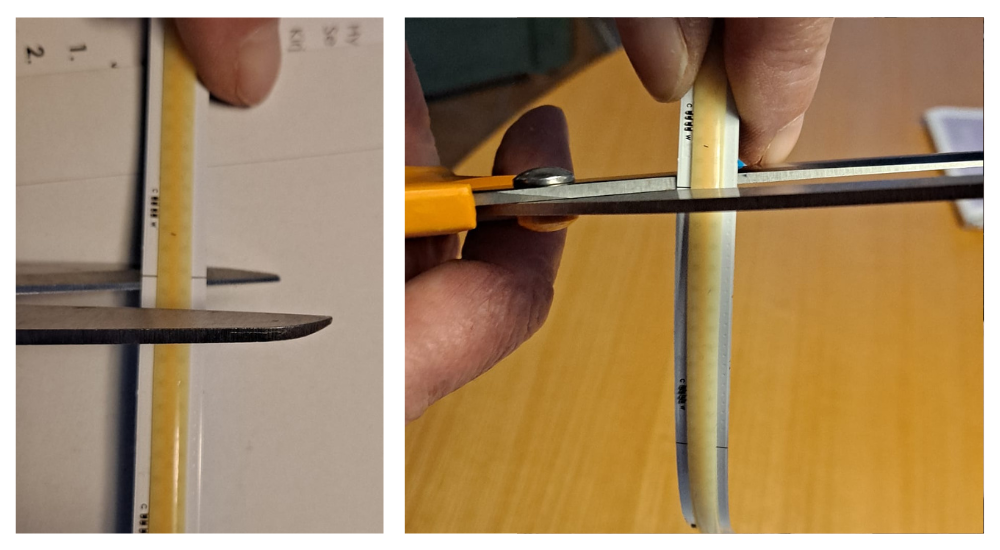
Led strip cutting occurs at the marked points
When the LED profiles were drying, the LED strip lights had to be prepared to their dimensions. This 14,4w CCT SOLO led strip light can be cut off at marked points every 5cm. Conveniently with scissors.
If the strip is cut freely, the LED strip light will work until the next intact 5cm cut-off distance. In addition, the cut-off points have solder points for the wire and the extension.
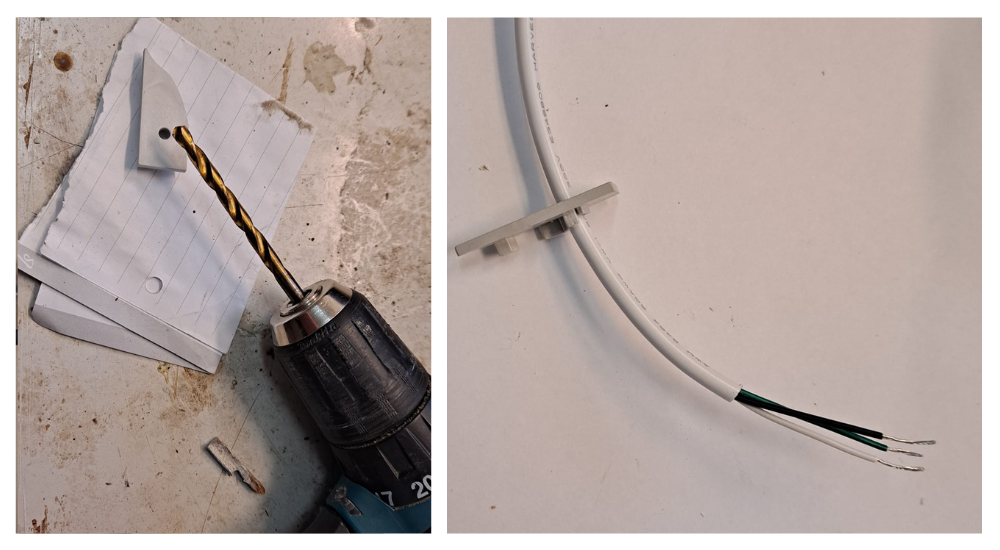
Enlarging the opening for the cable
The Led profile was supplied with the heads. The pre-drilled wire holes in the ends are only 4mm, so they had to be enlarged. Since the LED strip was a CCT adjustable LED strip, it had 3 wires and the 3×0,5mm wire is thicker with a sheath. 6mm. That is, using a drill to enlarge the hole.
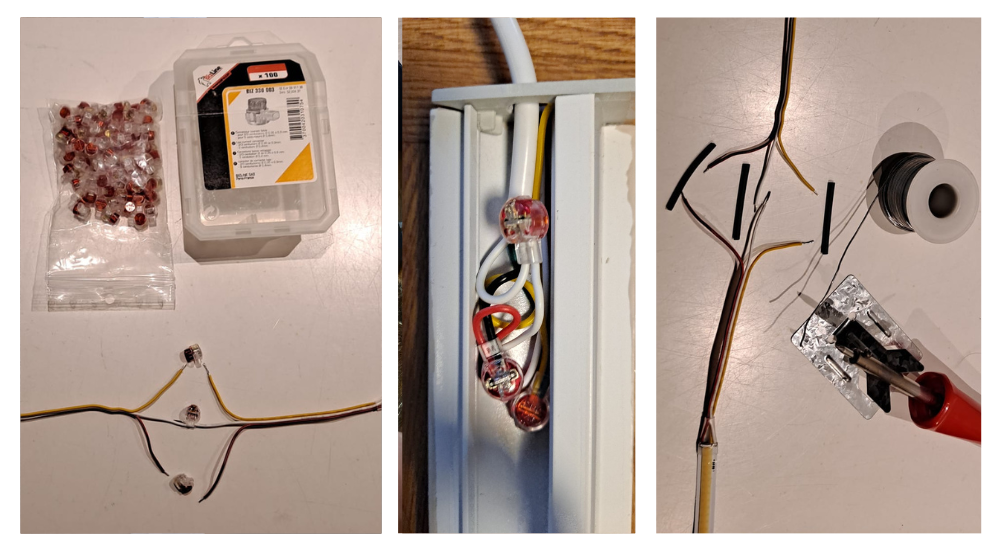
Connecting wires with compression connectors or soldering irons
After disconnecting the Led strip, you need to connect the wire that goes to the transformer. There are two ways to connect.
- If the LED strip has a ready-made connecting cable, it can be shortened and a longer supply cable can be connected directly to the wires with small compression connectors. Quick connectors work on wires.
- If the LED strip light does not have a connecting cable soldered, it must be soldered directly to the LED strip light. We do not recommend the use of quick and compression connectors directly on the LED strip. Generally speaking, they don’t even fit inside profiles.
The joint itself fits into a groove in the back of the indirect profile.
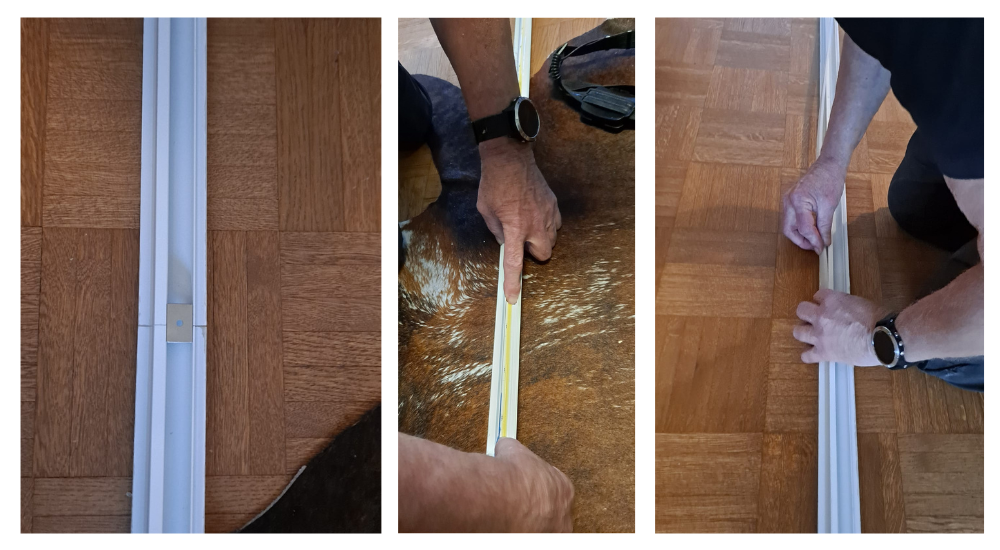
Joining the profiles and gluing the LED strip – and installing the diffuser
Earlier in the painting phase, we joined the profiles. By using one wall anchor at the seam, the extension can be best supported. With the profile on the floor, the LED strip is easy to glue using the double-sided tape on the strip, and the diffusing cover is easy to install.
The diffuser also supports the seam of the LED profile when the cut-off seam of the diffuser is not at the same point as the cut-off seam of the aluminium. This can be easily done by switching the cut profiles and decks starting from different directions at the same time.
For mounting the fasteners, markings on the wall, laser-straightened
Come on! The Led profile is on the floor and tested to work (hopefully!). Next, mark the positions of the LED profile brackets on the wall directly. You can use a laser to help, or just measure down from the ceiling an equal distance to each bracket.
In the latter case, if the roof is uneven, even the row of brackets will be uneven and the profile will not snap straight on. Similarly, if the wall is wavy and uneven, an extra amount of wall brackets will help a lot, as the aluminium will flex with small irregularities.
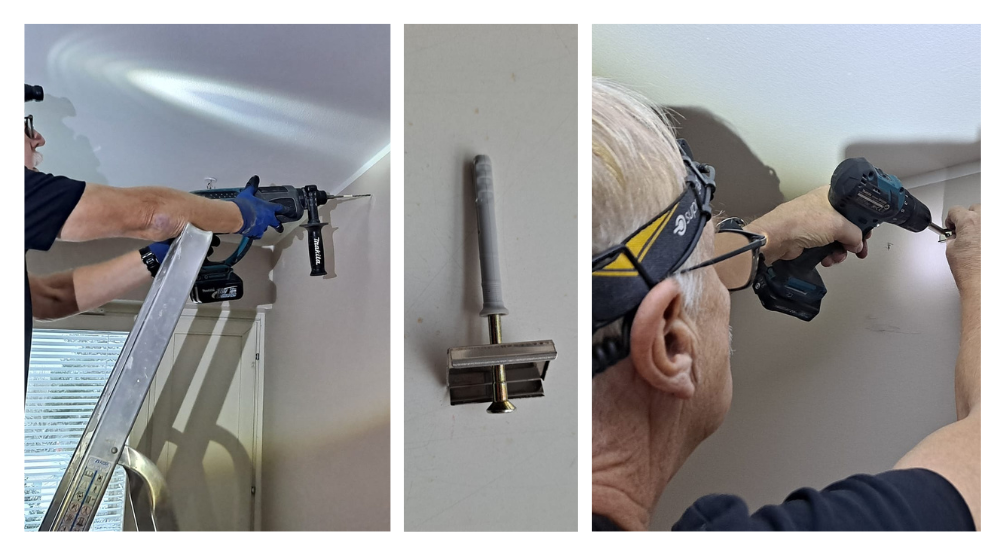
Drilling holes in the stone wall and screwing them in place
Bring on the drill! In this case, it was a stone wall, so holes had to be drilled for the props. After drilling the holes, the brackets were screwed in place.
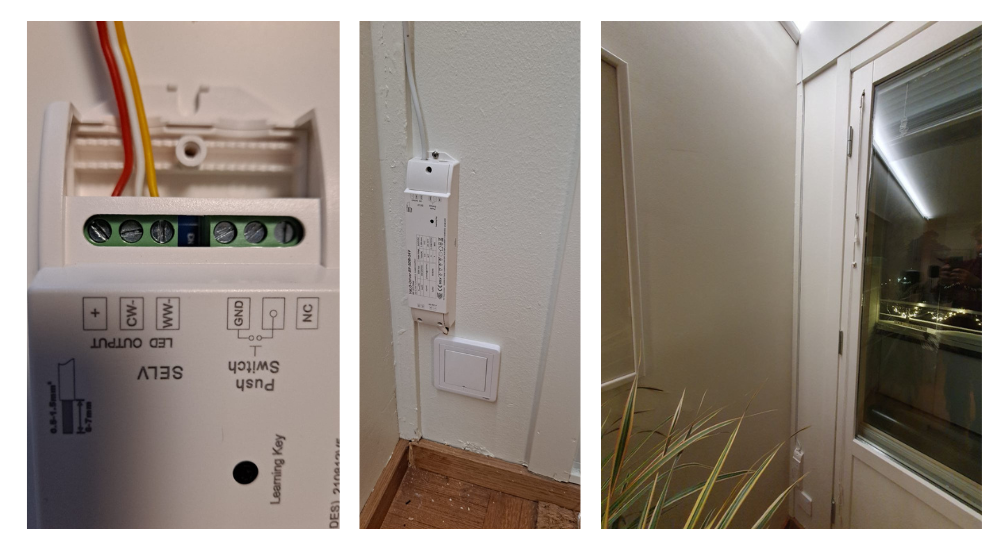
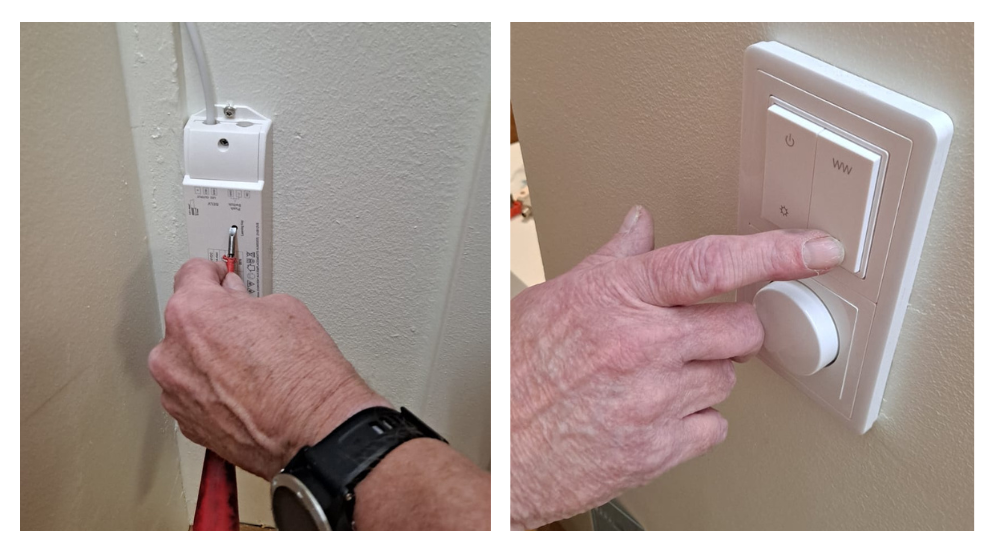
The wires are brought to the corner of the drive and connected to the transformer
When the indirect LED profile is finally on the living room wall, the cable from the end of the LED light is brought down along the corner. The wire is often hidden under a taped wire sheet, but in this case it ends up being a large plant. This also hides the transformer from view behind the plant, but still allows easy access for pairing additional buttons.
A wireless control button is installed alongside the old button
Wireless devices in marketplaces are often less stylish and easily lost. In this case, a control button for adjusting the light temperature and dimming was installed directly above the old button. Because the button uses the so-called. standard 55mm internal size, it was easy to place on the wall by simply replacing the existing frame with a two-piece one. These frames using the 55mm interior include. JUNG, EXXACT, GIRA, MERTEN..
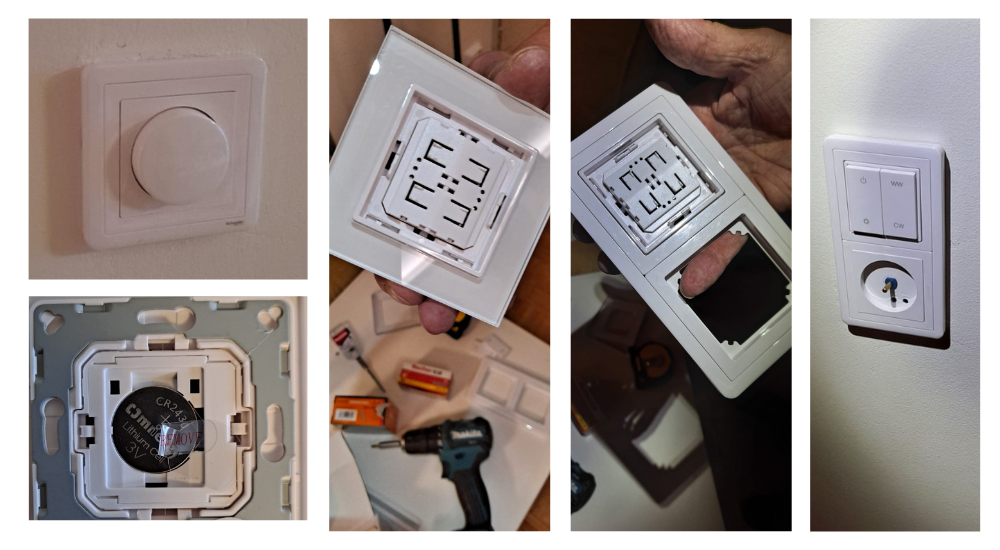
Easy button pairing to the transformer
Pairing the button with the transformer is very easy. Press the button on top of the transformer once, then press the wireless button once. Done!
Versatility with colour temperature control
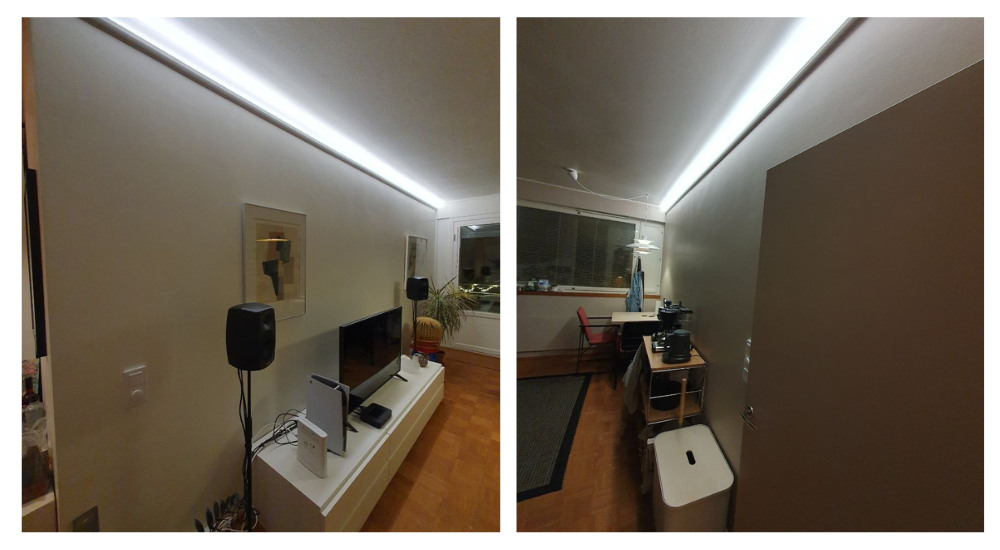
Indirect lighting for your living room wall is ready! The colour temperature of the light can be easily adjusted to the desired Kelvin level with a wireless controller on the wall. For example, a warm dim light just to set the mood, or a slightly more neutral and brighter light when you want to clean up..
So, two profiles were installed in the same space on opposite walls, as it is a “kitchen-living room”.
Philips HUE and home automation
The controller is an RF controller, but those interested in home automation could just as easily choose Zigbee versions of the same products and thus control lighting with different systems. It allows, among other things, timings and automations. So in addition to the Zigbee transformer, you also need a Zigbee bridge, a hub like Philips Hue or Samsung Smart Things.

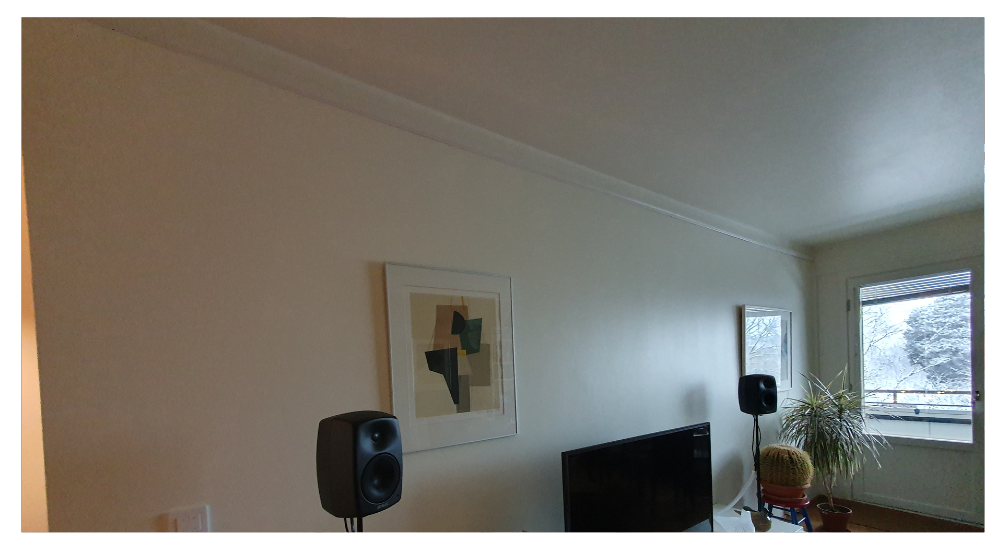
Amount of light in the living room
In the living room, 200lux is sufficient, but this is a kitchen-living room, so it’s also where we eat. The final amount of light is affected by the reflection of surfaces (indirect light!), and other materials and colours. In this case, the light from the two walls is 100-150lux over a height of one metre.
Remember that indirect light is hardly ever enough to work with, so there must be reading and task lighting as well. That’s why there’s a pendant light on the dining table to provide extra light for everyday chores.
How much does indirect lighting in the living room cost?
The price usually consists of three components. Installation work, lighting and electrical accessories. The cost of this item was 1139,00€
Installation work
In this case, the working time would be 8 hours, at a cost of 512,00€
Led luminaires
For the led lights we chose 14,4W CCT SOLO 10m led light strip without dots = 278,00€
For the led profile we chose an indirect profile for the wall, one way 4x 2,5m = 280,00€
For the transformer we chose 2 x 100W RF transformer = 258,00€
Control button P1CCT = 69,00€
Also props, screws and paint.
So a total of 627,00€
Electrical supplies
Electrical accessories would not necessarily have been needed, as the lamp transformers can be plugged directly into the socket. Now the electricity was taken from inside the socket and covered with the so-called. with blind plate )10,00€.
The cost is not huge. If you are interested in replacing your lighting fixtures, you can find surface-mounted LED panels here. And if you need help, our installation service is here to help!
Lighting expert
LedStore has been an expert in LED lighting and lighting design since 2010. We have our own product design, so our products are technologically state-of-the-art. Products have quarantee for up to 7 years. We also carry out lighting maintenance.
We focus on temperature-controlled and high colour rendering lights, so they work brilliantly and last a long time. We do around 500 lighting designs for our clients’ sites. Read more here or order a lighting design
We offer a service of custom-made led strips, i.e. custom-made led strips in aluminium profile. Also installed. Did you know? LedStore offers lighting design from 99 euros for the whole house!
Remember that we are always ready to offer our help to you along the way, by email (myynti@ledstore.fi) and by phone (045 251 4510). As always, feel free to share photos of your own projects on social media at ledstore.fi at Instagram and ledstore.fi at Meta. We love to see the great things our LEDs do, and it helps to provide inspiration for those who are unsure of the power and awesomeness of LEDs. Did you know that we already have over 3500 pictures of our LED installations in our Gallery!
Gallery of Led lights:
Product gallery: Pictures of products in different installation locations
Indirect light: Indirect light in different spaces
Room-specific: Light in different rooms
References: Complete houses that have been photographed