For a long time, Led strips have only been available in models that can only be bent into a curved shape parallel to the plane, not sideways. LedStore’s new NEON LED strip can be used to create a wide variety of shapes even on a straight surface, such as a ceiling or wall. In this article we will go through our own lessons and tips on installing LED NEON strip and making shapes in the ceiling.
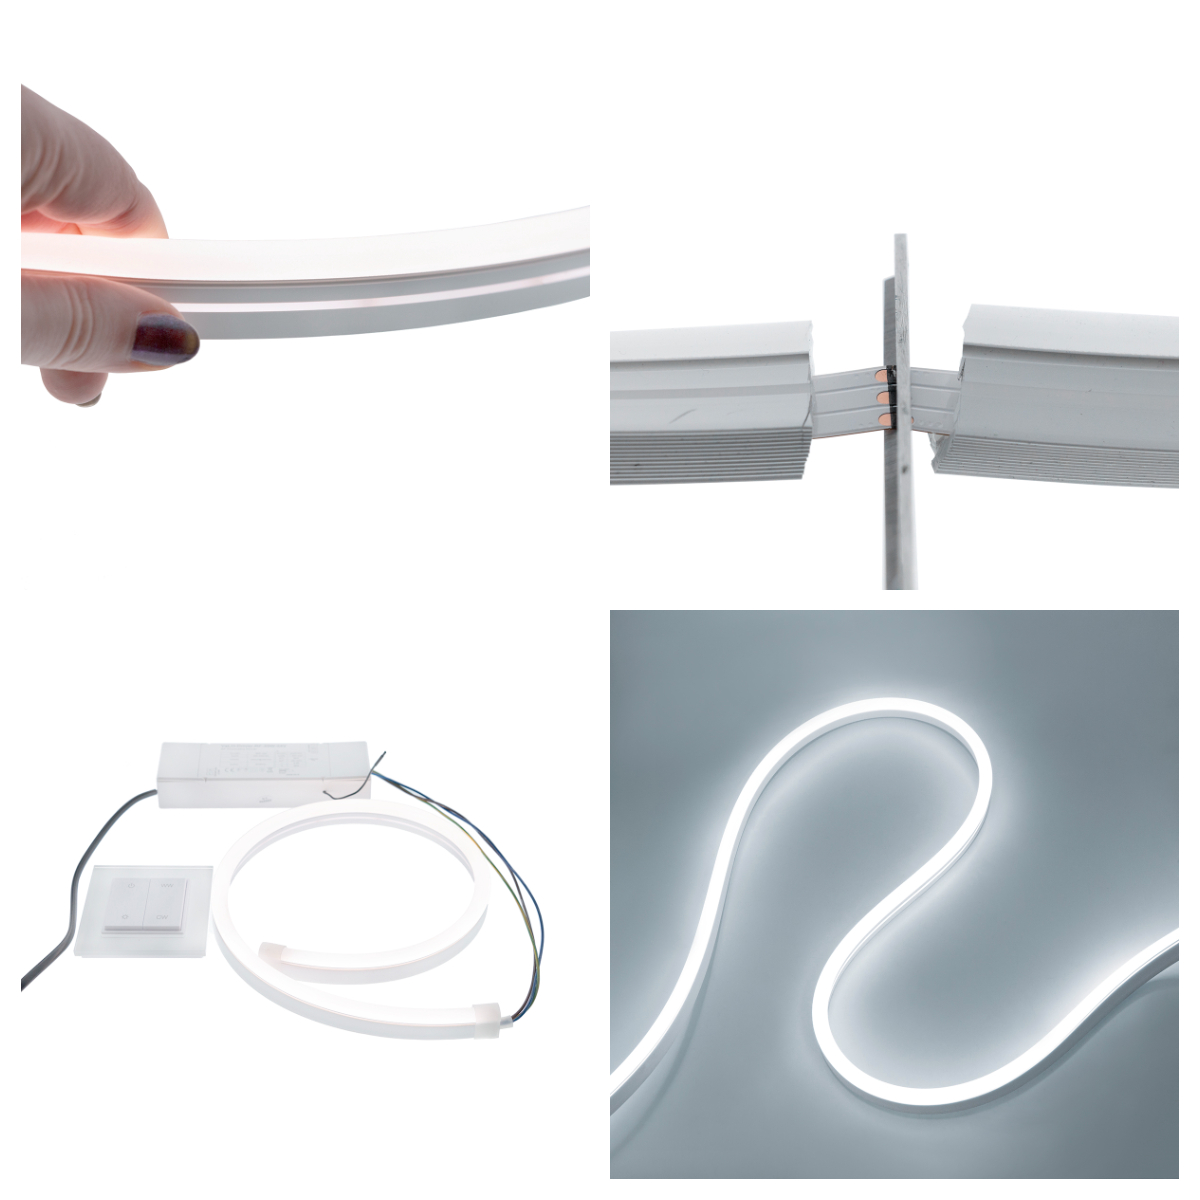
Led NEON strip can be used to create decorative shapes both indoors and outdoors. The ribbon itself is contained within a rubber-silicone cable, from which the light opens in one direction as a flat strip of light. The tape is water-resistant and does not require an aluminium profile for installation. The NEON strip is attached either by metal U-fasteners screwed to the object, or by embedding it in a groove machined for the tape.
How to make curved shapes with LED?
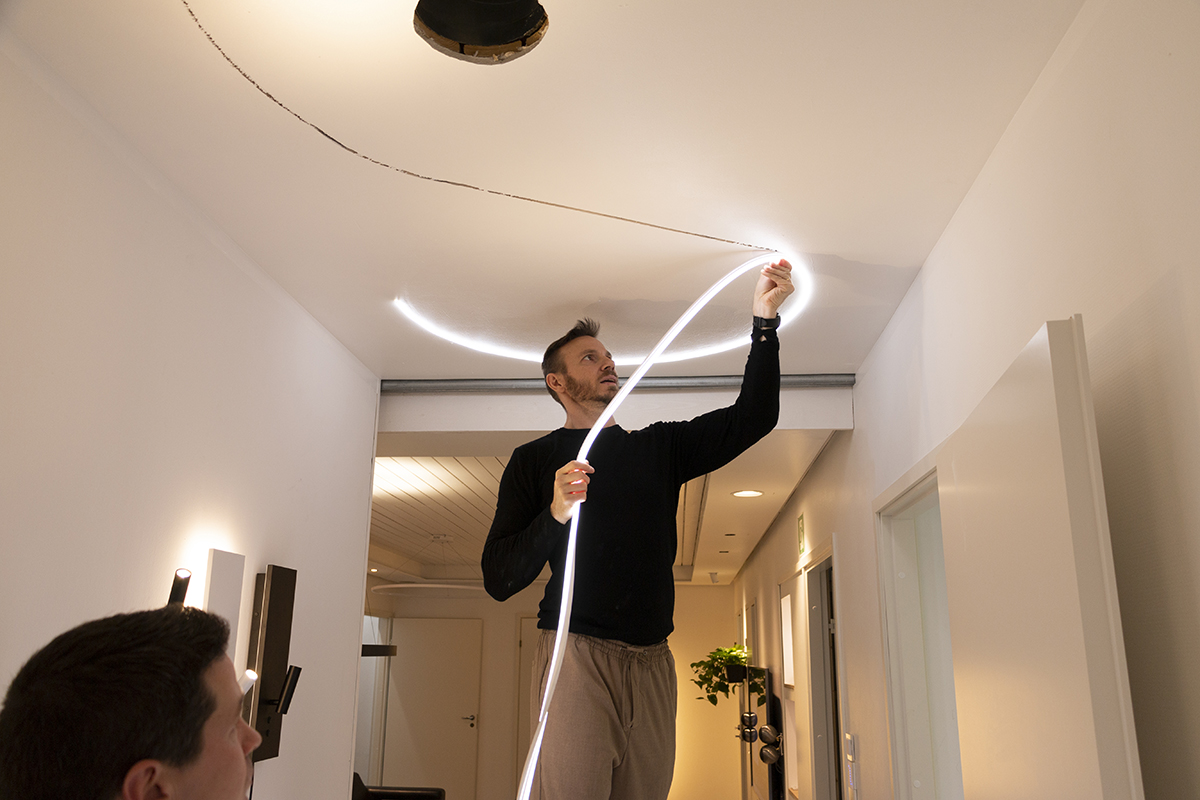
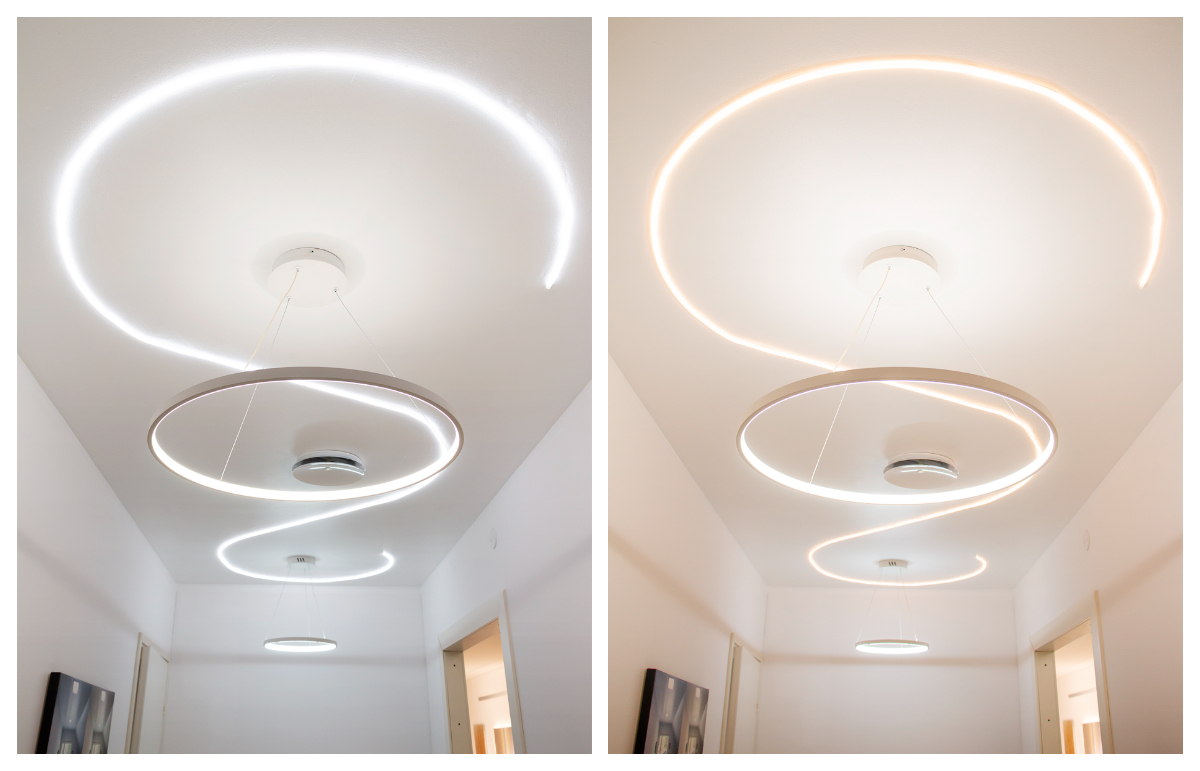
LedStore was used to add a decorative touch to a corridor that is 4 metres long and 170 cm wide. The space already had minimalist single colour temperature RINKELI luminaires, so it was decided to create a playful, colour temperature adjustable (CCT) LED NEON strip light with curved shapes for the ceiling. The lighting was thus made two-level. The Led strip can be used separately and the suspended ceiling lights separately.
Need for renovation and cost of lighting
For the renovation, the roof was re-boarded by adding plasterboard to the surface of the boarded roof. The Led NEON strip was used to create curved shapes on the ceiling, using 8 metres of strip. The Led NEON ribbon (24 VDC) can be cut every 5 cm and the price per metre is 39 e/m. The price of eight metres is therefore €312.
They wanted a wireless control for the Led strip, which could be combined with an intelligent control if desired. Therefore, a driver transformer of suitable size was chosen. The largest of the transformer sizes (30W, 50W, 100W and 200W) was chosen, as the power needed for the LED strip is 14.4W per metre, and 115W for 8 metres. With a 200 watt Zigbee transformer, the strip has plenty of load capacity. We recommend to leave a load margin of about 15%, i.e. to choose a transformer at least 15% larger than the total output power of the LED strip would require. drivers transformers run on 24 VDC, as does the led NEON ribbon. The price of the transformer is 209 euros.
A wireless push-button dimmer was chosen as the operating switch, which can also be used to adjust the colour temperature. The button has a 3V battery, which will last for years, and is of course replaceable. The button can be paired directly to a Zigbee transformer, eliminating the need for a bridge/hub. The button and driver can also be connected to a ZigBee interface such as Philips HUE or Samsung Smart Things. The price of the button is €79.
The cost of the lighting came to €600. In addition to the lighting, the renovation involved drywall, paint and a lot of packing 🙂
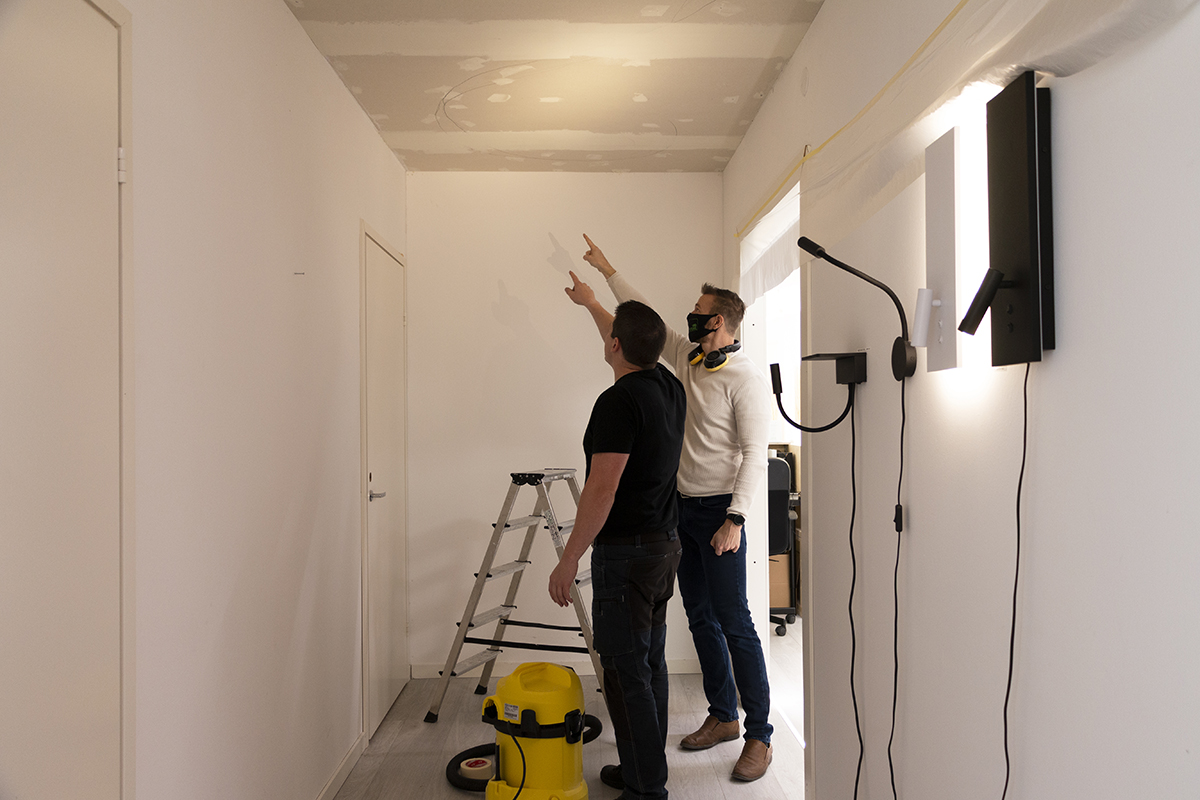
Implementation of the renovation and the challenge of form
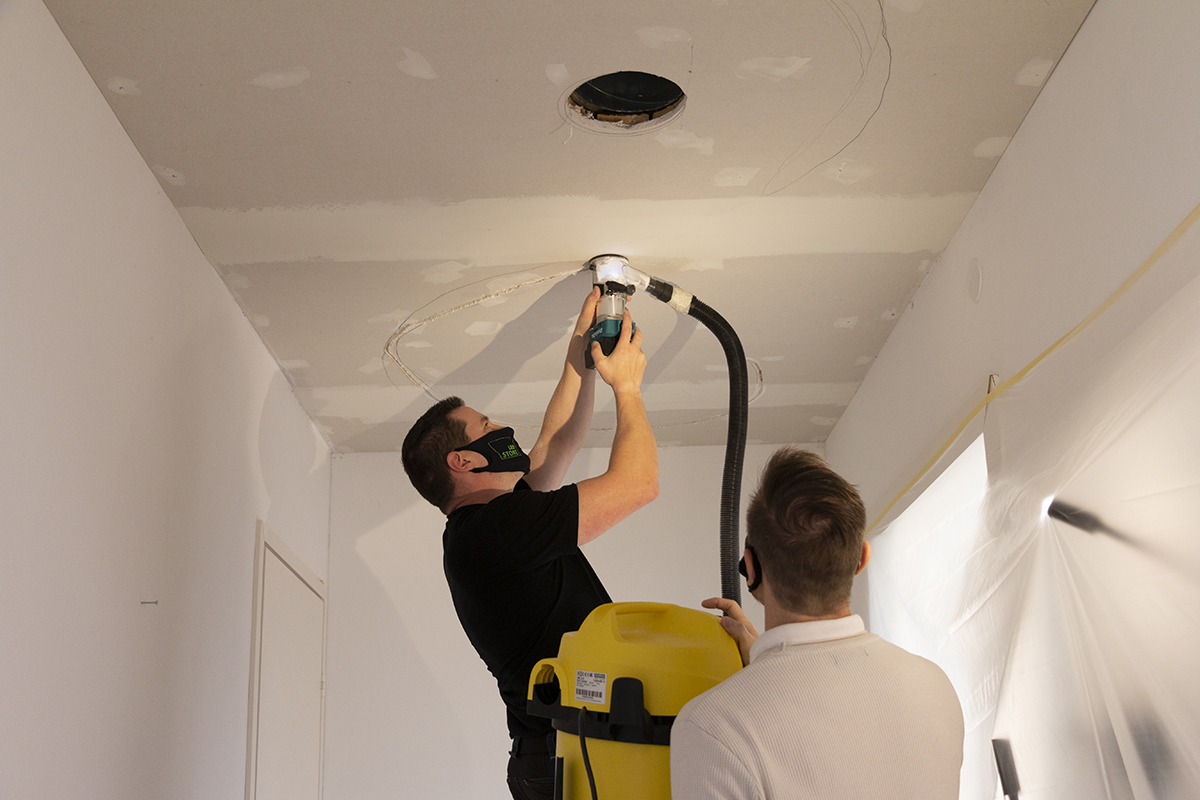
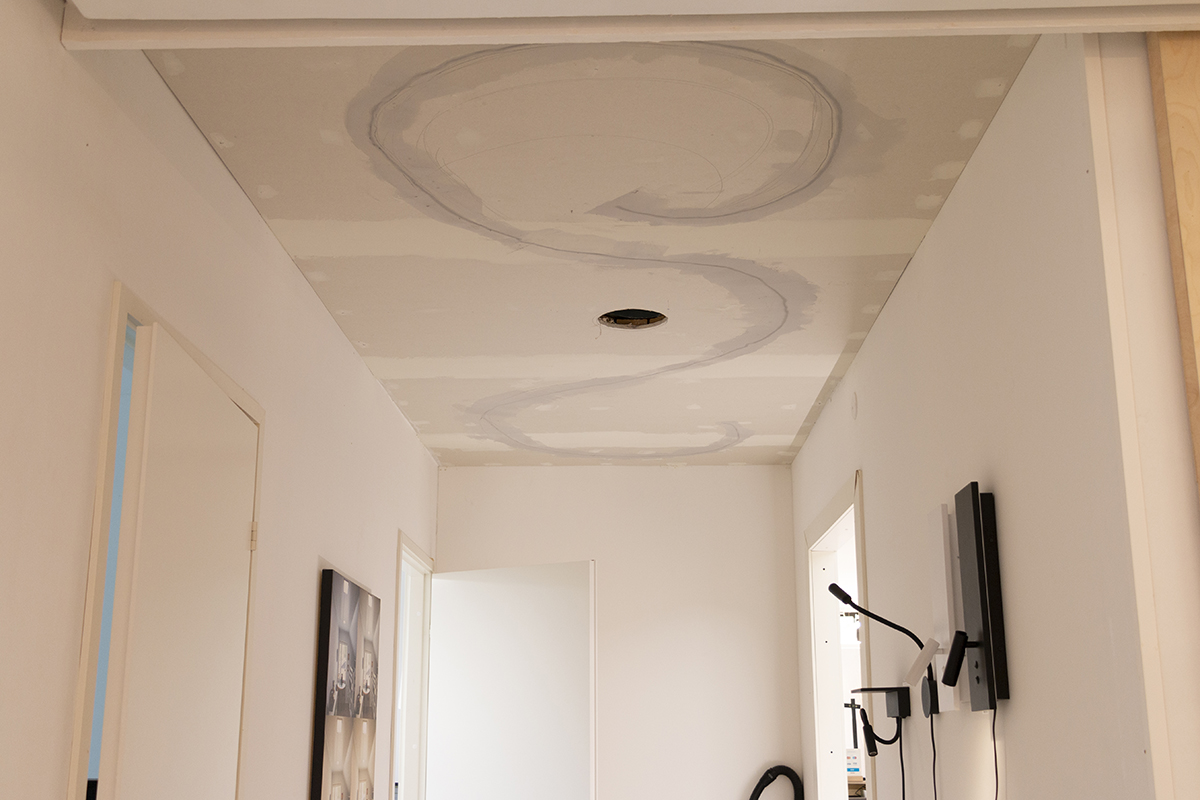
The ceiling to be renovated was boarded, so initially plasterboard was added to show the shape of the LED NEON strip. The walls were white, so it was easy to get the plasterboard to match. The curved shapes for the LED were first sketched in pencil on the ceiling, and fixed into the desired shape, along which the groove was cut. A 10mm groove blade and 13mm depth were set in the milling cutter for the groove. Then came the challenging part. Milling a groove in the roof from the arm proved surprisingly difficult. If the shape could have been run on a table, the job might have been a little easier…
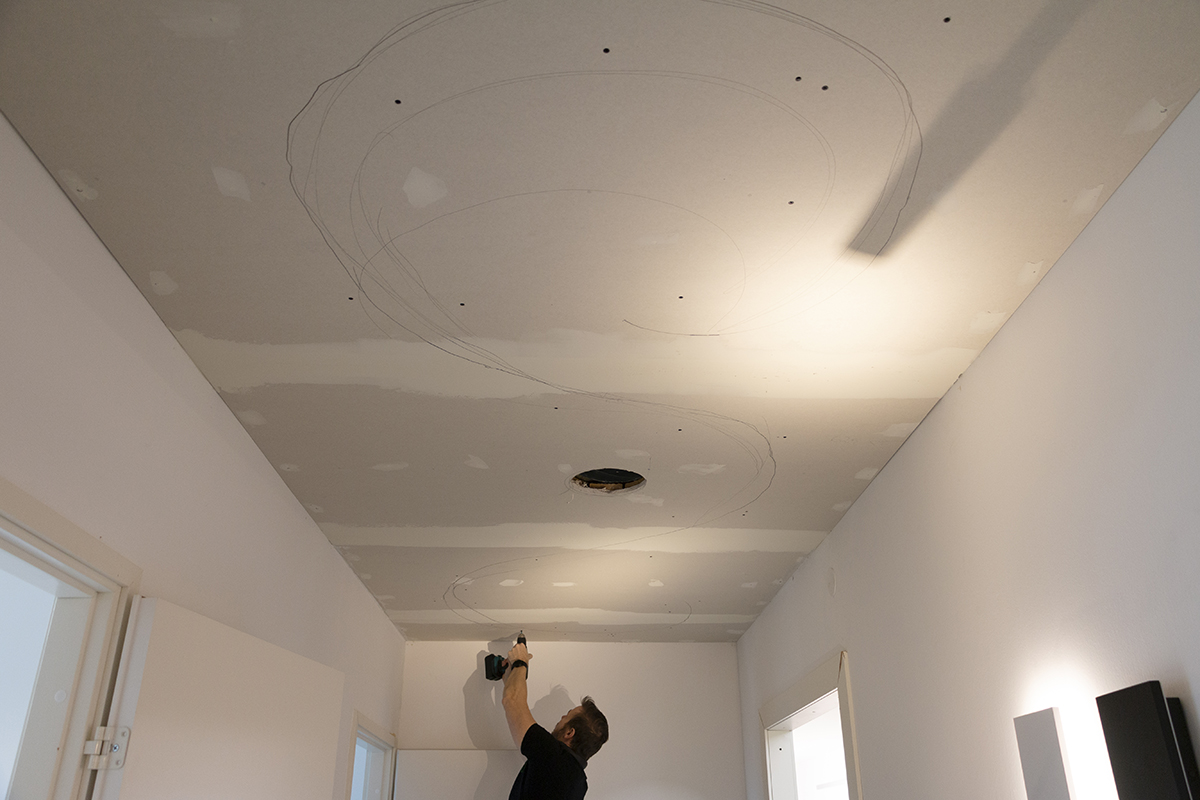
When the curved shape was finished, it was wider than intended in places, and in many places the milling cutter had hit the nails in the planking, which rocked the milling cutter badly. The end result was a bit of a run *ustu… 🙂 After a couple of days of inactivity, we decided to try to make a new career. The next step: a lot of packing and a milled groove to close.
The second round of milling was assisted by a support rod, which was screwed into the centre of the circular shape. The supporting wire was iron wire, which gave some stability to the milling of the arc. For straight sections, a brace was used, which was screwed into the ceiling and milled against to create a straight groove. There was virtually no mess with a good milling cutter and vacuum cleaner working together.
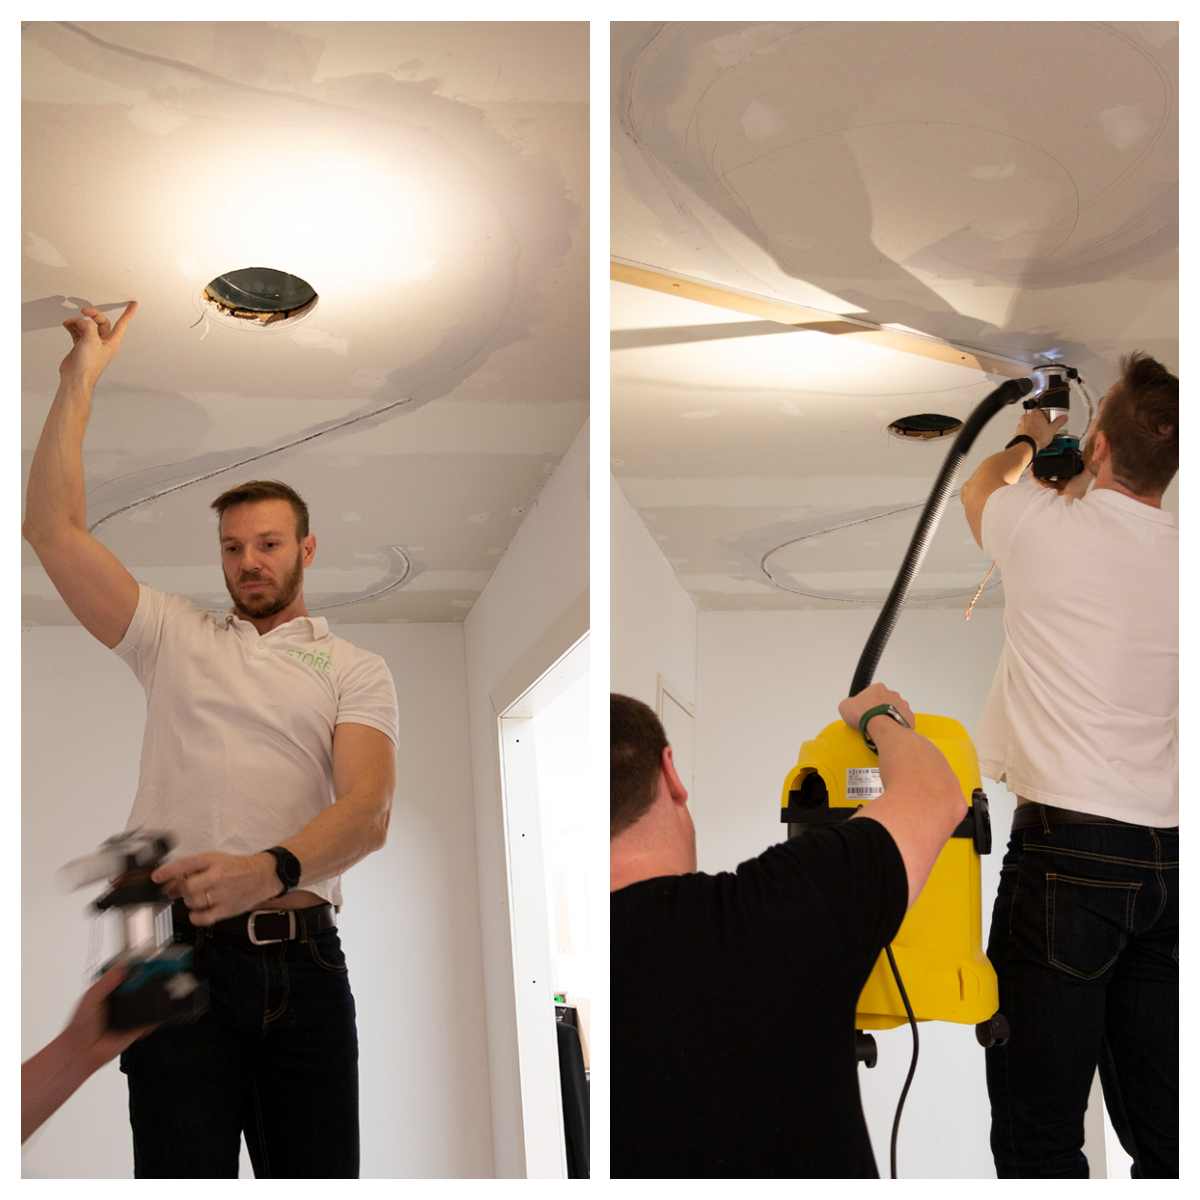
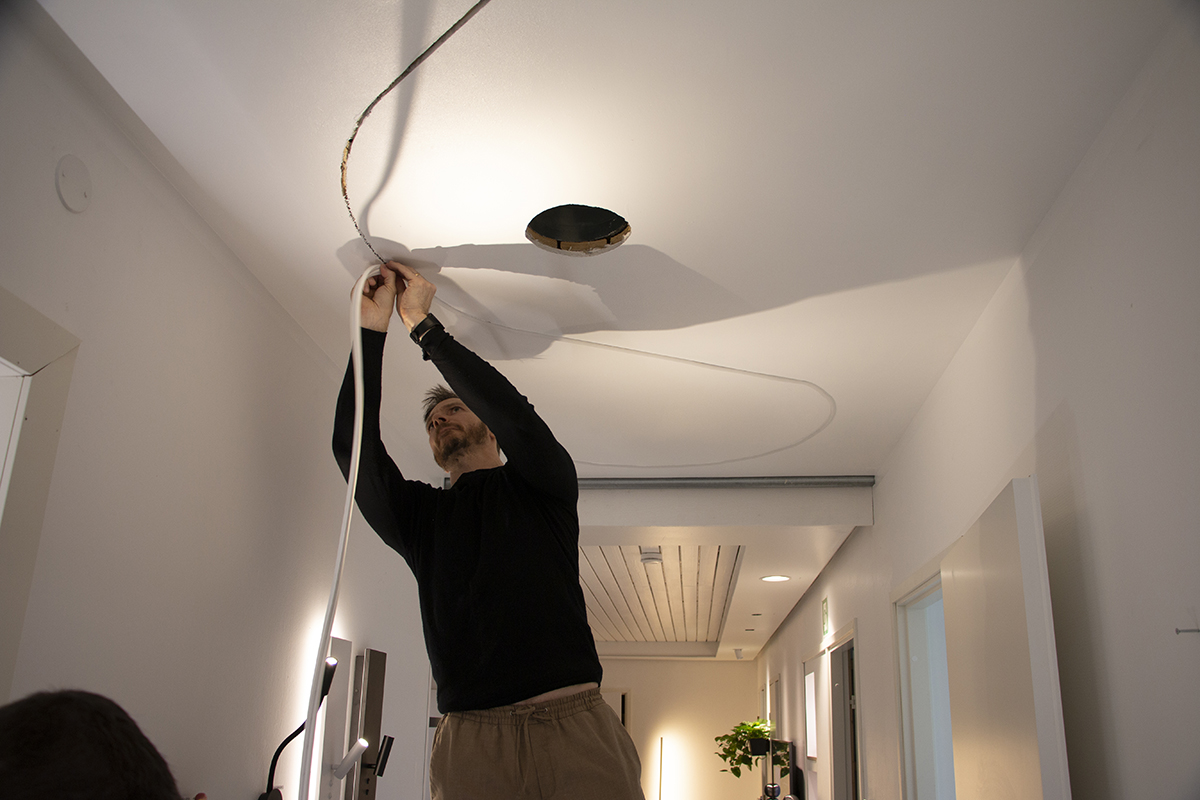
When the groove was smooth enough, the roof was painted. The 10 mm groove was just right for the LED NEON ribbon, which sat nicely in place, without glue or other fixings. The connecting cable from the strip to the transformer was pushed into the ceiling, where the transformer had a ready place, as there was also an LED strip in the next room. The transformers use the same service hatch.

Curved shapes with LED – Lessons and tips on installing NEON tape
Led NEON strip is great for making different shapes, but making shapes that mill into the ceiling is challenging. Curved shapes with LED would work best with a mould. We recommend making a curved mould from, for example, plywood, which you can follow to make sure the milling process produces an even shape. In curved form, a support rope or iron wire is also a fairly effective means. The challenge, however, is to keep the wire taut, and to secure the wire to the cutter so that the distance is maintained at all times and the arc is flat. So hopefully you will learn from our mistakes. 🙂
The plan is to commission customers with different sized arch moulds / stencils to make it easier to run the grooves of the NEON strip. If you are planning to use NEON ribbon in a fashion light, please contact LedPaja!
Come and see LED lighting in the shop!
Led NEON strip and its curved shapes are featured on LedStore, as are our other LED luminaires. Our spaces have ideas and implementations for many different spaces such as living room, kitchen, bathroom and sauna lighting. Our store is located in Koivuhaa, Vantaa, at Mesikukantie 16, 01300 Vantaa. We are open Mon, Fri 8.30 – 15.30, Tue – Thu 8.30 – 17.00, and Saturdays 10.00 – 14.00. In the shop you can see all the products installed. In the same space, we also have a LedPaja, where we make custom-made LED strip installations on a daily basis. Our email address is myynti@ledstore.fi and the store’s telephone number is always open during opening hours 045 251 4510.
Other articles on Make-it-yourself for the spiritual:
All the articles on the renovations: https://ledstore.fi/blog/category/remontit/