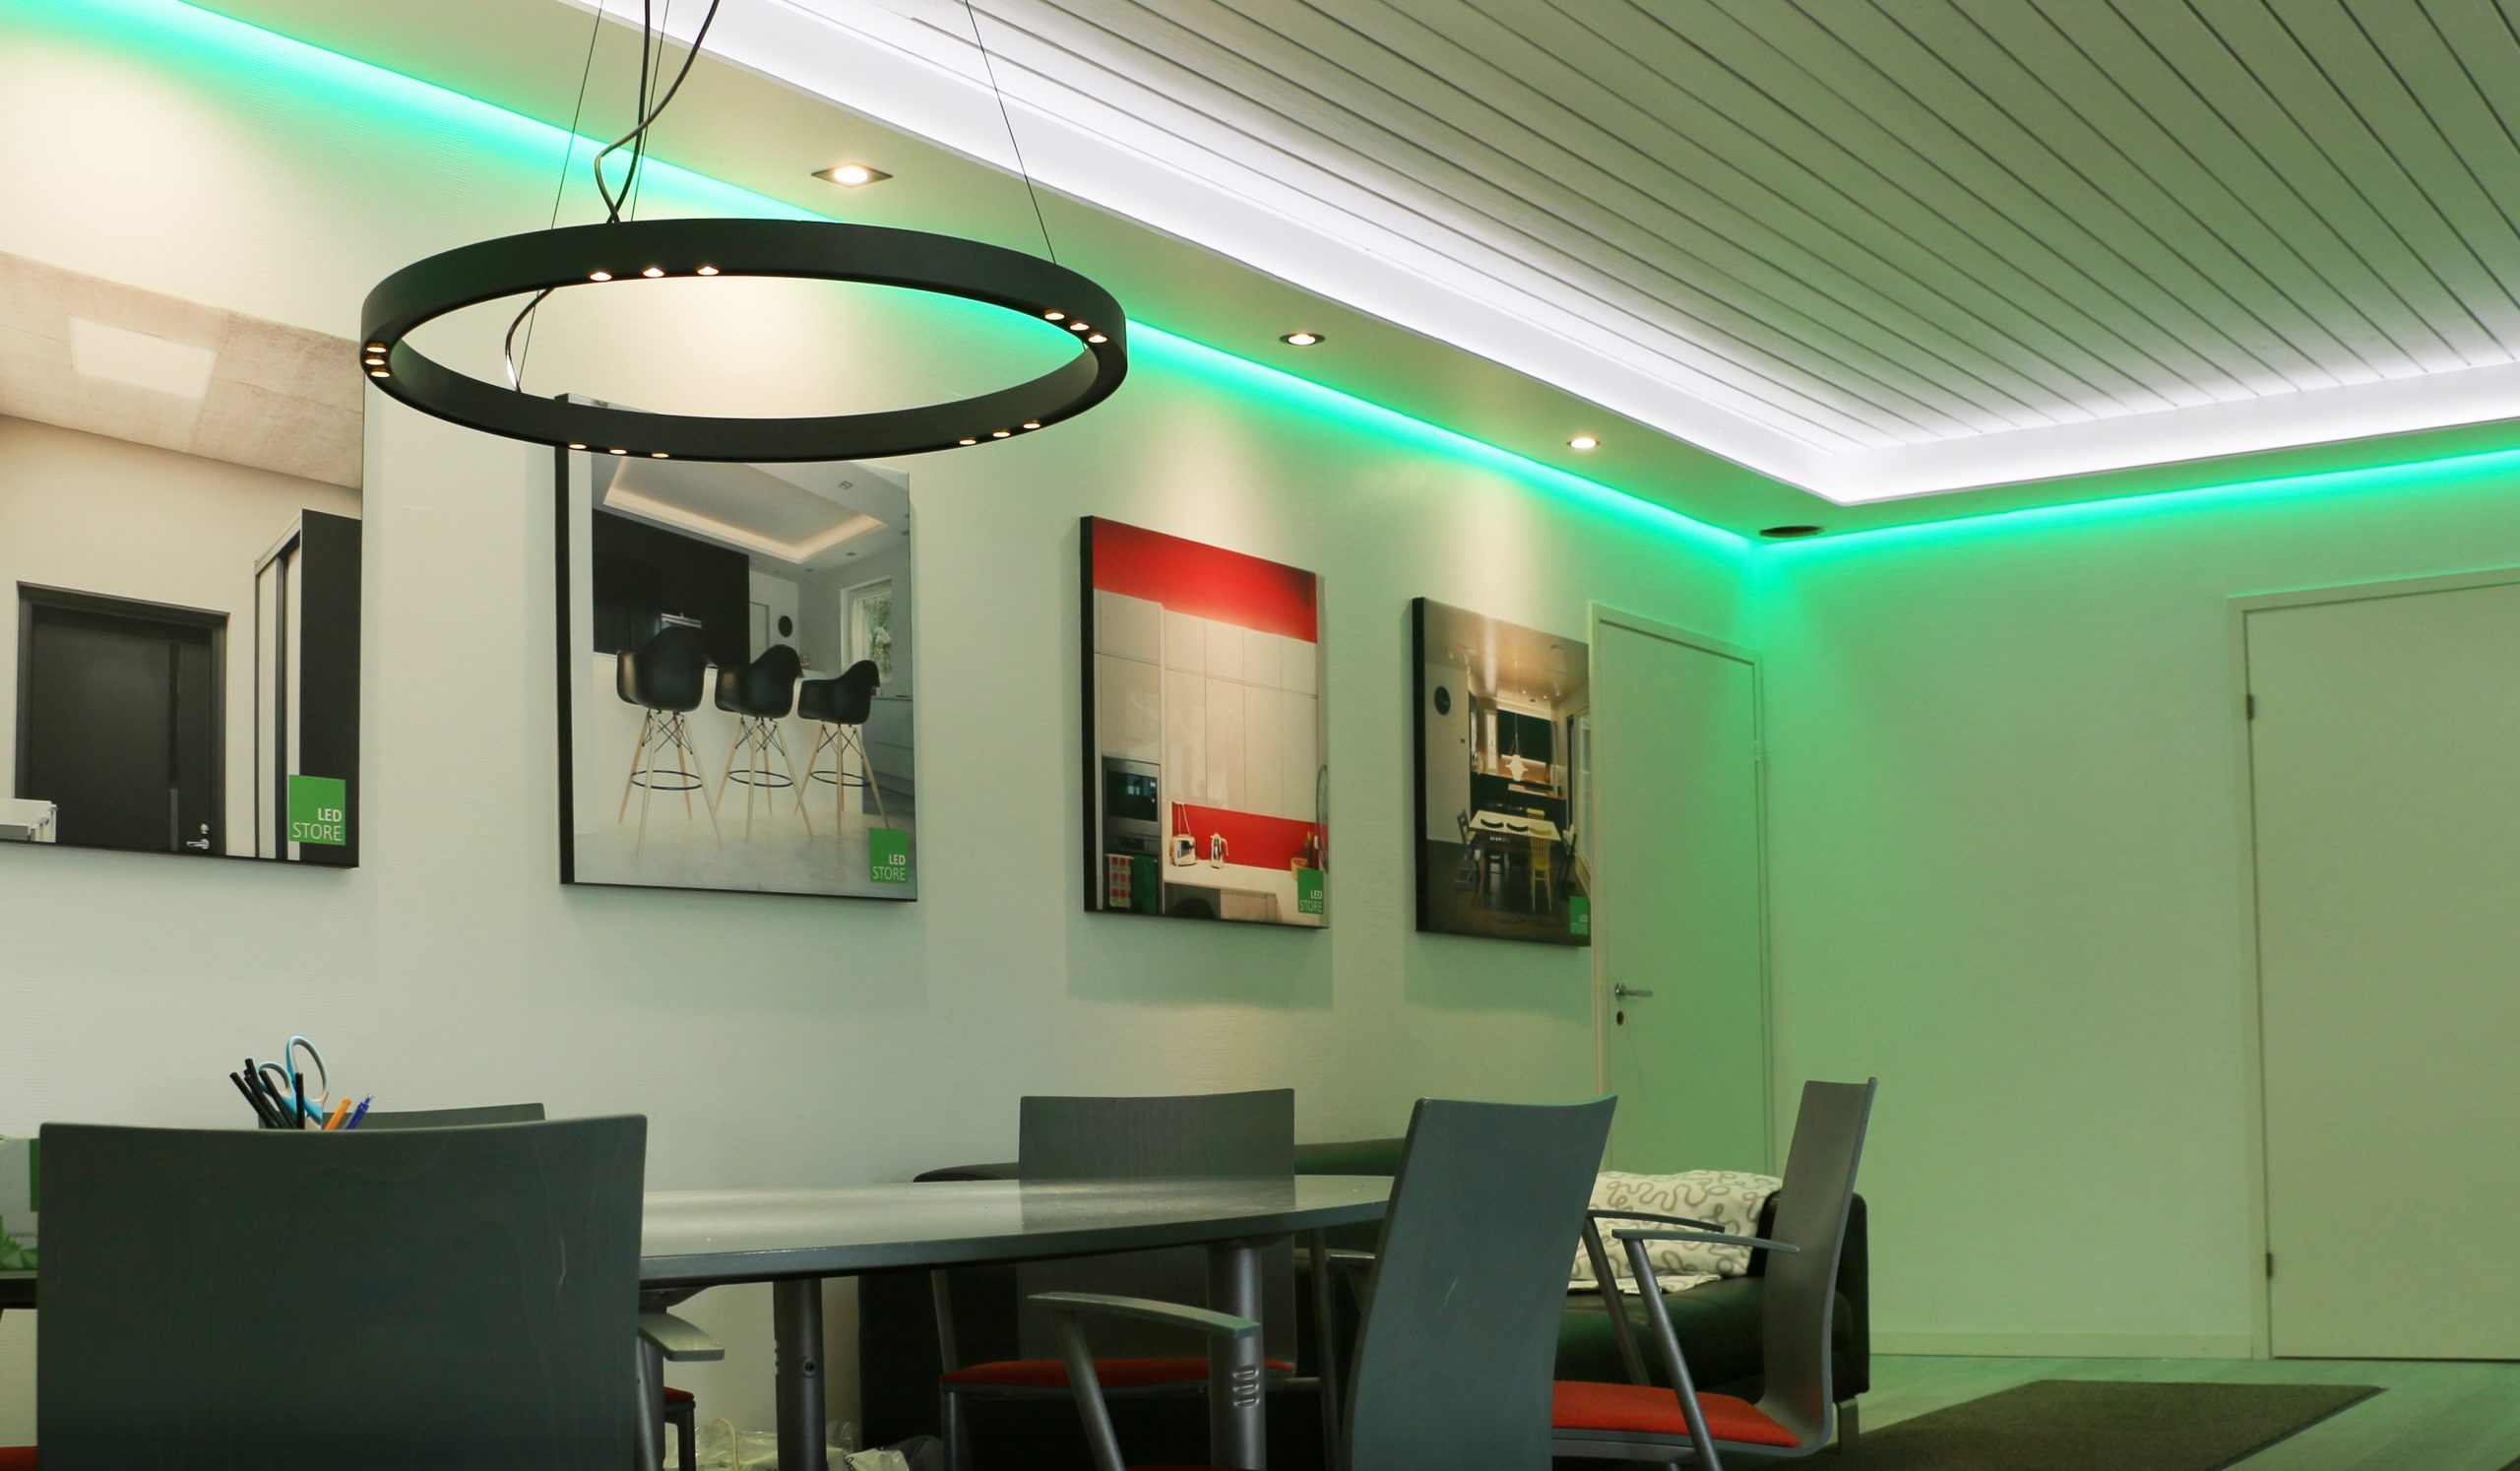
Zigbee devices for wireless lighting control enable timers and different lighting situations for almost any lighting fixture in your home. This article will walk you through setting up a Zigbee pair connection via a hub/bridge, and provide tips for typical problem areas based on experience. In terms of user interfaces, the most positive experiences we have had so far are with Samsung Smart Things and Philips Hue (autumn 2021). The lighting can be controlled by mobile phone / mobile phones and tablets, as well as wireless push-button control. In part one, we gave tips for creating wireless control of lighting when the hub is not used. Conventional wired control switches can also always be installed on the side to turn the lights on and off.
Zigbee smart lighting components for programming lighting
Of course, the basis of lighting is the luminaires themselves. As LedStore is a lighting professional, our products naturally go before the quality of the light and the quality of the lamp. With the advent of Zigbee and the IoT world, new possibilities have emerged for smart lighting, and our luminaires have also jumped into the smart age, without compromising on quality. The same reliable designs can be made suitable for smart home control requirements using Zigbee receivers and transformers, as well as controllers.
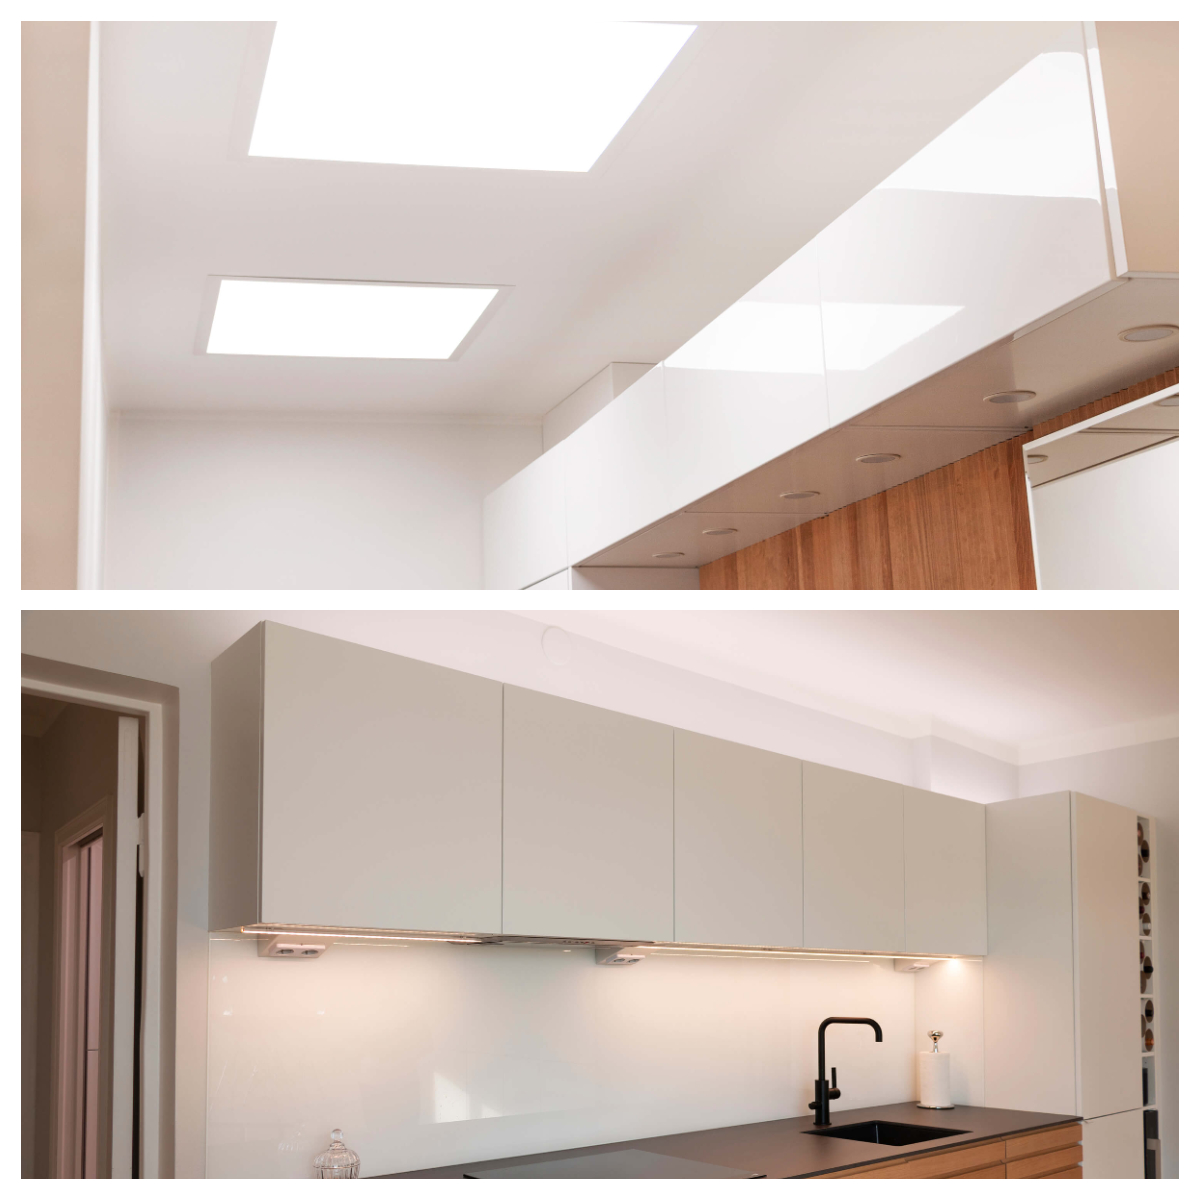
Our downlights, or spotlights, and LED strip lighting solutions are the most widely used for intelligent lighting control. The third major product group is rectangular and circular LED panels. A new product category has been added: LED bulbs with Zigbee capability. As a driver, we recommend using Philips Hue software for bulbs.
Zigbee devices, power supplies and controllers
For all these luminaires, we offer Zigbee-capable power supplies, i.e. drivers that include a Zigbee receiver. A single receiver can also be selected for a luminaire or a group of luminaires. Zigbee receivers bring intelligence to the lighting, i.e. the possibility of timing and programming through the user interface. The receiver is the factor that determines which lights are obeyed in which group. When the right type of receiver is added to a group of luminaires, it can be connected to the desired system, such as Philips Hue or Samsung Smart Things.
In addition to the receiver, it often makes a lot of sense to install wall-mounted controllers in addition to the mobile controller. LedStore has a range of wall dimmers and controls for lighting control, including remote controls for colour temperature and dimming. Lighting control can also be achieved with dimmers that combine wired control, i.e. a mains-powered controller, and wireless control, of which we offer one model.
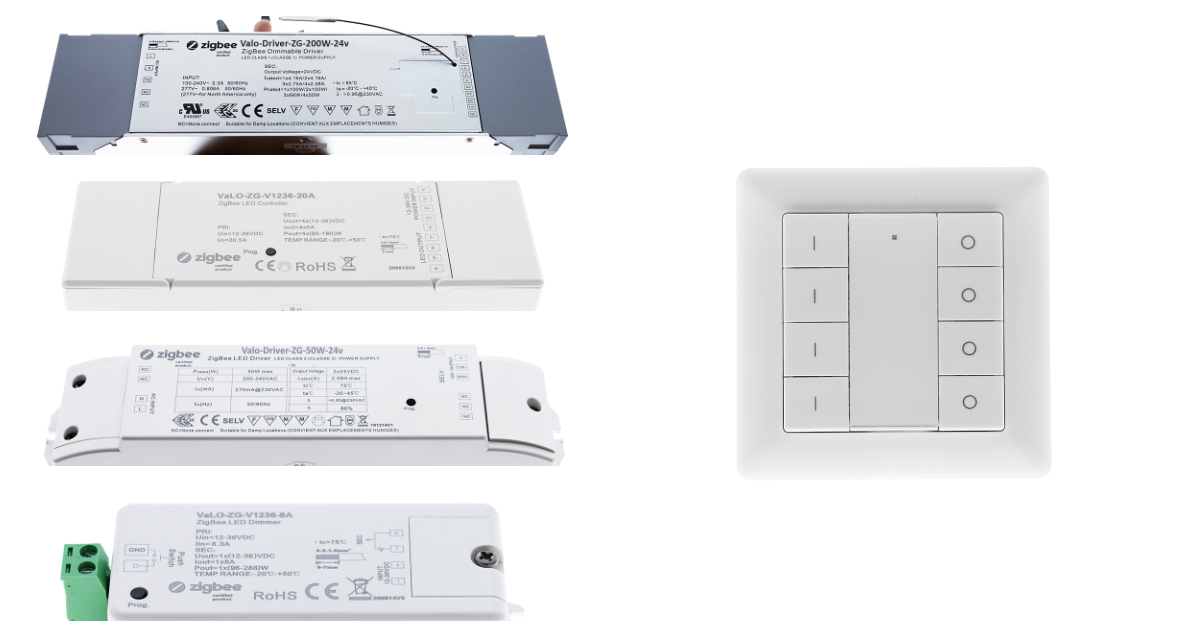
It is essential that the controllers and receivers are compatible, i.e. that they use the Zigbee wireless protocol. To get the full benefit of the system, a bridge and interface is needed to allow programming and the desired luminaire groupings. A bridge is the part of the system that connects to the home internet network. It can be called not only a bridge, but also an encoder, a hub, a concentrator or an operator, depending on the manufacturer.
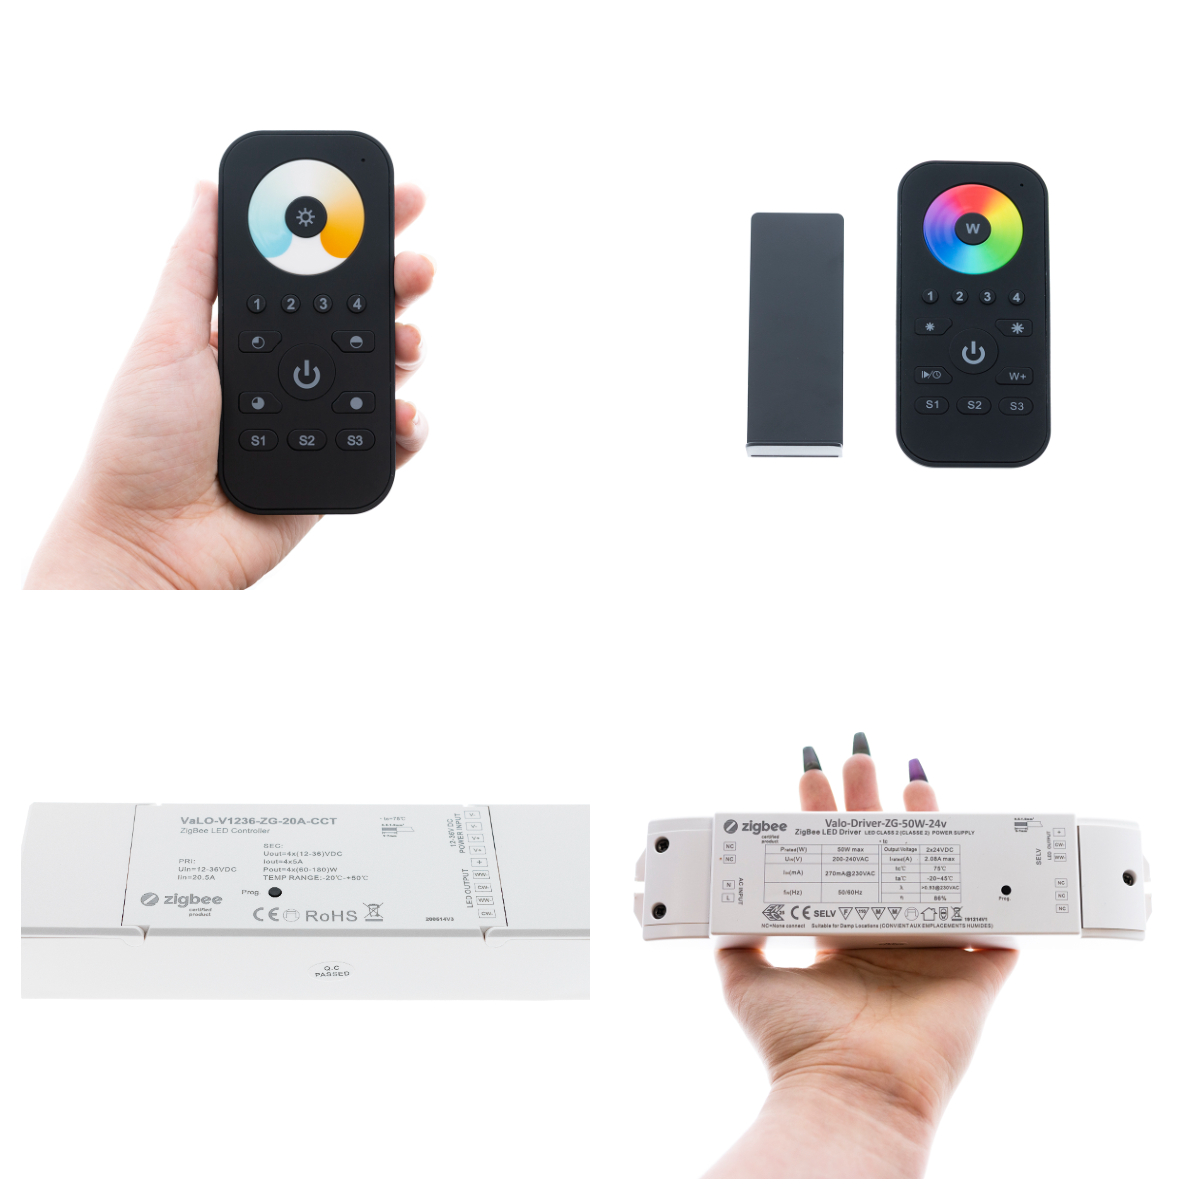
The receiver or the driver containing the receiver is selected according to the characteristics of the luminaire / the desired use of the luminaire. The controller is usually a battery-operated, free-standing, wall-button style dimmer/colour thermostat/colour control. They work for one, two or four receivers. There are also remote controls, which makes it easier to specify the colour of an RGB LED strip, for example, because the control has a visual colour wheel.
Zigbee devices, compatibility with e.g. With Philips Hue and Samsung Smart Things
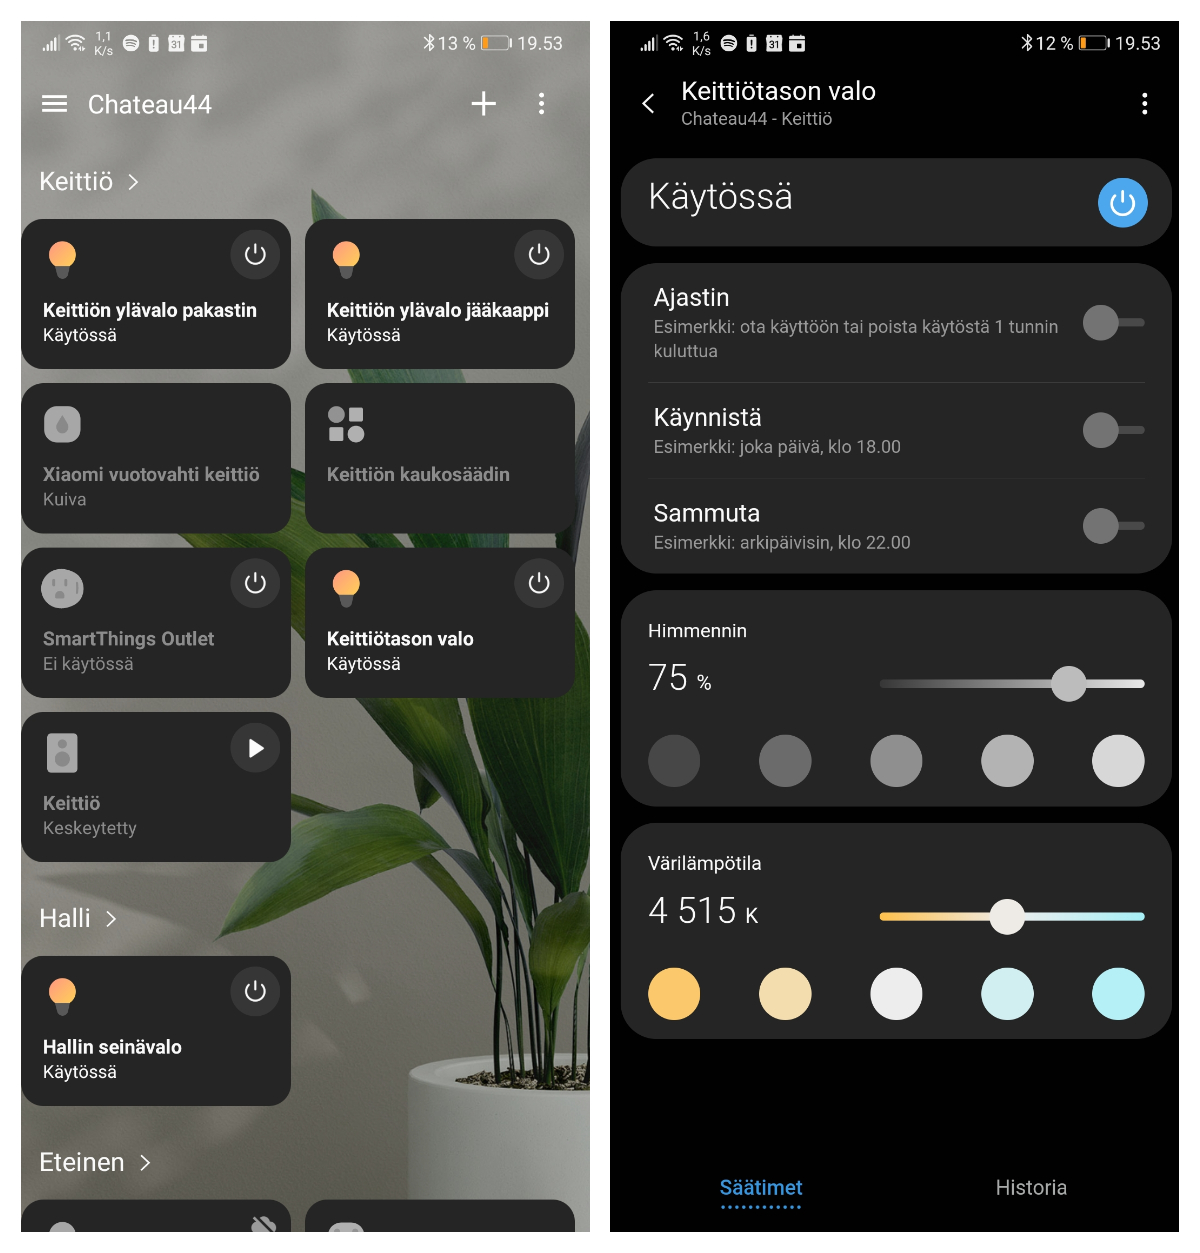
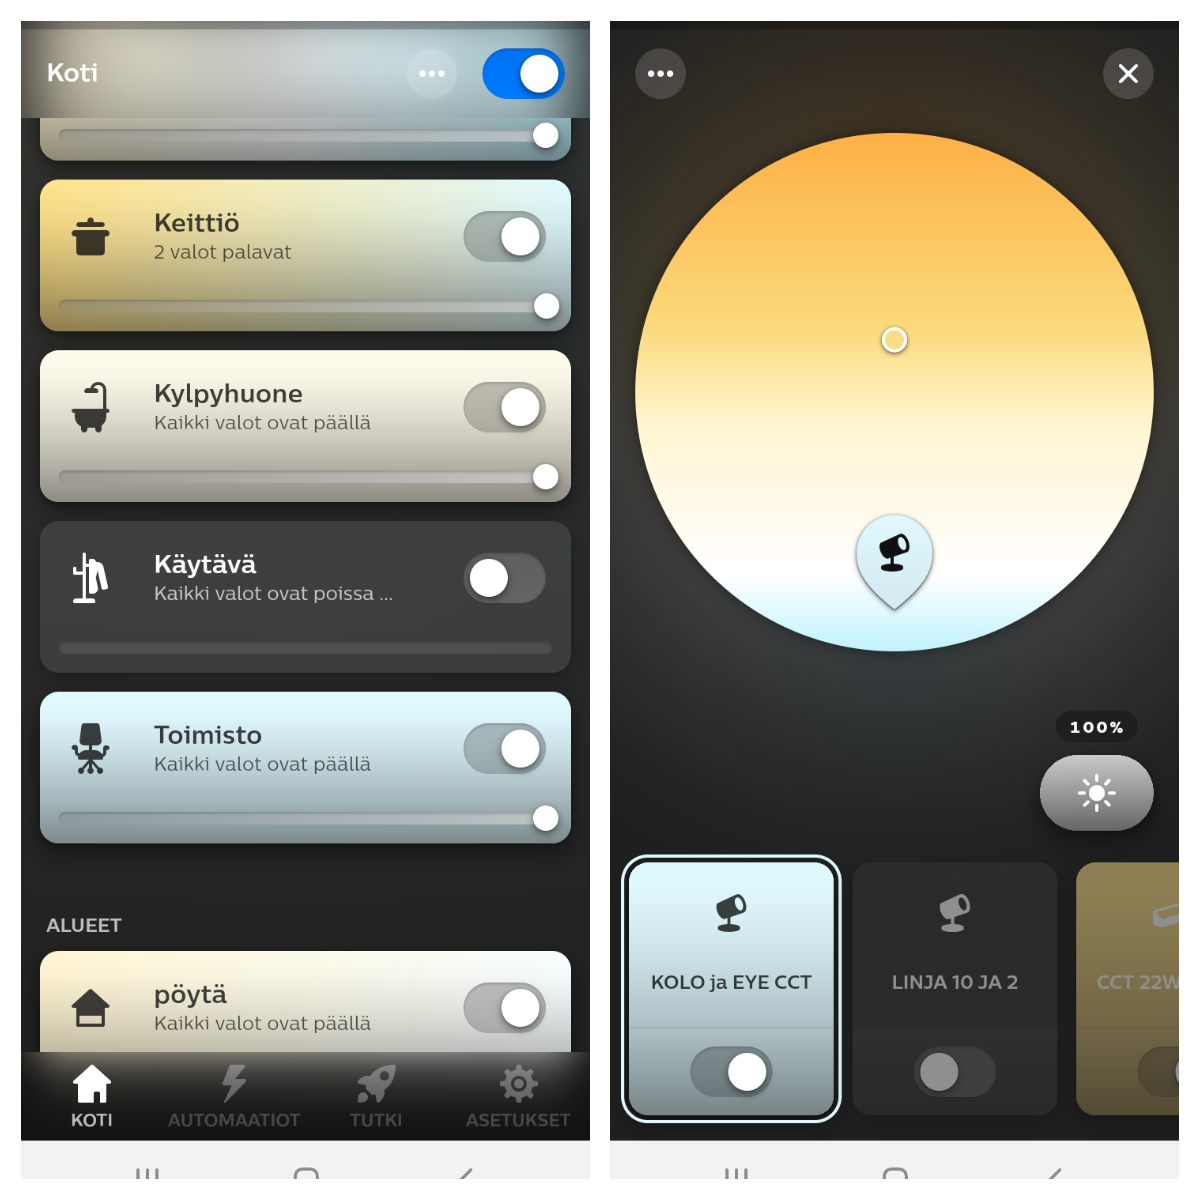
LedStore’s Zigbee devices are compatible with many smart lighting systems. You can read more about Zigbee in the Zigbee product category of our online shop. This article is about Philips Hue and Samsung Smart Things. For other manufacturers, LedStore’s Zigbee devices are so-called. third party equipment. This is reflected in the fact that the battery-powered control buttons may not be visible in the interface, but the pairing and control functions work well.
We like the Philips and Samsung interfaces ourselves, as they are clear and easy to use. These interfaces allow not only lighting but also other Zigbee devices such as air conditioning, AV equipment, air purifier, robot vacuum cleaner, irrigation system and camera system to be operated from the same interface.
Zigbee drivers and buttons can also be deployed in other Zigbee-enabled systems. We’ve written about other systems and products in our blog article Zigbee lighting control, part 3.
Zigbee devices, pairing using a bridge/hub
If you want to control the lights from one or more buttons and a mobile app, then
1. the button and the driver are separately inserted into the hub/bridge, then
2. the button or buttons are paired with the transformer.
NOTE! It is important that the pairing order is correct when using the buttons AND the app! If the button and the driver are already paired, this connection must be reset first!
How to connect a CCT or Zigbee colour temperature controlled button to your hub/bridge
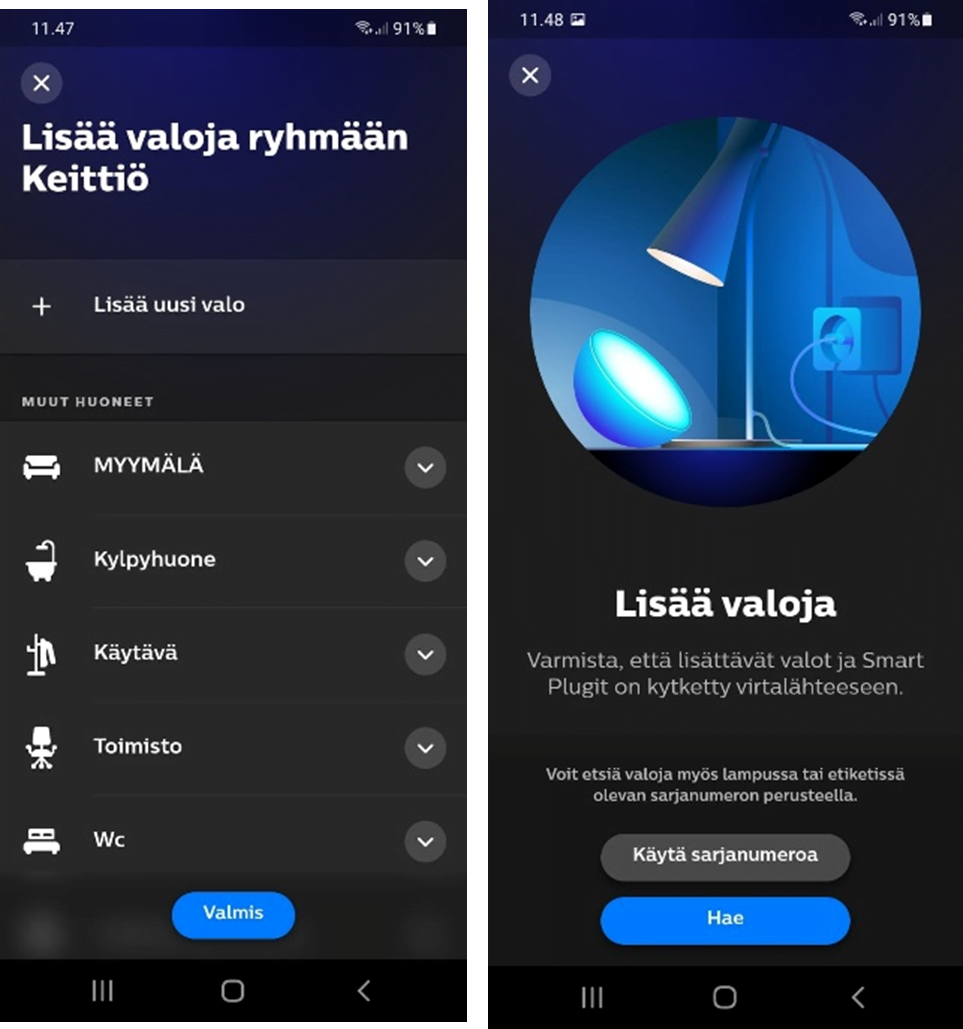
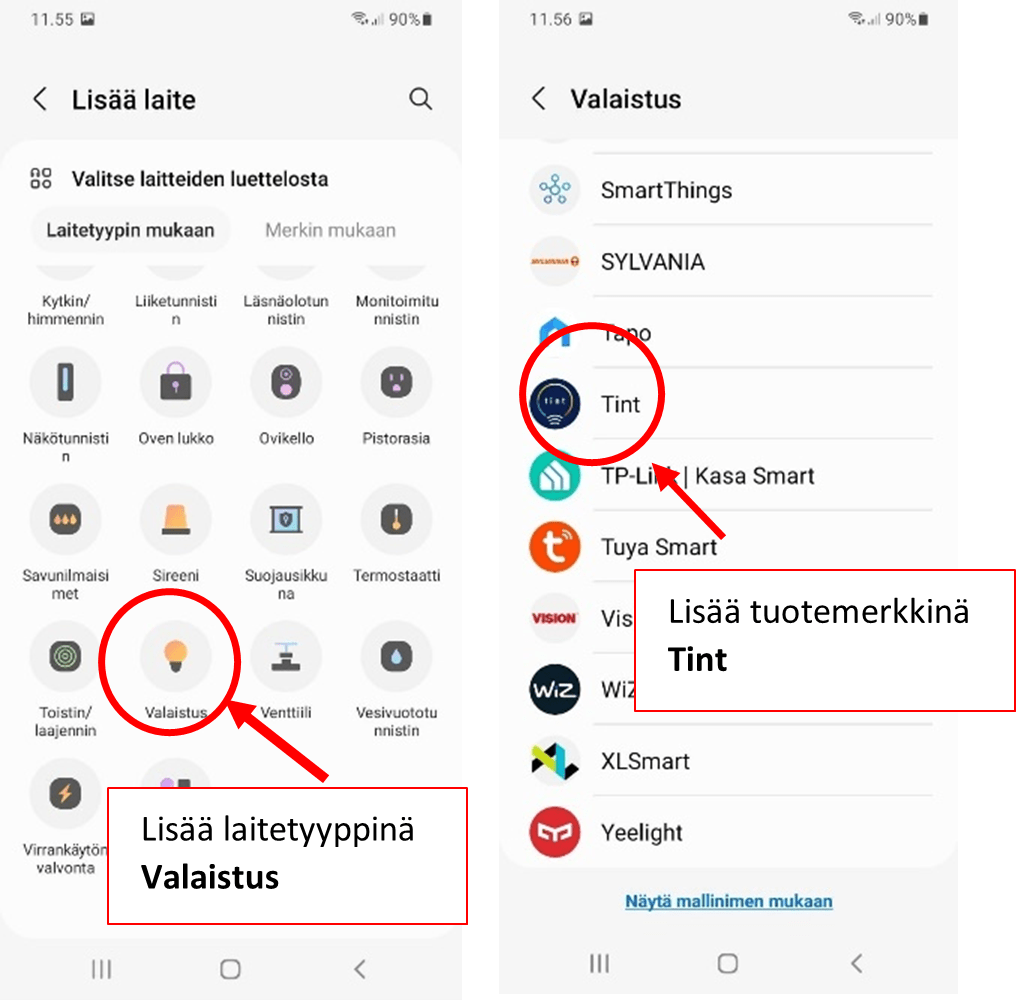
1. Add the device/lights by following the bridge/hub instructions in the interface. When the program wants to connect a new device, it
2. Press the bottom two buttons three times quickly (S1 and S2 simultaneously). If you have another button, look for “Pairing through coordinator or hub” in the button help.
3. The green light on the button flashes when the process is running. When the indicator light goes out, the connection is complete.
4. The connected button may not appear in the UI, but it is now connected nonetheless.
How to connect a Zigbee transformer to your hub/bridge
1. Connect the power to the transformer.
2. Add the device/lights by following the bridge/hub instructions in the interface.
3. When the program wants to pair a new device, press the Prog. button five times quickly and pairing will begin.
4. The device found will appear in the interface.
When the buttons and drivers are on the hub network, they are paired together, so that the button or buttons you want to control are paired with the transformer see. lights. The easiest way to do this is with Touch Link, which means
Pairing of CCT adjustable RF-Zigbee button with Zigbee transformer, 100W driver transformer shown
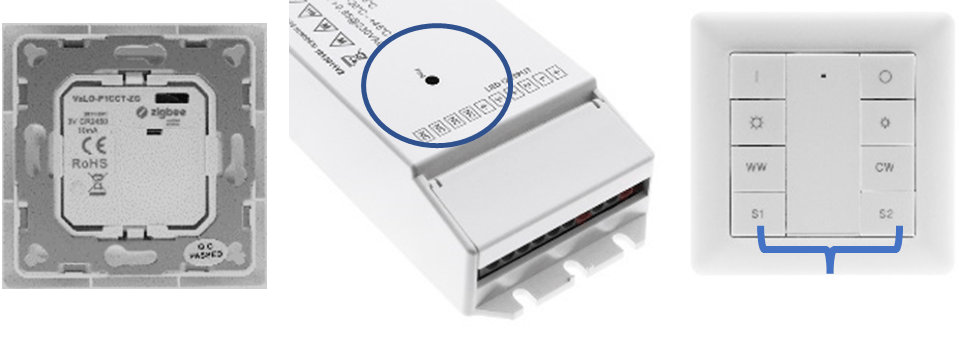
1. Remove the battery cover of the button and bring the button 0 – 10 cm away from the transformer (Touch Link method).
2. Connect the power to the transformer (the lights will come on).
3. Press the transformer’s Prog. button four times quickly.
4. Press and hold down the bottom two buttons (S1 and S2) for more than 3 seconds. Unplug when the green light comes on. If you have another button, see the “Touch Link to a Zigbee Lighting Device” section of the manual for the correct buttons.
5. Finally, the lights flash twice to indicate a successful pairing. Do not take the button away from the transformer until the pairing is complete. It takes about 10 seconds for the joint to form.
This Touch Link method is also used to pair devices when the hub/bridge is not used. Then you connect one button and one driver to each other. We wrote about this method in our previous blog post Zigbee lighting control, part 1.
Before connecting, it is a good idea to reset the receivers and controllers to factory defaults. factory reset. In this case, the pairing is most likely to be successful
The most common way to reset the receiver is to turn on the power, and the lights wired to the receiver will light up. Press prog five times. button (the little black button with the word prog. next to it), the lights will flash three times to indicate reset.
For controllers, the reset is done by the controller e.g. CCT adjustable button (VaLO-P1CCT-ZG) by pressing the lower buttons three times simultaneously until the LED lights up and the LED flashes three times rapidly to indicate a successful reset.
TIP: If you use lights without connecting them to a wireless controller or hub, every time the power is turned on, the light will blink twice slowly (for 15 seconds) as it enters pairing mode. So by switching lights off and on, you can search the apartment for the lights that have not yet been paired with anything.
Watch our video on pairing, which shows how to connect a 1, 2 and 4-piece button to a transformer using the Touch Link method.

Once devices, both receivers and controllers, are connected to the Zigbee network, they can be grouped and scheduled as desired in the user interface. They can also be controlled and adjusted by wireless controllers. The LedStore online shop provides user manuals in Finnish and English. We are constantly developing our guidelines and are happy to help you choose and use our products.
We write about smart lighting and how to control and pair it
For other articles in the series on Zigbee, see the links below:
- part 1 Zigbee lighting control master part 1
- part 2 you’re reading it now 🙂 zigbee lighting control take over part 2
- part 3 Zigbee lighting control, part 3
- part 4 Zigbee CCT smart lighting from an installer’s perspective – Zigbee lighting control part 4
- part 5 Zigbee lighting control master part 5 – pairing like this
A collection of articles, including renovation projects where this approach has been used, can be found in the blog category : https://ledstore.fi/blog/category/zigbee/
All ZigBee devices are available at LedStore’s store in Koivuhaa, Vantaa, at Mesikukantie 16, 01300 Vantaa. We have installed Zigbee controls in the store, and we use Philips Hue and Samsung Smart Things apps.