
The indirect light coming through the wall is soft and comfortable. If light also features infinitely variable white light colour temperature control and dimming, you are always guaranteed to match your interior design and mood! We implemented two different interior lighting schemes with LedStore’s circular wall lamps. In this article, we tell you about the project and the costs!
Need for interior lighting renovation and light chosen, Eclipse
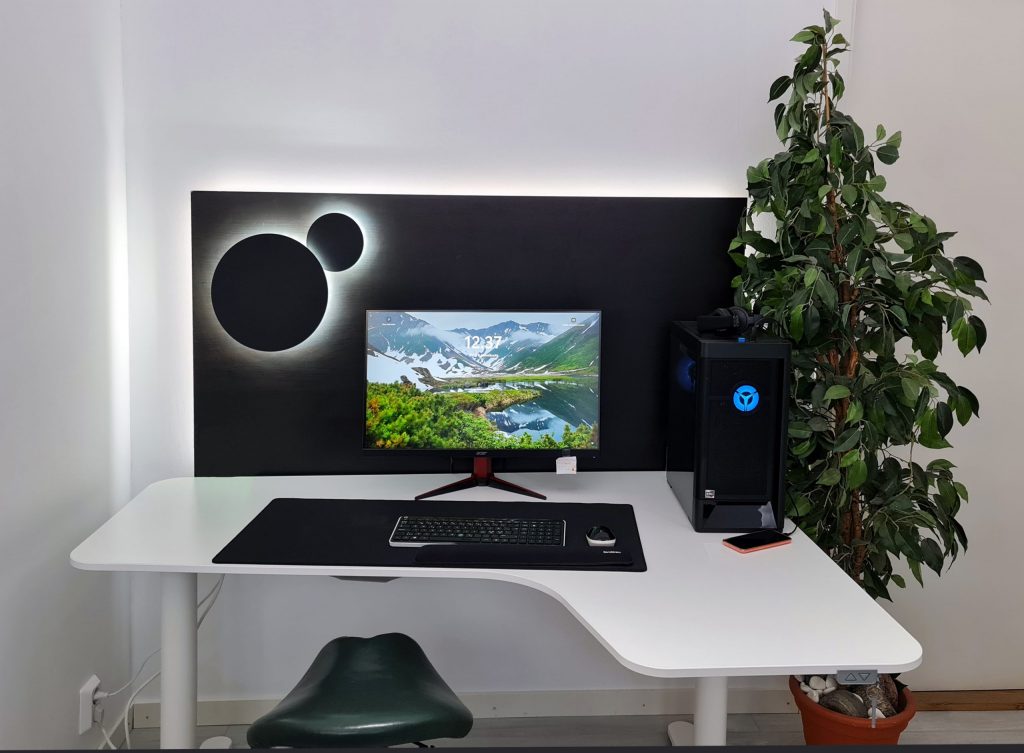
The room needed a nice focal point on the all-white wall, and more lighting didn’t hurt either. Another need was to add a decorative element to the workstation, as no changes to the wall were required.
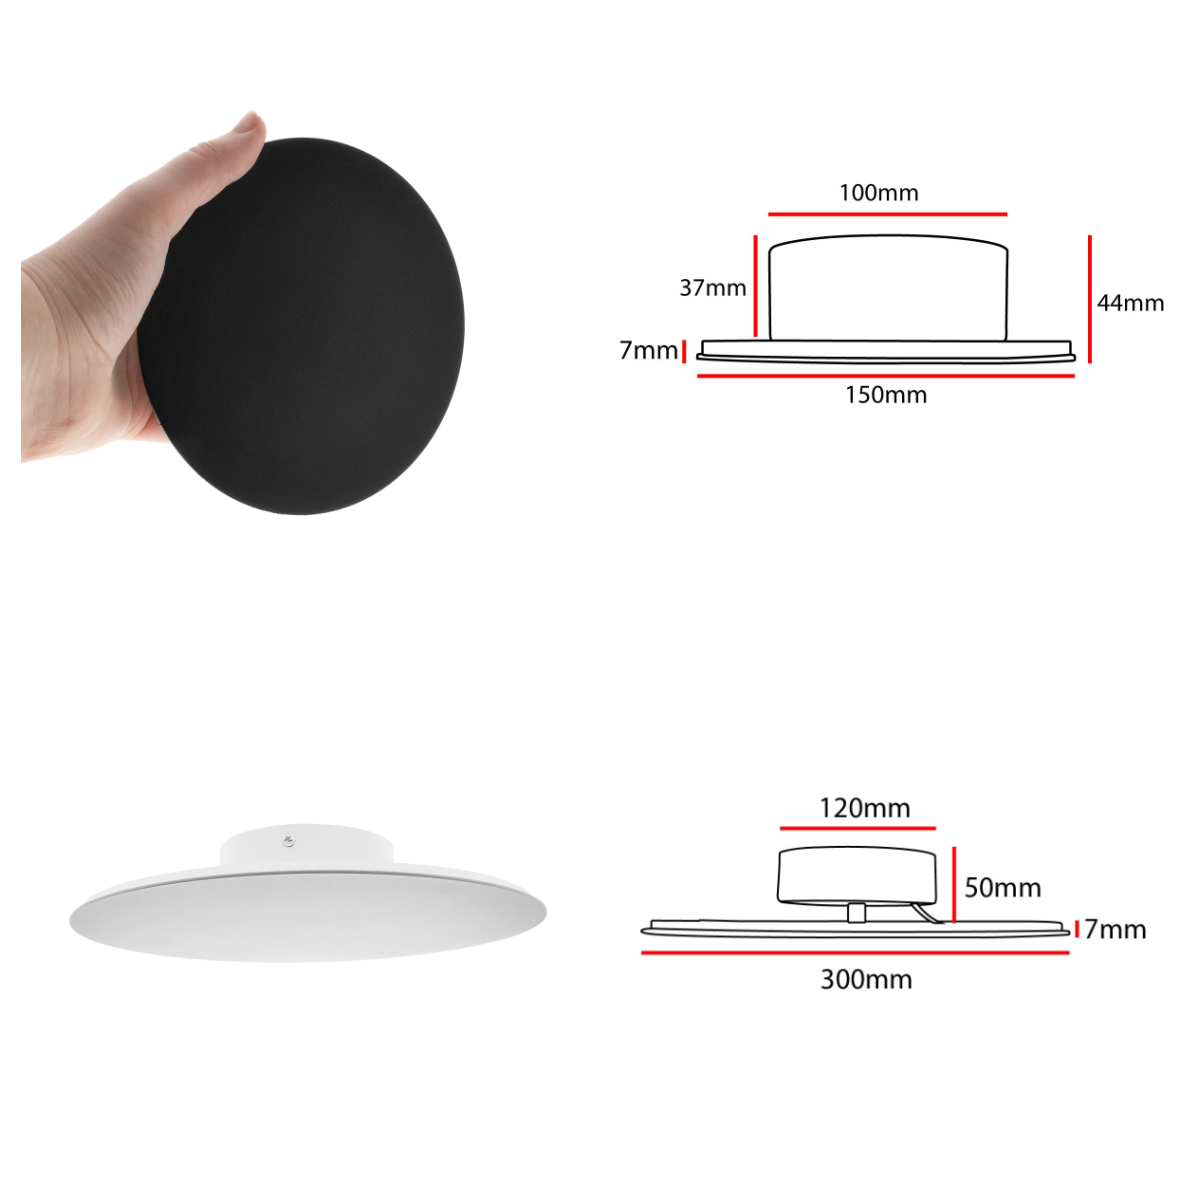
light Eclipse wall light mounted Led wall light is available in white and black, with a powder coated matt finish, which is an advantage when, for example, the lights are installed side by side. A matt surface gives less reflection, so the light patterns remain regular in all directions. The luminaires are ordered individually, so you can choose the exact number, colour and size you want for your layout. There are two sizes, 30 cm and 15 cm. The larger Eclipses are 50 mm from the wall and the smaller Eclipses are 37 mm, 13 mm lower. Luminaires can be installed either individually or in groups.
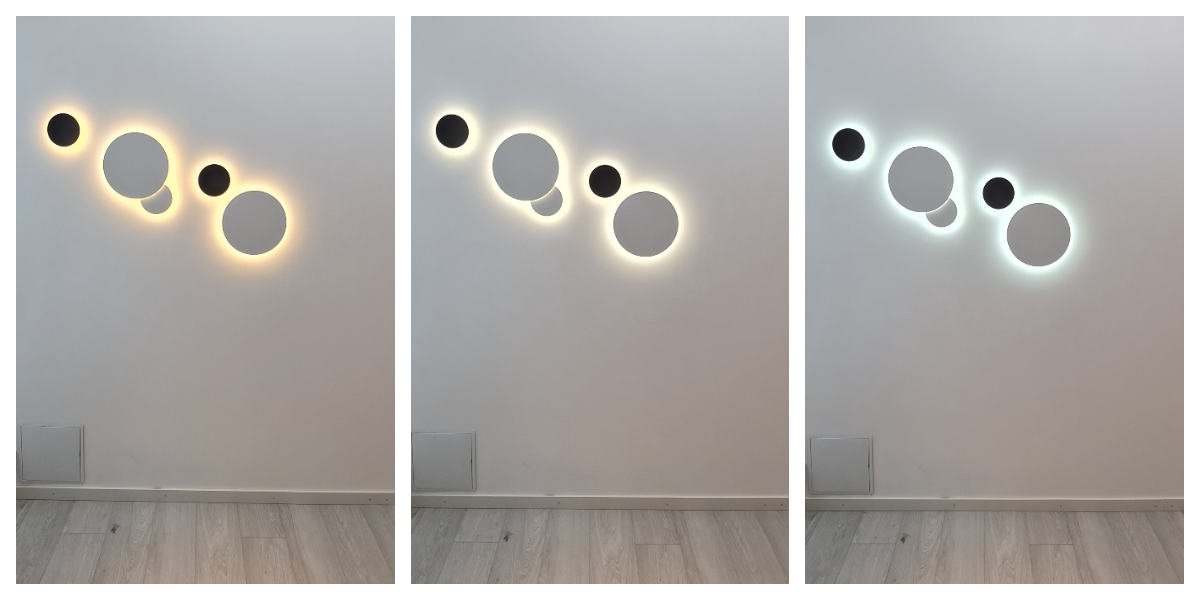
The Kelvin, or colour temperature control, makes the luminaires well suited to all shades of interior design, and they also have a high colour rendering index, meaning that the light reproduces all the colours of the environment exactly as they should be.
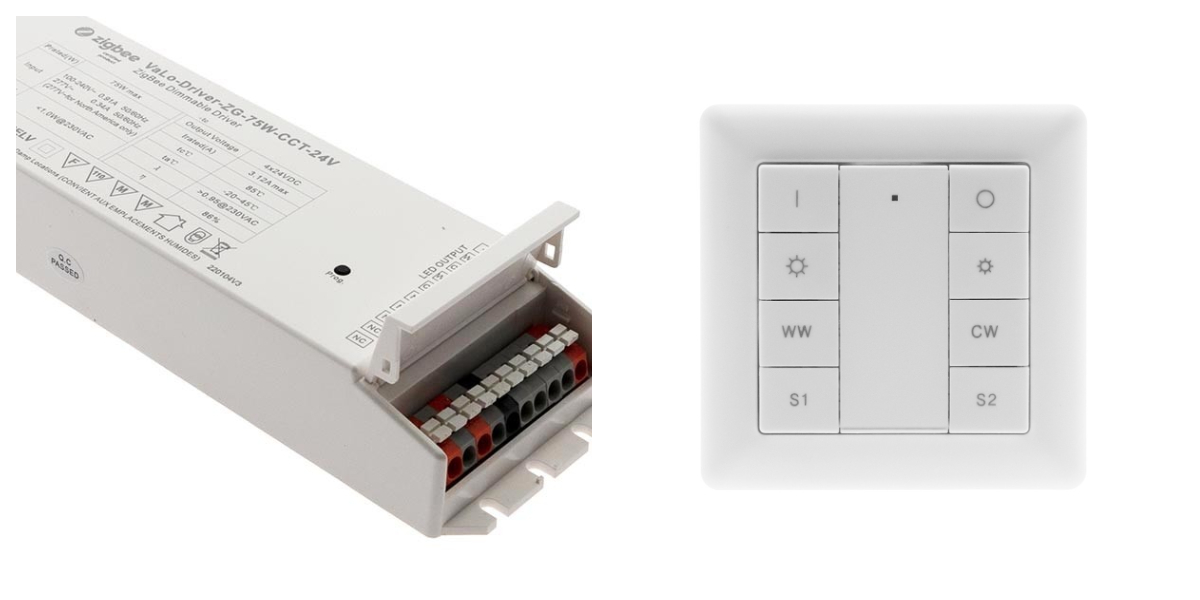
For the LedStore wall set, two white large and three small ones were chosen, two black and one white Eclipse. The layout was chosen for an area of 120cmx70cm, in a left-to-right descending shape. The total power required from the transformer and load shackle is 70W, so a 75W driver wireless control transformer and a wireless controller for colour temperature control and dimming were selected from LedStore’s range.
Two black Eclipses, a large and a small one, were chosen for the desktop set behind the desk, interlocking in the upper right corner of the slightly larger Eclipse.
light light shines evenly from the back of light towards the wall, so there is no glare when viewed from the side. The figure below illustrates the variation of colour temperature in a luminaire.
Implementing wall lighting with Eclipse
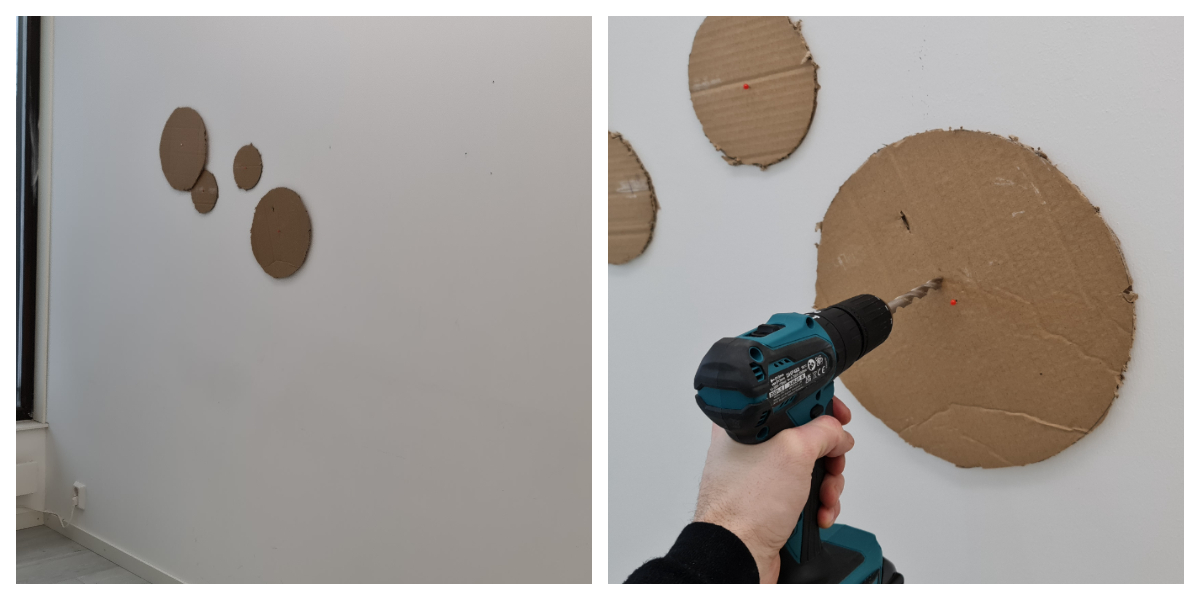
To make the plaster wall set-up, it was necessary to run the lighting wires inside the wall to the transformer, and a service hatch was installed in the wall. The steps were as follows:
- Make stencils and use them to outline the locations of lights.
- Make openings in the wall and, if necessary, in the bracing for the cable entry and service hatch.
- Pull the mains power cable to the transformer in the service hatch (requires a professional), and the low-current cables to the luminaires ready.
- Fill in the hole in the wall for the wiring, pack, paint/wallpaper the wall and install the service hatch.
- Install the brackets on the wall in the correct places and connect the installed wires to the light wires, e.g. With Wago bulb connectors, attach the lamps to the brackets.
- Pair up the transformer and the controller and the lights is ready to use.
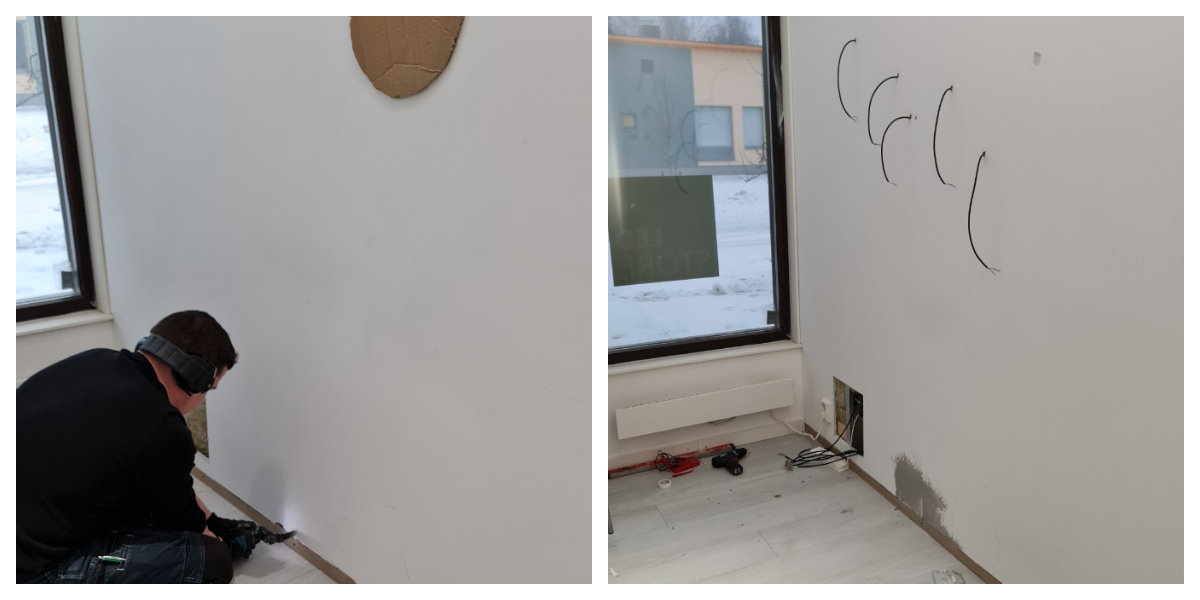
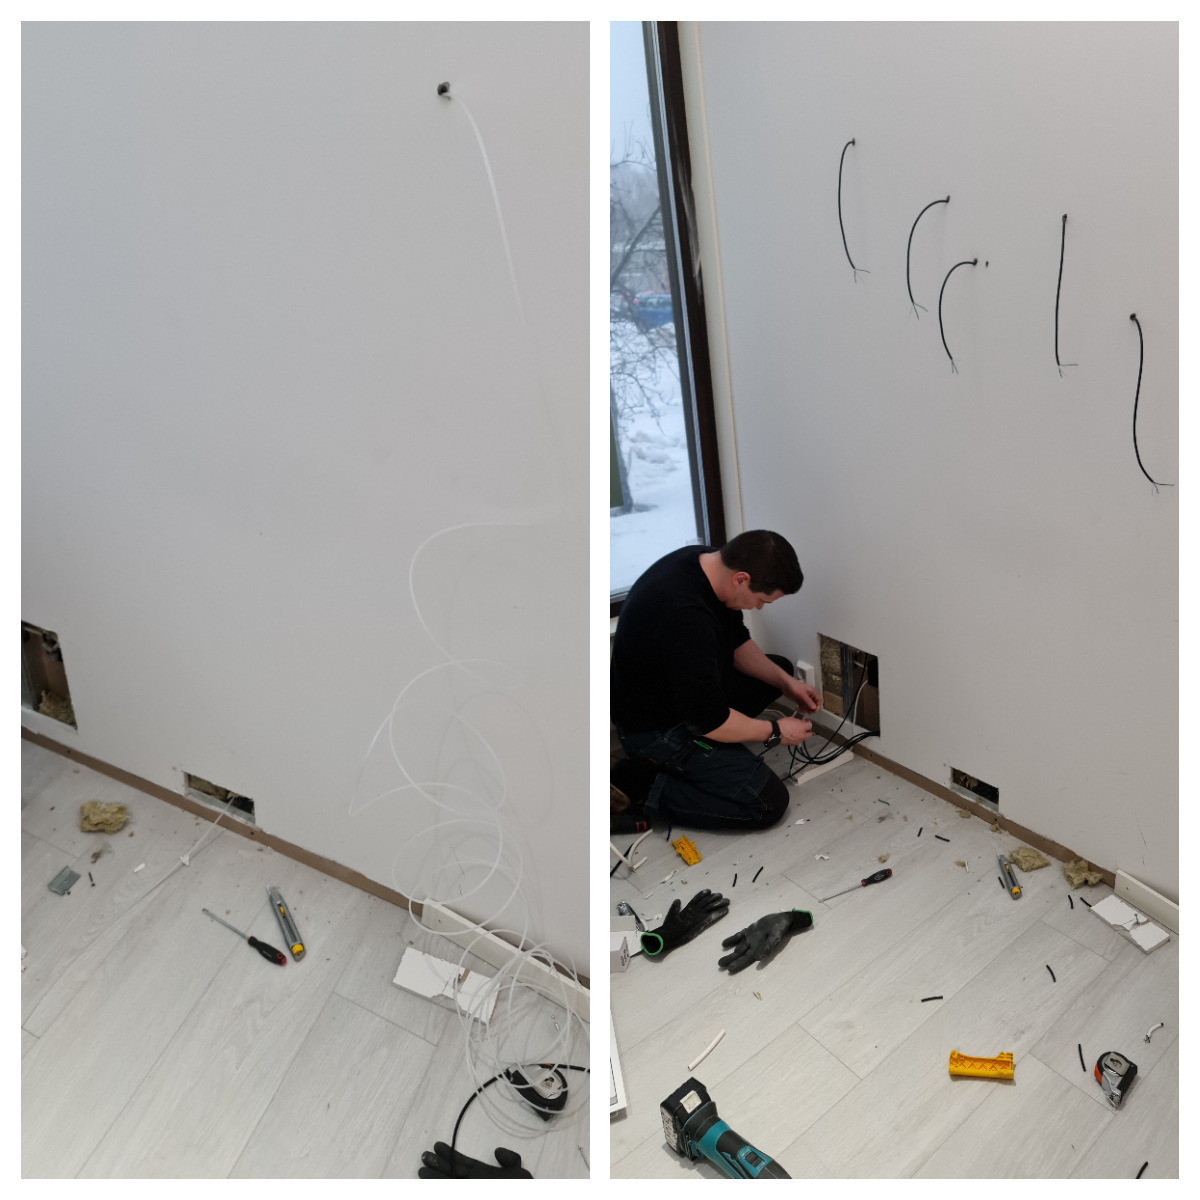
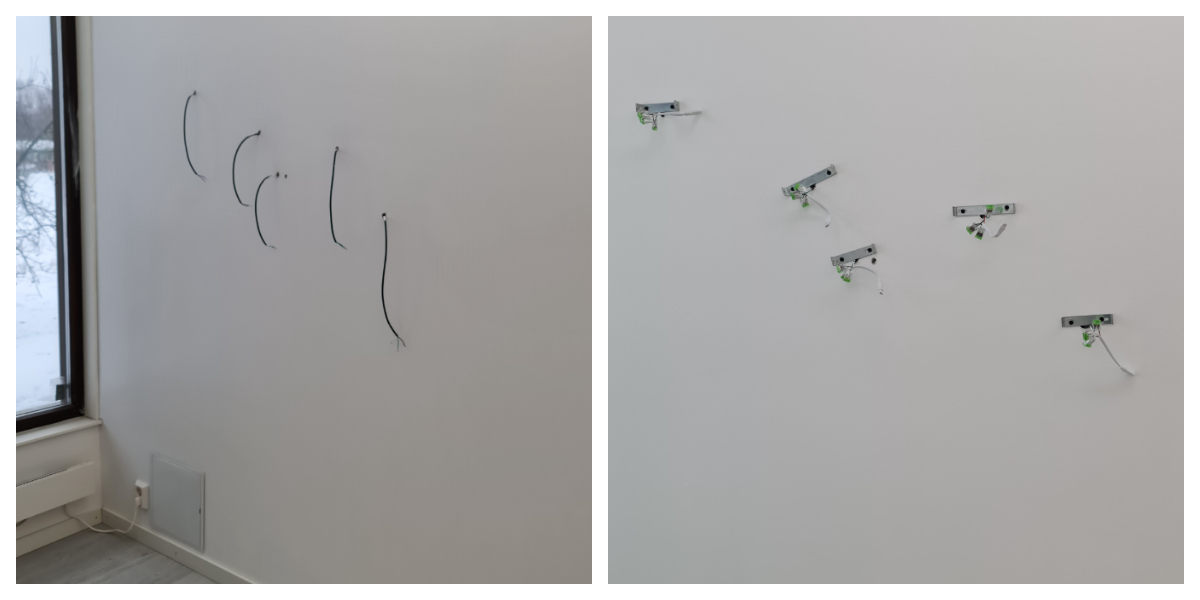
The service hatch here is 33×33 cm. Smaller ones are available if needed, but in this space the service hatch remains behind the furniture. All the wiring and the driver were brought inside the wall. Wall brackets were screwed to the wall for mounting. As the luminaires are round, the brackets do not need to be in a straight line. The fixture was attached to light with three two-position lever connectors per light, to which Eclipse’s own quick connector was connected. The red wire is connected to positive, the black wire produces cold white and the white wire produces warm white. The colour temperature control switch on the luminaire was removed to allow the lights to be controlled continuously. When installed with a colour temperature switch, light will operate in one of the three selected colour temperatures (warm, neutral, cold).
Pairing with Zigbee wireless controllers
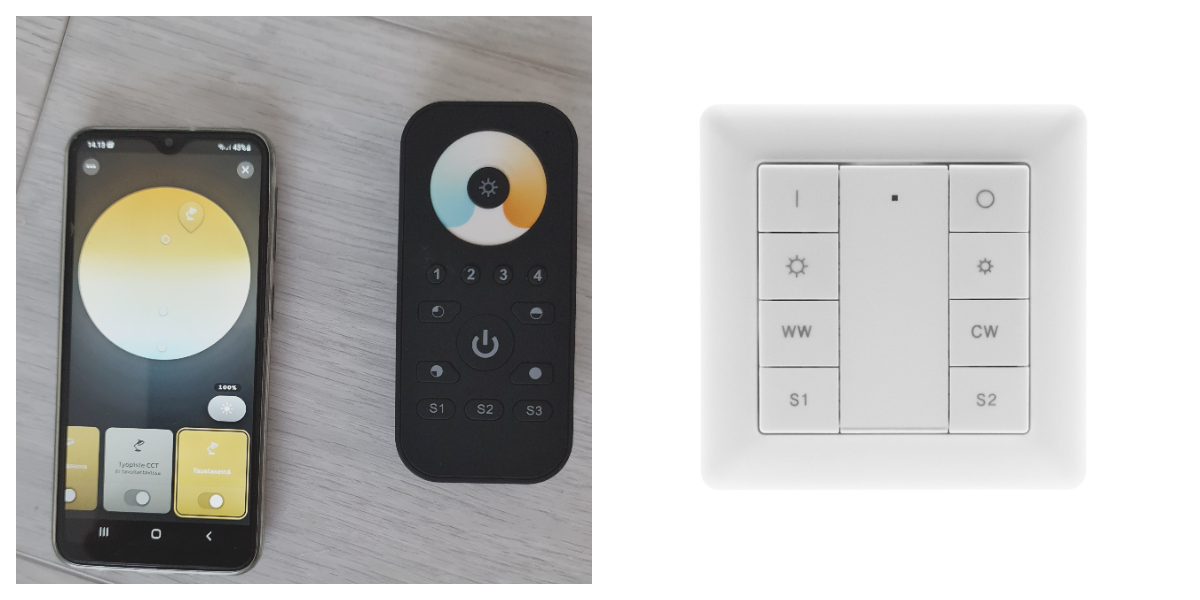
Once the luminaires are installed and the power is on, they can be connected to either one controller, e.g. to a wall controller, or to two/more controllers via an intelligent control system. Remember to insert the batteries if you have a remote control, and remove the protective plastic from the back of the battery if you have a wall controller.
If a single controller is sufficient, then no intelligent controller is needed to pair. The transformer has a built-in receiver with which the controller is paired. We have written about pairing in Zigbee lighting control part 1. For example, connecting to a wireless wall controller is as simple as pressing the prog button on the transformer four times to open the pairing connection. Place the controller next to the transformer (less than 10 cm away) and first press the on button ( I ) to “wake up” the device and flash the green indicator light. Then press the brightness increase button (below the on button) once. It takes a while to connect. When it is ready, the lights will flash twice. This type of connection is called a TouchLink paired connection.
The remote control pairing guide can be found in the product link in the online store under Files: https://ledstore.fi/langaton-led-himmennin-valo-zigbee-4-ryhman-cct-kaukosaadin
We have blogged about pairing via hub/bridge in the article Zigbee lighting control part 2.
Costs and time spent on the wall-hanging artwork
Five Eclipses, a 75W driver transformer, connecting cables and a wireless controller cost a total of 593 euros (incl. VAT). In addition, paint, screed, connectors and tools were needed, as well as professional skills in electrical work. For the money we got 60 watts of LED luminaire power, and indirectly illuminating 4800 lumens. The total effective working time for this project was 8 hours.
A simpler and faster implementation is obtained if the collar can be milled, for example. behind a 7-10 cm high skirting board. In addition, if there are no wool or similar in the partition wall. insulation, it is faster to import the wires, as no traction is needed to pull the wires. The light fittings themselves require such small holes in the wall that if the wall surface is clean, there is no need to paint at all. In its simplest form, a project can be completed in about 3 hours.
Indirect illumination from behind a wall or furniture panel
Eclipse wall luminaires are also ideal for mounting on, for example, furniture panels. In the solution shown in the photo, the honeycomb table top has been transformed into a lighting element behind the workstation. The 50W wireless control transformer solution has a hole machined into the back of the board. The thickness of the transformer is only 33 mm, while the thickness of the furniture panel is 35 mm. In addition, a 25mm strip was mounted behind the panel, to which an LED track was attached to illuminate along the wall.
The price for the lighting and control of this package was only 466 e (incl. VAT).
All you have to do is lift the unit onto the wall using the screws and attach it to the socket, as the plug is ready to use. The wall light can be easily controlled wirelessly with colour temperature control and dimming. For a more detailed description of how to implement the project, which can also be done by you, read the next article in our blog. Below you can also get a taste of this project in its finished form.
If you are interested in the lamps in this article, we will be happy to provide you with more information. You are also welcome to visit our store in Koivuhaja, Mesikukantie 16, 01300 Vantaa, Vantaa. Our All in One stores feature all the products presented in the article. We serve all customer groups, from consumers to contractors, under one roof. Take a look at the shop.