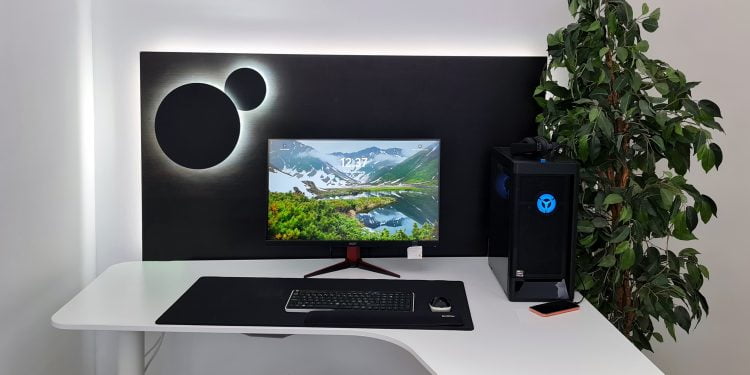
With a little effort, you can build a hanging wall lighting element from a prefabricated table top. The indirect light coming through the wall is soft and comfortable. If light also features infinitely variable white light colour temperature control and dimming, you are always guaranteed to match your interior and mood! We implemented the desk lighting project as decorative backlighting with LedStore’s Eclipse circular wall lights and an aluminium profile mounted LED strip. In this article, we tell you about the project and the costs!
Desk lighting with interior design and selected light, Eclipse
There was a need to add some decorative touches and lighting to the desk, but no changes to the wall. This solution works anywhere you want to add lighting to a wall. So this is not a direct light, but gives a sensual atmosphere to a working day, or a backdrop with coloured lights gives a game atmosphere for youngsters.
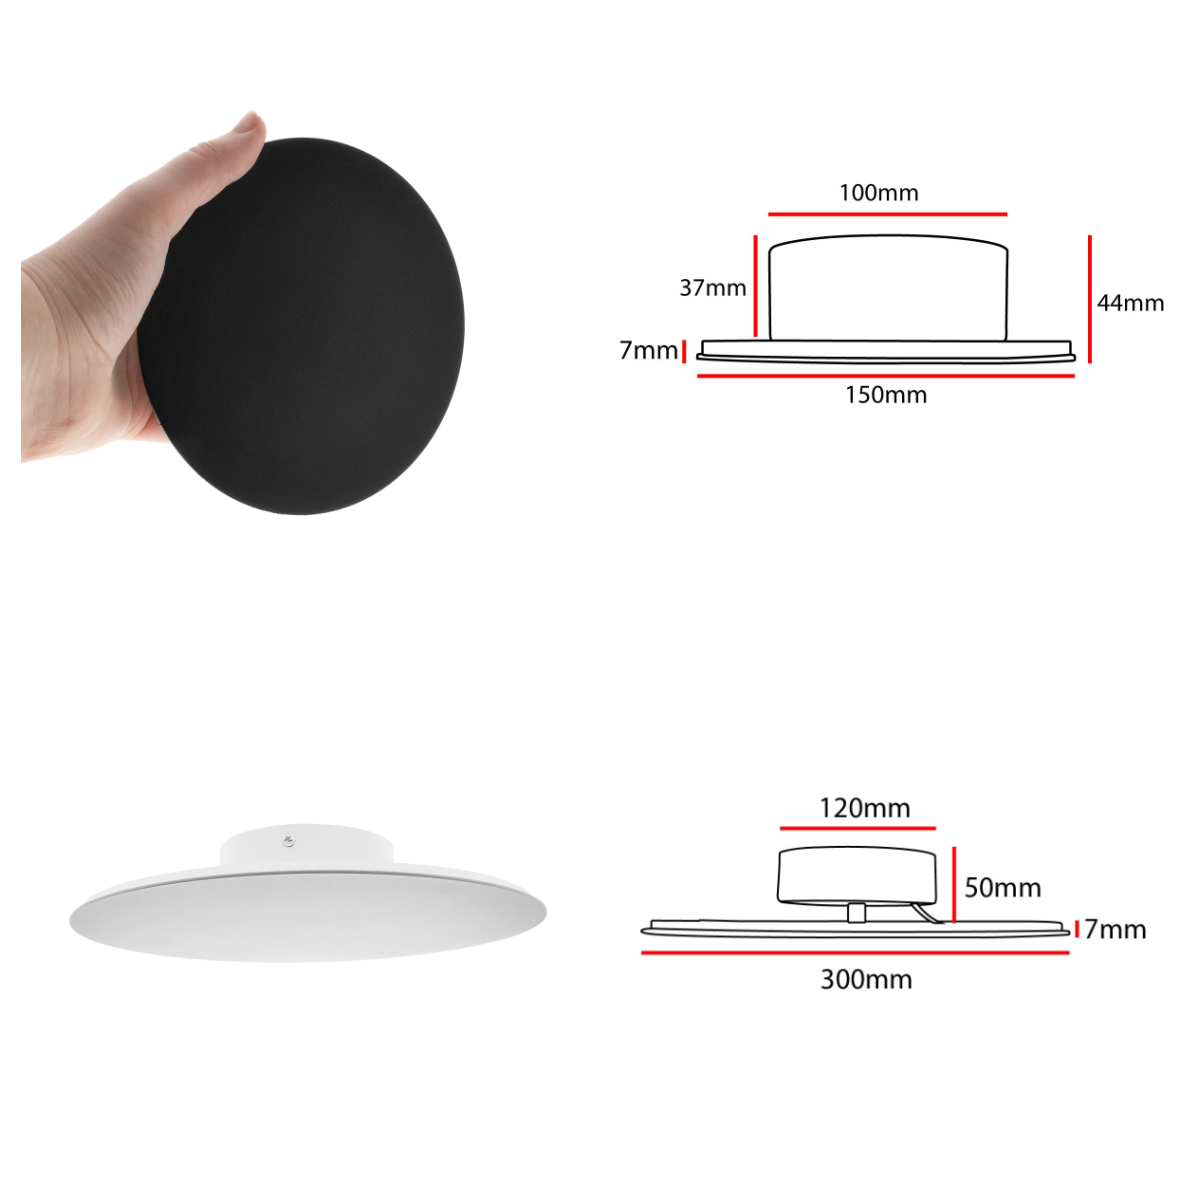
The wall-mounted or, in this case, panel-mounted Led wall light Eclipse is available in white and black, with a powder-coated matt finish, which is an advantage when, for example, the lights are installed side by side. A matt surface gives less reflection, so the light patterns remain regular in all directions. The luminaires are ordered individually, so you can choose the exact number, colour and size you want for your layout. There are two sizes, 30 cm and 15 cm. The larger Eclipses are 50 mm from the wall and the smaller Eclipses are 37 mm, 13 mm lower. Luminaires can be installed either individually or in groups.
The Kelvin, or colour temperature control, makes the luminaires well suited to all shades of interior design, and they also have a high colour rendering index, meaning that the light reproduces all the colours of the environment exactly as they should be. The lighting on the desk can therefore be varied according to your level of alertness.
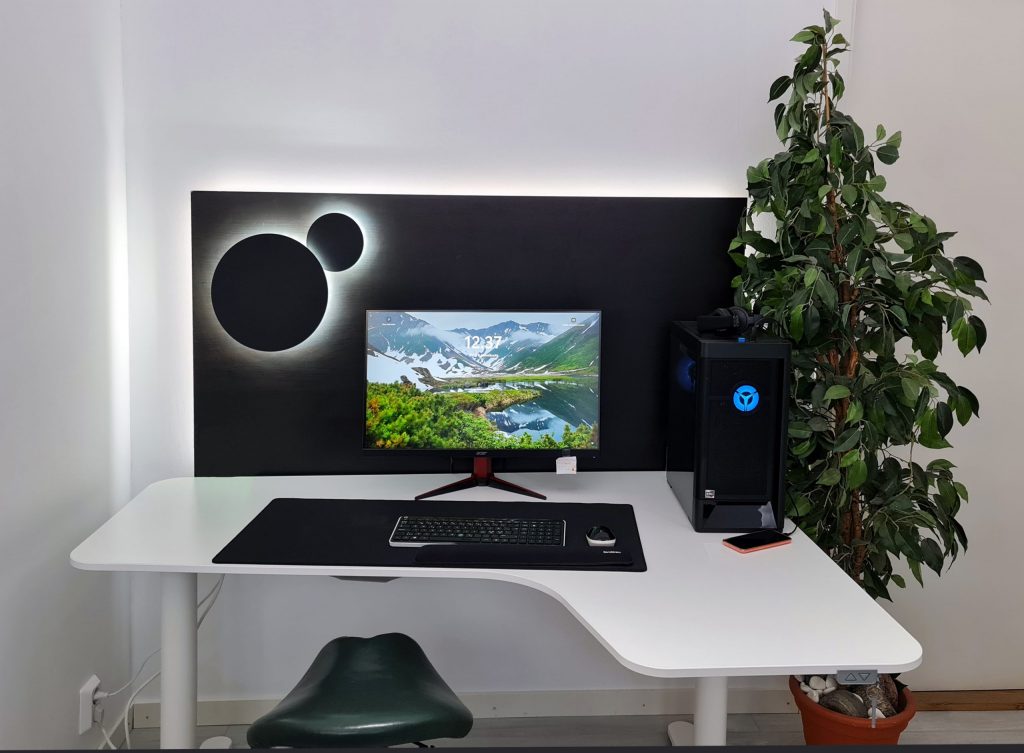
Two black Eclipses, a large and a small one, were chosen for the desktop set behind the desk, interlocking in the top right corner of the slightly larger Eclipse. A highly uniform SOLO 7.2 W/m colour temperature controlled LED strip was chosen to rotate around the table top, mounted on a black aluminium surface profile. 3 metres of LED strip and profile were needed. We also sell strips and profiles at metre prices. Contact LedPaja (paja@ledstore.fi), or calculate the price yourself with our calculator on the custom order page.
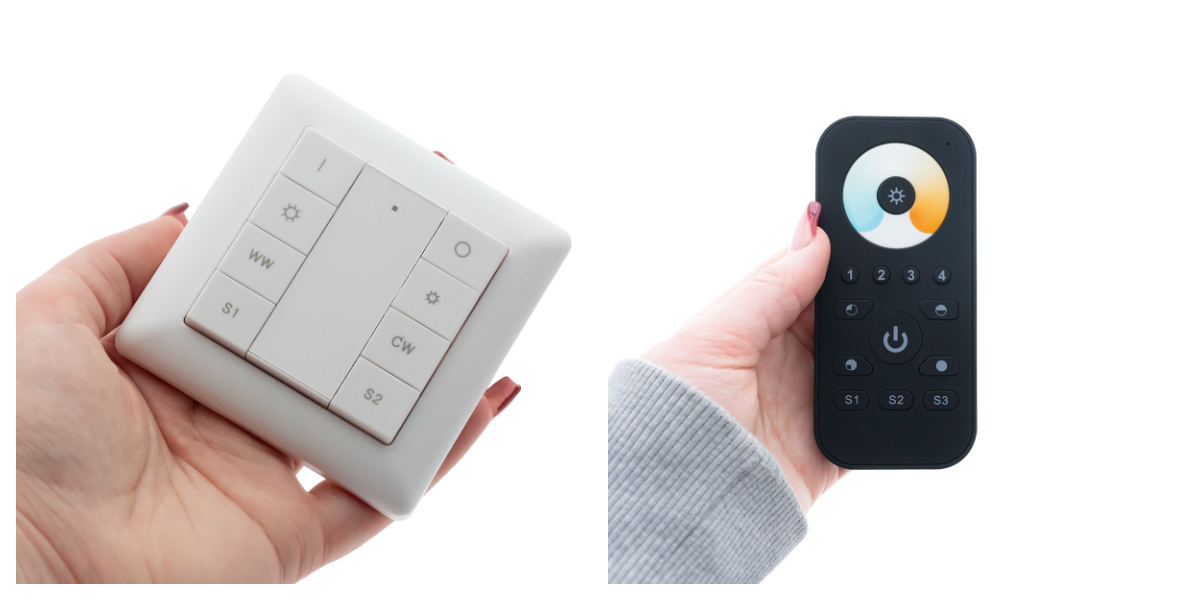
The total power required from the transformer and load shackle for the luminaires is 50W, so a 50W driver wireless control transformer and a wall-mounted wireless controller for colour temperature control and dimming were selected from LedStore’s range. A remote control for colour temperature control is also a good solution. The remote control stand can be fixed to the wall and the controller is attached to the stand with a magnet. So the lighting on your desk can be freely controlled from anywhere.
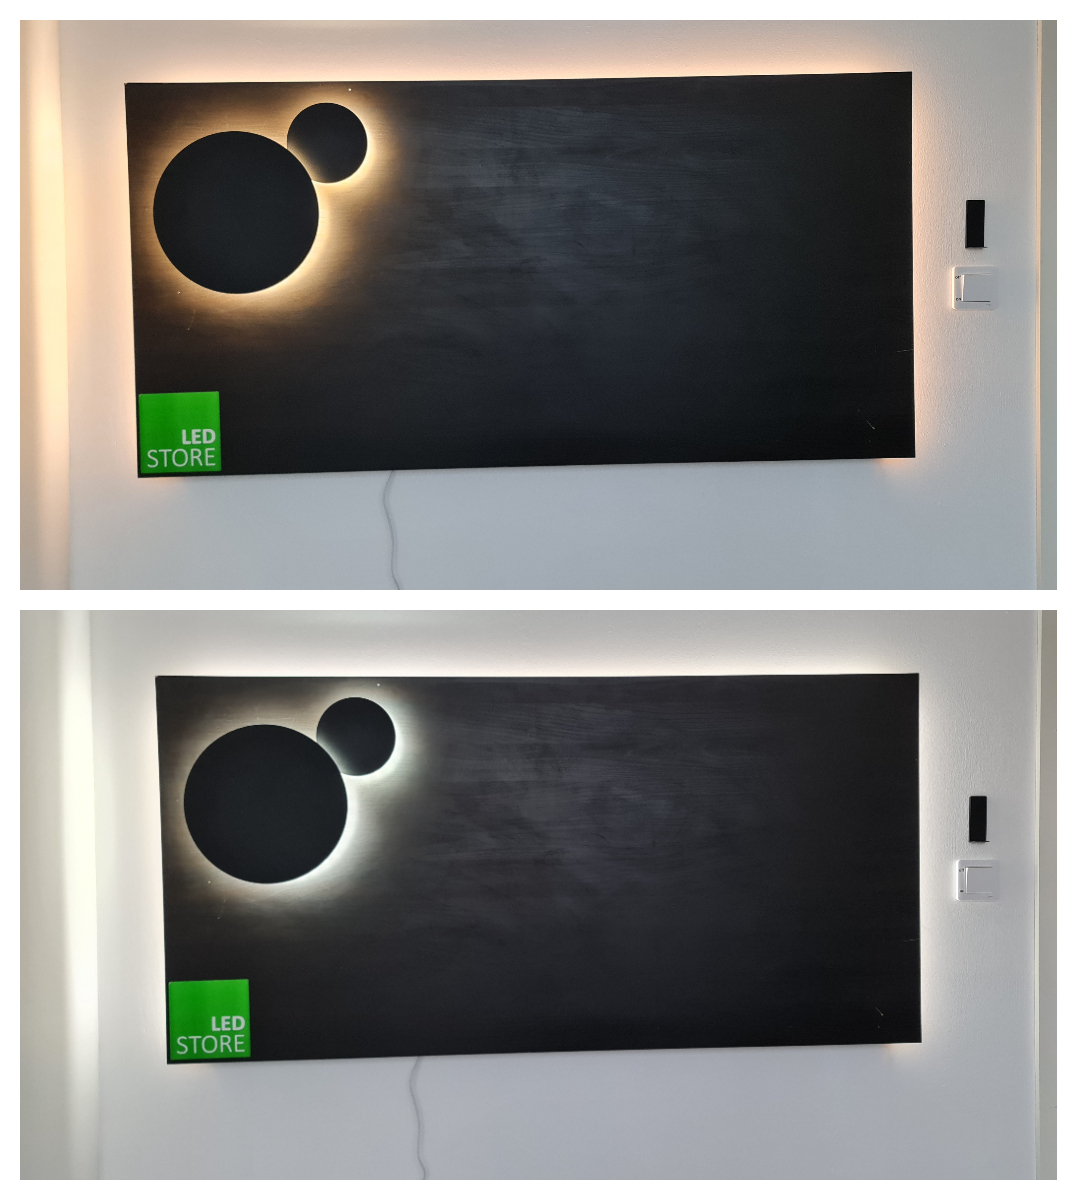
The lights shine evenly from the back of light towards the wall, so there is no glare when viewed from the side. The picture below illustrates the colour temperature variation of the Eclipses and the SOLO CCT 7,2 W/m LED strip illuminating the back of the panel. Since the lights are connected to the same power supply, they can be adjusted simultaneously. The colour temperature and dimming are both the same.
Desk lighting and implementation with Eclipse and LED strip
Making the composition on the furniture panel was simple, as the transformer could fit behind/inside the panel, and the electricity is supplied by a plug-in light socket. The steps were as follows:
- Make a frame on the table top for wall mounting and LED strip. Around this frame (here on three sides), LED rails are mounted.
- Cut the aluminium profiles to the correct dimensions and make the appropriate jigs for the corners.
- Fix the aluminium profiles to the frame with plastic fasteners and the single strip strip to the aluminium profile. The connecting cable must reach the transformer.
- Slide the Eclipset onto the table top, remove the colour temperature switch and drill holes for the wires.
- Make a hole for the transformer behind the plate and hollow out the cell. Glue the removed plate back into the hole.
- Put the Eclipse wires through the holes to the appropriate length to reach the transformer.
- Connect the wires of the LED strip and Eclipses in parallel to the DC-DC transformer. Connect the mains power cable to one end of the transformer.
- Attach the driver to the slot and the wires neatly, e.g. hot glue to the plate.
- Switch on the power and connect the transformer and the controller in pairs.
- Screw the screws to the wall and hang the element in place.
Desk lighting, photos of steps 1-3
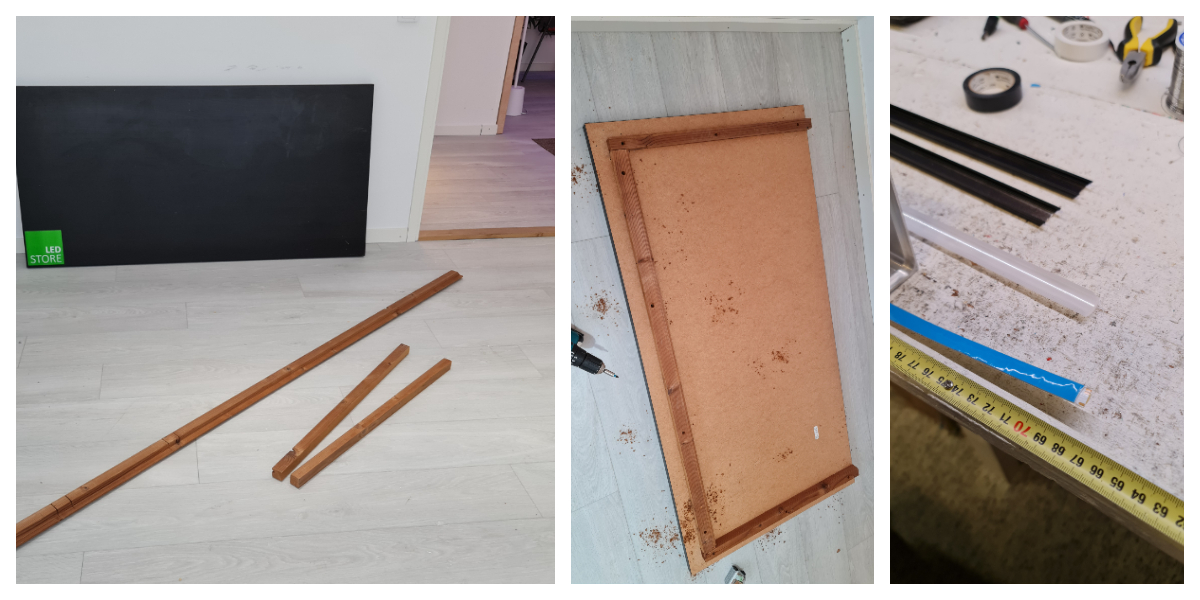
The battens were measured and attached to the 150x75cm board about 5 cm inwards from the edge of the board. The profiles were cut into a yoke and a connecting wire was punched into the end of the LED strip. If you buy a five-metre roll, you will have a 10 cm length of wire ready. The connecting cable can also be ordered from us in the desired lengths and dimensions. The picture shows the blue protective plastic on the LED strip, under which the adhesive surface is ready for fixing the LED strip to the aluminium profile.
Desk lighting, kpictures from steps 4-8
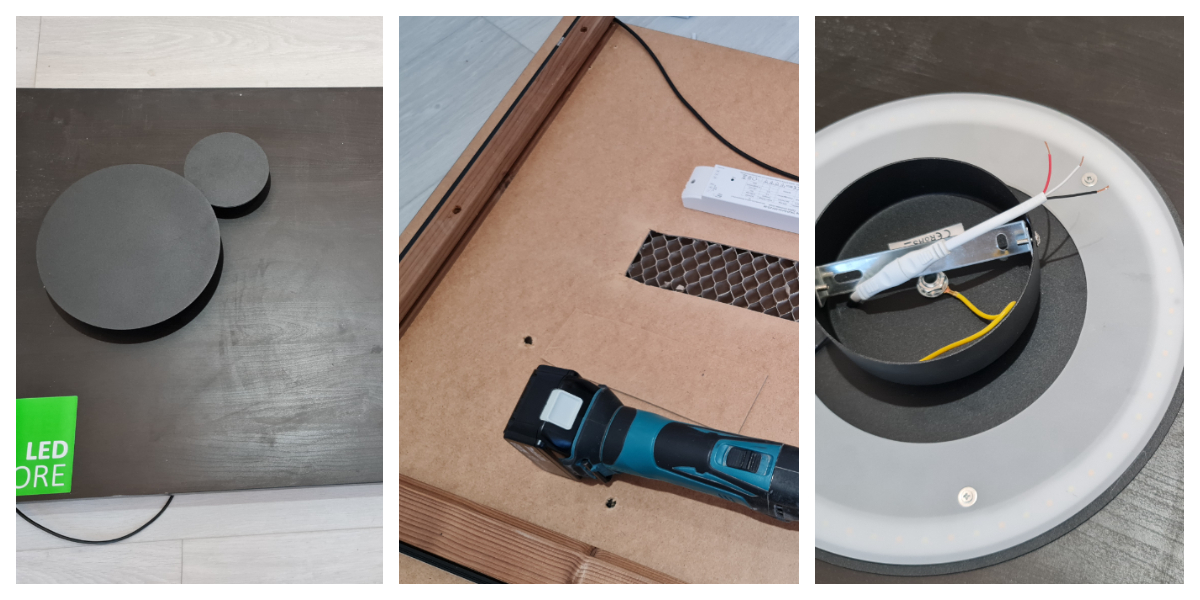
The Eclipset was mounted on a table top and holes were drilled through it for the wires. The picture also shows the start of making a hole in the transformer. Eclipse’s own colour temperature control box was removed because the lights were to be infinitely variable. The three-wire system controls both the current and the colour temperature of the LED. Red going to the luminaire is +, black is cold white CW – and white is warm WW -.
All the wires of the Eclipses and the LED strip were connected in parallel to the transformer with a three-wire low-current cable. Here used green + , black cold CW and white warm WW.
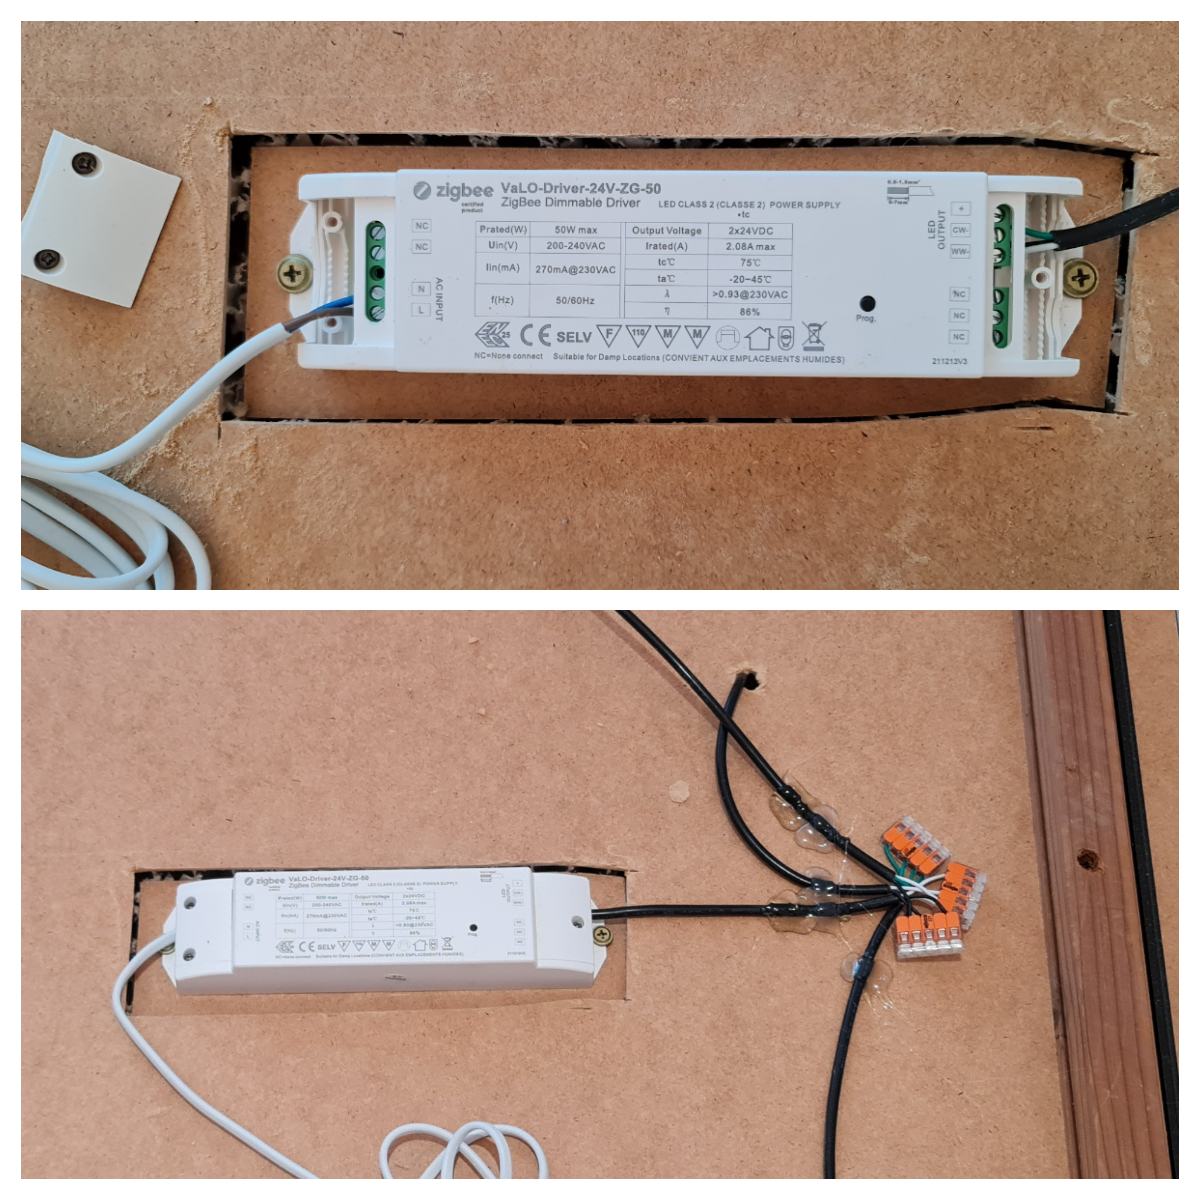
Desk lighting, vtopics 9-12
Fixing on the front of the plate light was still done in parallel, with three two-position lever connectors per light. Reds together, blacks together and whites together. The colour temperature control switch on the luminaire had been removed to allow the colour temperature control of the lights to be infinitely variable. When installed with a colour temperature switch, light will operate in one of the three selected colour temperatures (warm, neutral, cold).
The transformer has places for green + , CW – black and WW – white wires. If the wires are not facing the same way as in the lamp, the colour temperature controller will not adjust the lights correctly. The solution is to check that the pluses and minuses to the cold light and the minuses to the warm light are connected the right way round.
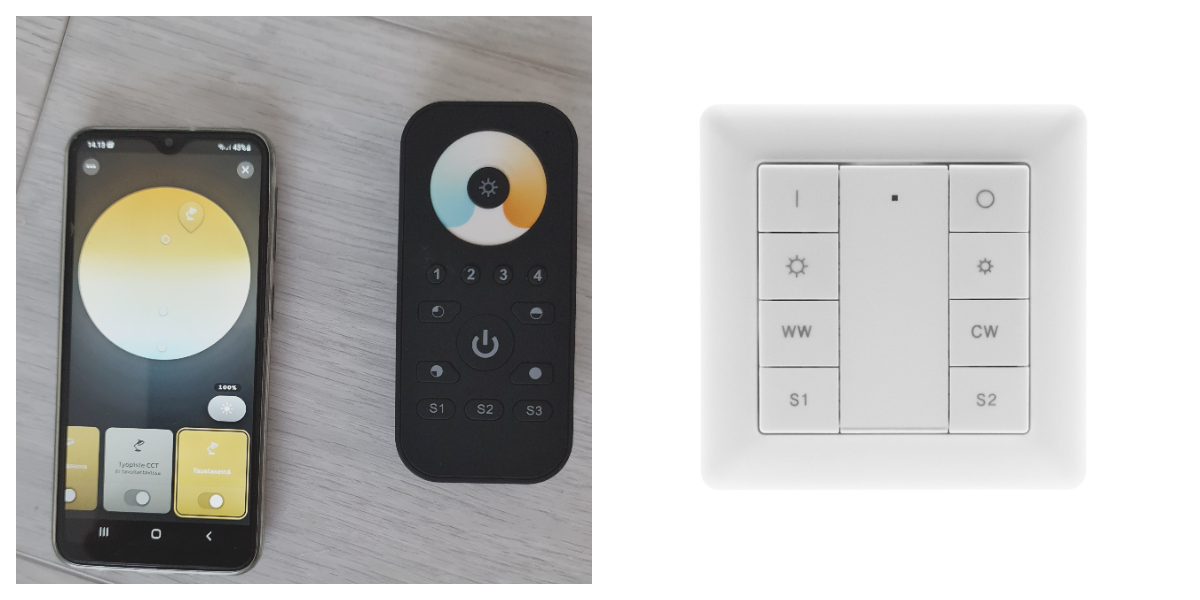
Pairing with Zigbee wireless controllers
Once the luminaires are installed and the power is on, they can be connected to either one controller, e.g. to a wall controller, or to two/more controllers via an intelligent control system. Remember to insert the batteries if you have a remote control, and remove the protective plastic from the back of the battery if you have a wall controller.
If a single controller is sufficient, then no intelligent controller is needed to pair. The transformer has a built-in receiver with which the controller is paired. We have written about pairing in Zigbee lighting control part 1. For example, connecting to a wireless wall controller is as simple as pressing the prog button on the transformer four times to open the pairing connection. Place the controller next to the transformer (less than 10 cm away) and first press the on button ( I ) to “wake up” the device and flash the green indicator light. Then press the brightness increase button (below the on button) once. It takes a moment to connect. When it is ready, the lights will flash twice. This type of connection is called a TouchLink paired connection.
The remote control pairing guide can be found in the product link in the online store under Files: https://ledstore.fi/langaton-led-himmennin-valo-zigbee-4-ryhman-cct-kaukosaadin
We have blogged about pairing via hub/bridge in the article Zigbee lighting control part 2.
Price and time spent on the finished package
Desk lighting can therefore be handled imaginatively. Eclipse wall luminaires are therefore also ideal for mounting on, for example, furniture panels. The sensor table top has been modified to create a lighting element behind the workstation. The solution was to machine a hole for the 50W wireless control transformer in the back of the board. The thickness of the transformer is only 33 mm, while the thickness of the furniture panel is 35 mm. In addition, a 25mm strip was mounted behind the panel, to which an LED track was attached to illuminate along the wall.
The price for the lighting and control of this package was only 466 e (incl. VAT).
All you need to do is lift the lighting element onto the desired spot on the wall using the screws and attach it to the socket. The wall light was easily connected to a wireless control system with colour temperature control and dimming. The effective working time was about two hours.
If you are interested in the lamps in this article, we will be happy to provide you with more information. You are also welcome to visit our store in Koivuhaja, Mesikukantie 16, 01300 Vantaa, Vantaa. Our All in One stores feature all the products presented in the article. We serve all customer groups, from consumers to contractors, under one roof. Take a look at the shop.
Other articles on Make-it-yourself for the spiritual:
All the articles on the renovations: https://ledstore.fi/blog/category/remontit/