
Is it possible to change the lighting in an existing kitchen without a major renovation? You can do it. When the ceiling and walls are painted plasterboard, it is possible to install LED strip lighting without major modifications. In the new layout, a recessed LED track extends from the ceiling in two parallel strips down to the wall, where angular shapes were made. Electricity was taken from the microwave oven and the versatile lighting control is handled by a wall-mounted button-button control. Read here about the progress of the renovation and see the step-by-step photos!
Easily adaptable lighting with colour temperature adjustable LED strip lighting
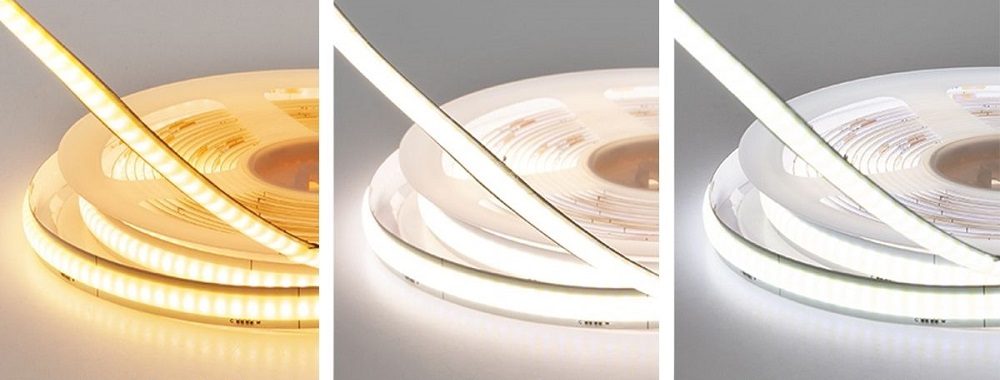
In the kitchen lighting renovation, a SOLO 14,4W LED strip with a high colour rendering index (CRI98) and adjustable colour temperature of white light was used. The advantage of a colour temperature adjustable (we use the abbreviation CCT for Changeable Color Temperature) strip is that it always gives the kitchen the right atmosphere, depending on the light from outside or the desired mood. In the SOLO strip, the LEDs are so small that there is no perceptible pinpointing when mounted in a deck profile, even when the lights are on full dim. For this renovation, we used a low-profile flush profile with an external width of 25 mm and a recess width of 18 mm. Below are pictures of the strip without profile, with three colour temperatures as an example, warm, neutral and cold. With the controller installed, the colour temperature and brightness of the light can be adjusted completely infinitely.
Led strip SOLO CCT 14,4 W/m gives approx. 1 000 lumens of light per metre without a lid. The cover blocks out the light and takes about 10% of the brightness. A total of ten metres of LED strip was installed in two rows in the kitchen, giving a total lumen output of around 9 000 lumens. For the size of the space, there’s plenty of light, over 1,000 lux, but we preferred this more powerful one, as it can be dimmed to suit the mood. The impression of brightness also varies depending on the colour temperature of the light.
Led strip and aluminium profile: a colour temperature adjustable 14.4 W/m CCT SOLO, strip was chosen because the light comes from a low, approx. from a 6 mm deep flush profile to a perpendicular space. This minimised the point spacing of the LED.
Transformers and controls: a common transformer was chosen for the strips, a 150 W Zigbee CCT, and a wall-mounted battery-powered Zigbee button for easy, infinitely variable adjustment of lighting tone and brightness. Thanks to their Zigbee capability, these can also be integrated into a mobile-controlled smart lighting system.
Design and preparation of new lighting
When the need and desire to replace the lighting in the kitchen arose, the initial situation had to be determined, i.e. what kind of structure the ceiling and walls had. Existing electricity points were also identified. The design took some time, for example, not wanting the wall pattern to be too complicated and not shining directly into the eyes of those sitting at the table. It was therefore decided to bring the pattern about 60 cm down from the roofline.
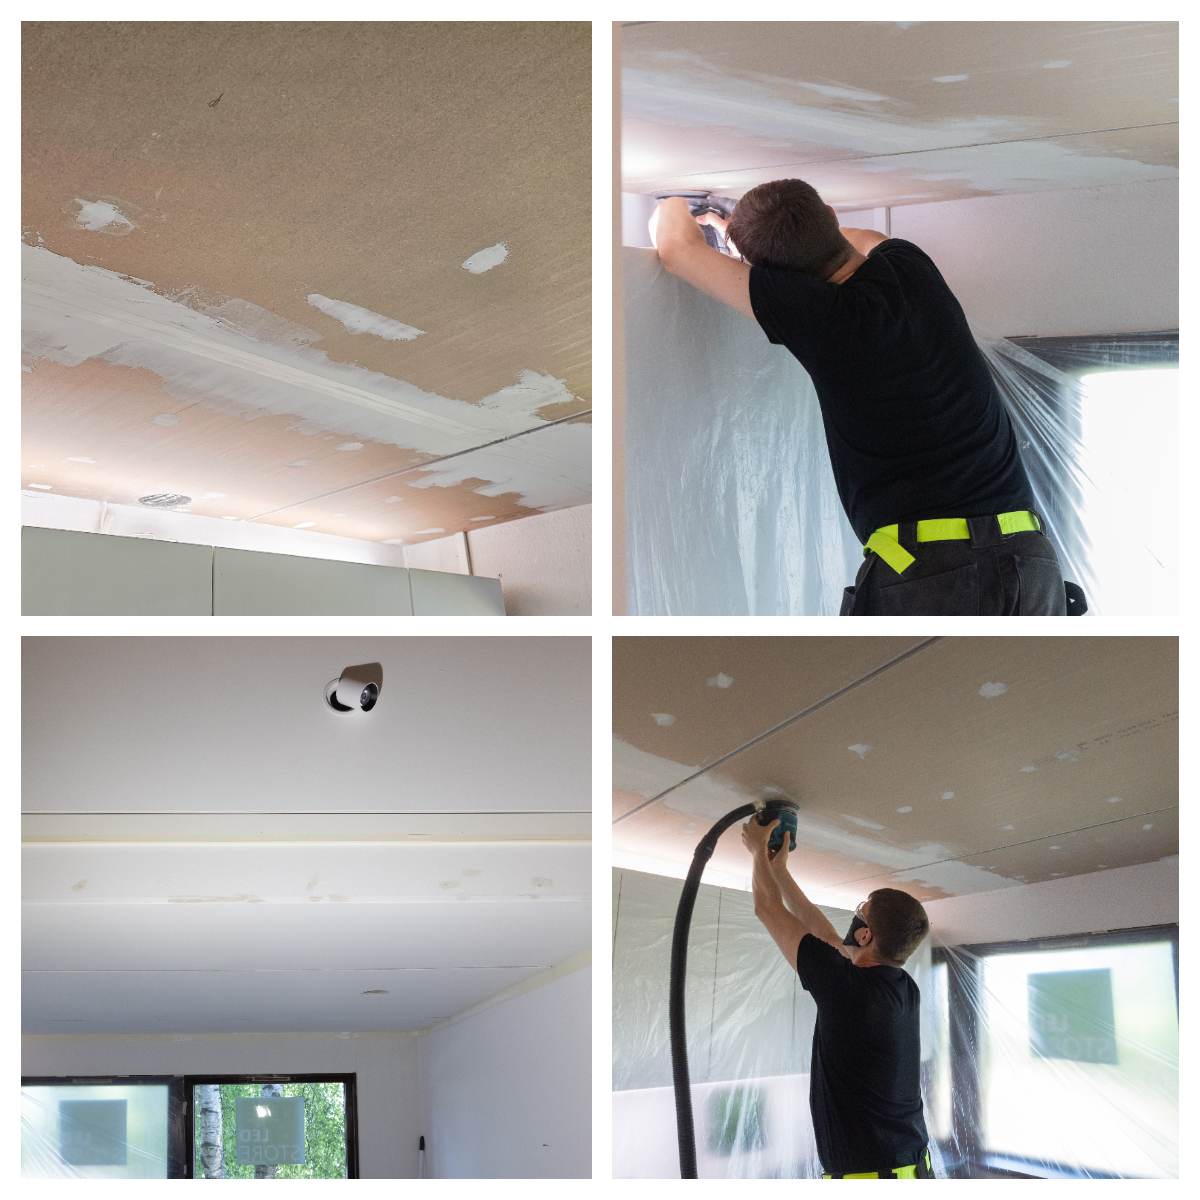
They also considered repainting the whole space, but ended up just re-plating the roof and painting it. On the wall, small installation marks were smoothed and sanded to hide them. On top of the cabinets, they also considered how far the light strips would be brought. The solution was to bring the light all the way to the wall, as it was the cleanest option to hide the connecting wires behind a shallow wiring loom.
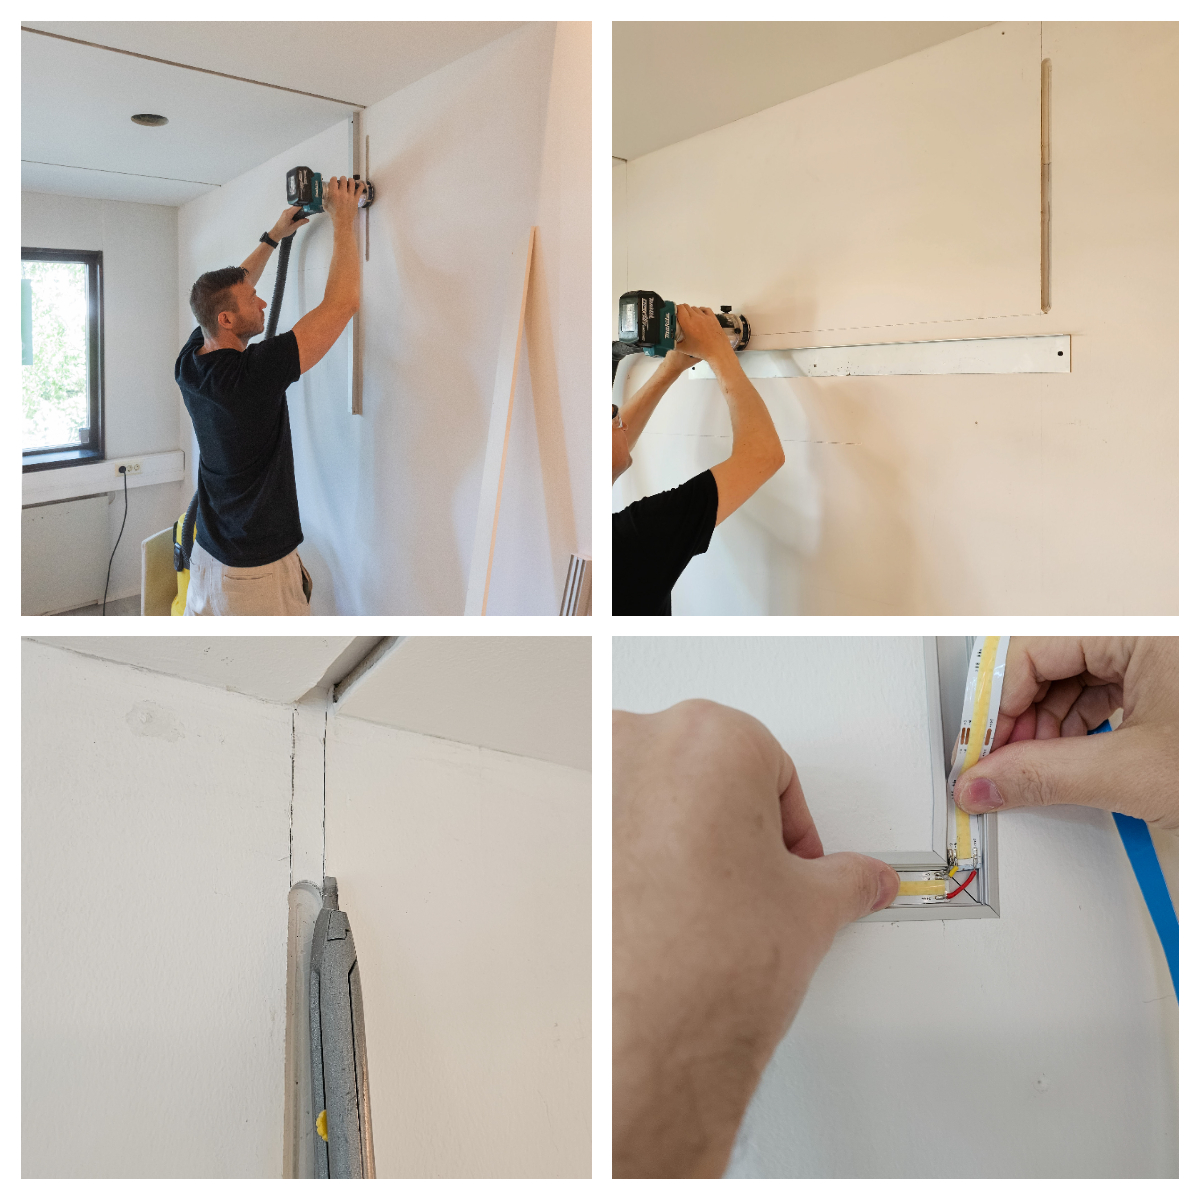
No special tools and materials were needed, and almost all the tools were found in the back: a milling machine with an 18 mm blade and a depth of 8 mm, a hand sander, a vacuum cleaner, protective plastic, white paint, smoothing compound, plasterboard, screws, brushes. A metal L-shaped jig was also needed from the hardware store to mill the horizontal shapes of the wall. In addition, a small piece of flush profile was used as a gauge to get the plates exactly the desired distance apart. In a groove of the right size, the profile is installed tightly without the need for fasteners.
Preparation of Led strips and aluminium profiles before installation
In this renovation, my own LedPaja put the wind in the sails, and the steps were as follows:
- Cutting the aluminium profiles to the right length, and sawing the corners of the wall form to the right size.
- Fitting the Led strip to the profile and cutting it to the correct dimensions.
- Knocking short corner wires into the wall corners of the Led strip.
- Soldering the appropriate length of connecting wires to the power supply end of the Led strips to connect them to the transformer.
- Testing the functionality of the tapes
- Pair connection between transformer and controller and testing.
As the aluminium profiles are 2.5 metres long and the roof is a good 3 metres long, the aluminium profiles were made in two parts and the LED strip light came in two lengths ready to roll. Led-ribbon bends the so-called. parallel to the roller, so no jointing was required between the roof and the wall. So in practice, only one corner joint was made per ribbon.
Making ceiling lighting
The renovation started with the removal of the old light fitting and the installation of new tiling on the ceiling. The new sheets were installed on top of the existing plasterboard at a suitable distance from each other so that the profile could simply be pushed into the groove.
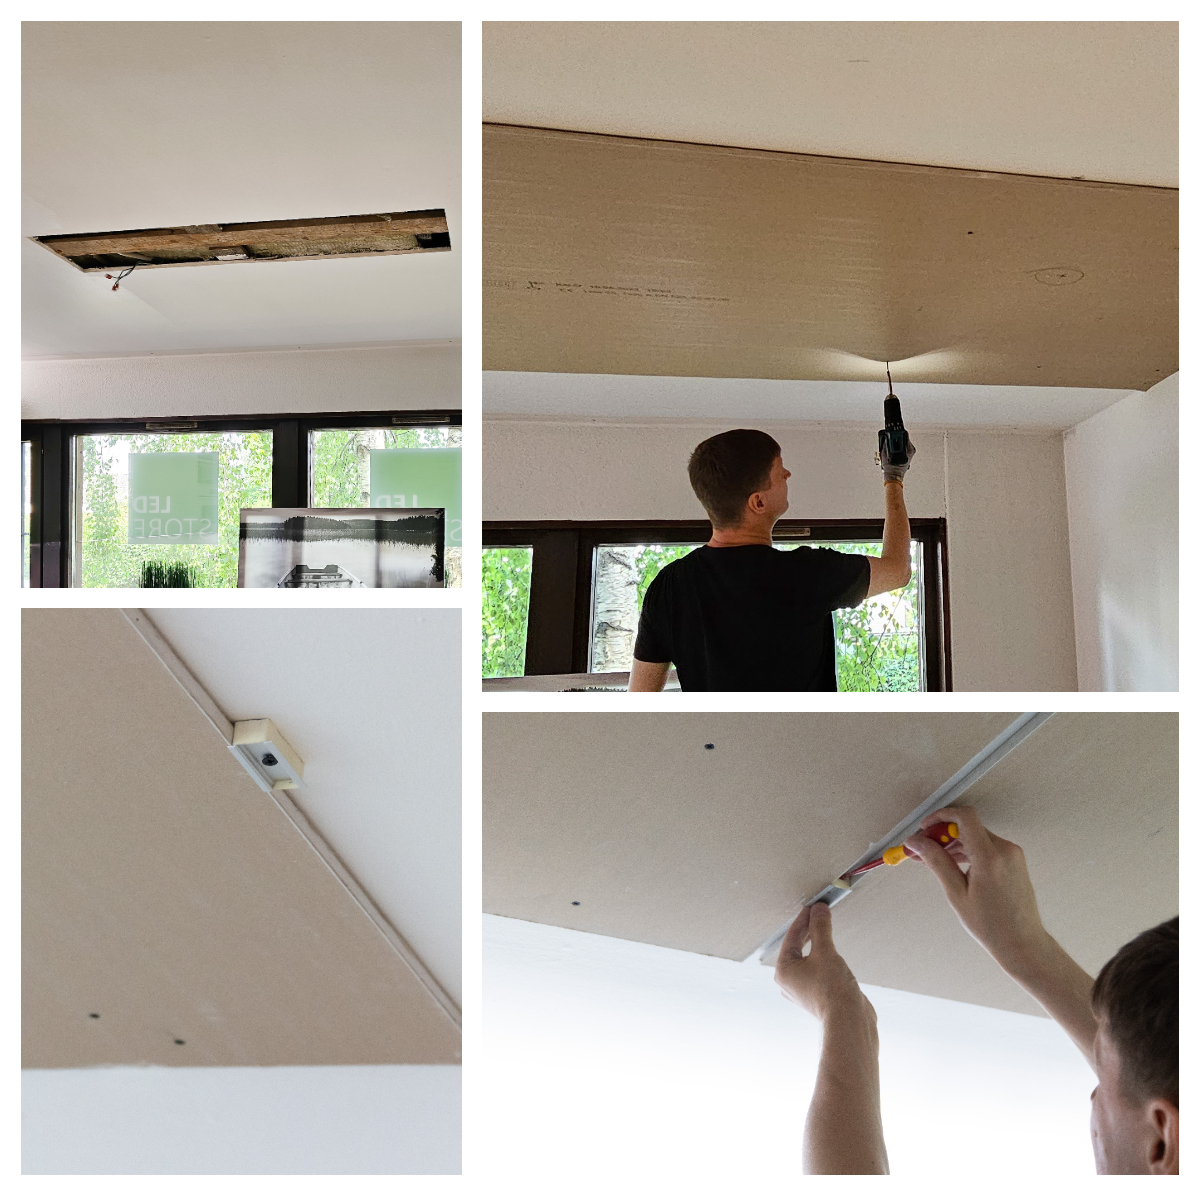
Working on the wall, milling the light groove
Once the roof was finished, the work on the wall groove began. 18 mm wide and 8 mm deep grooves were milled in the wall at the desired locations. To align the milling groove, a metal plate was screwed to the wall, against which straight grooves were made. In addition to the milling cutter, a hand-held blade had to be used to make the groove in the upper part. The aluminium profile fitted into the grooves with just the desired precision. Once all the LED profiles were in place, the installation of the LED strip lights began.
The heat-adjustable SOLO tape has a heat-conducting double-sided tape ready for use. First, the dust was wiped off the bottom of the profile and then the LED strip lights were glued into the groove. A diffuser lid was attached on top. The installation of the 2.5 metre cover for the LED profiles was started at a different end of the ceiling from where the installation of the 2.5 metre aluminium profile had started. This gave a solid extension to the roof, and the aluminium extension point and the seam of the deck did not meet. When the protective plastic on the lid was removed for the last time, the surface was beautiful and shiny.
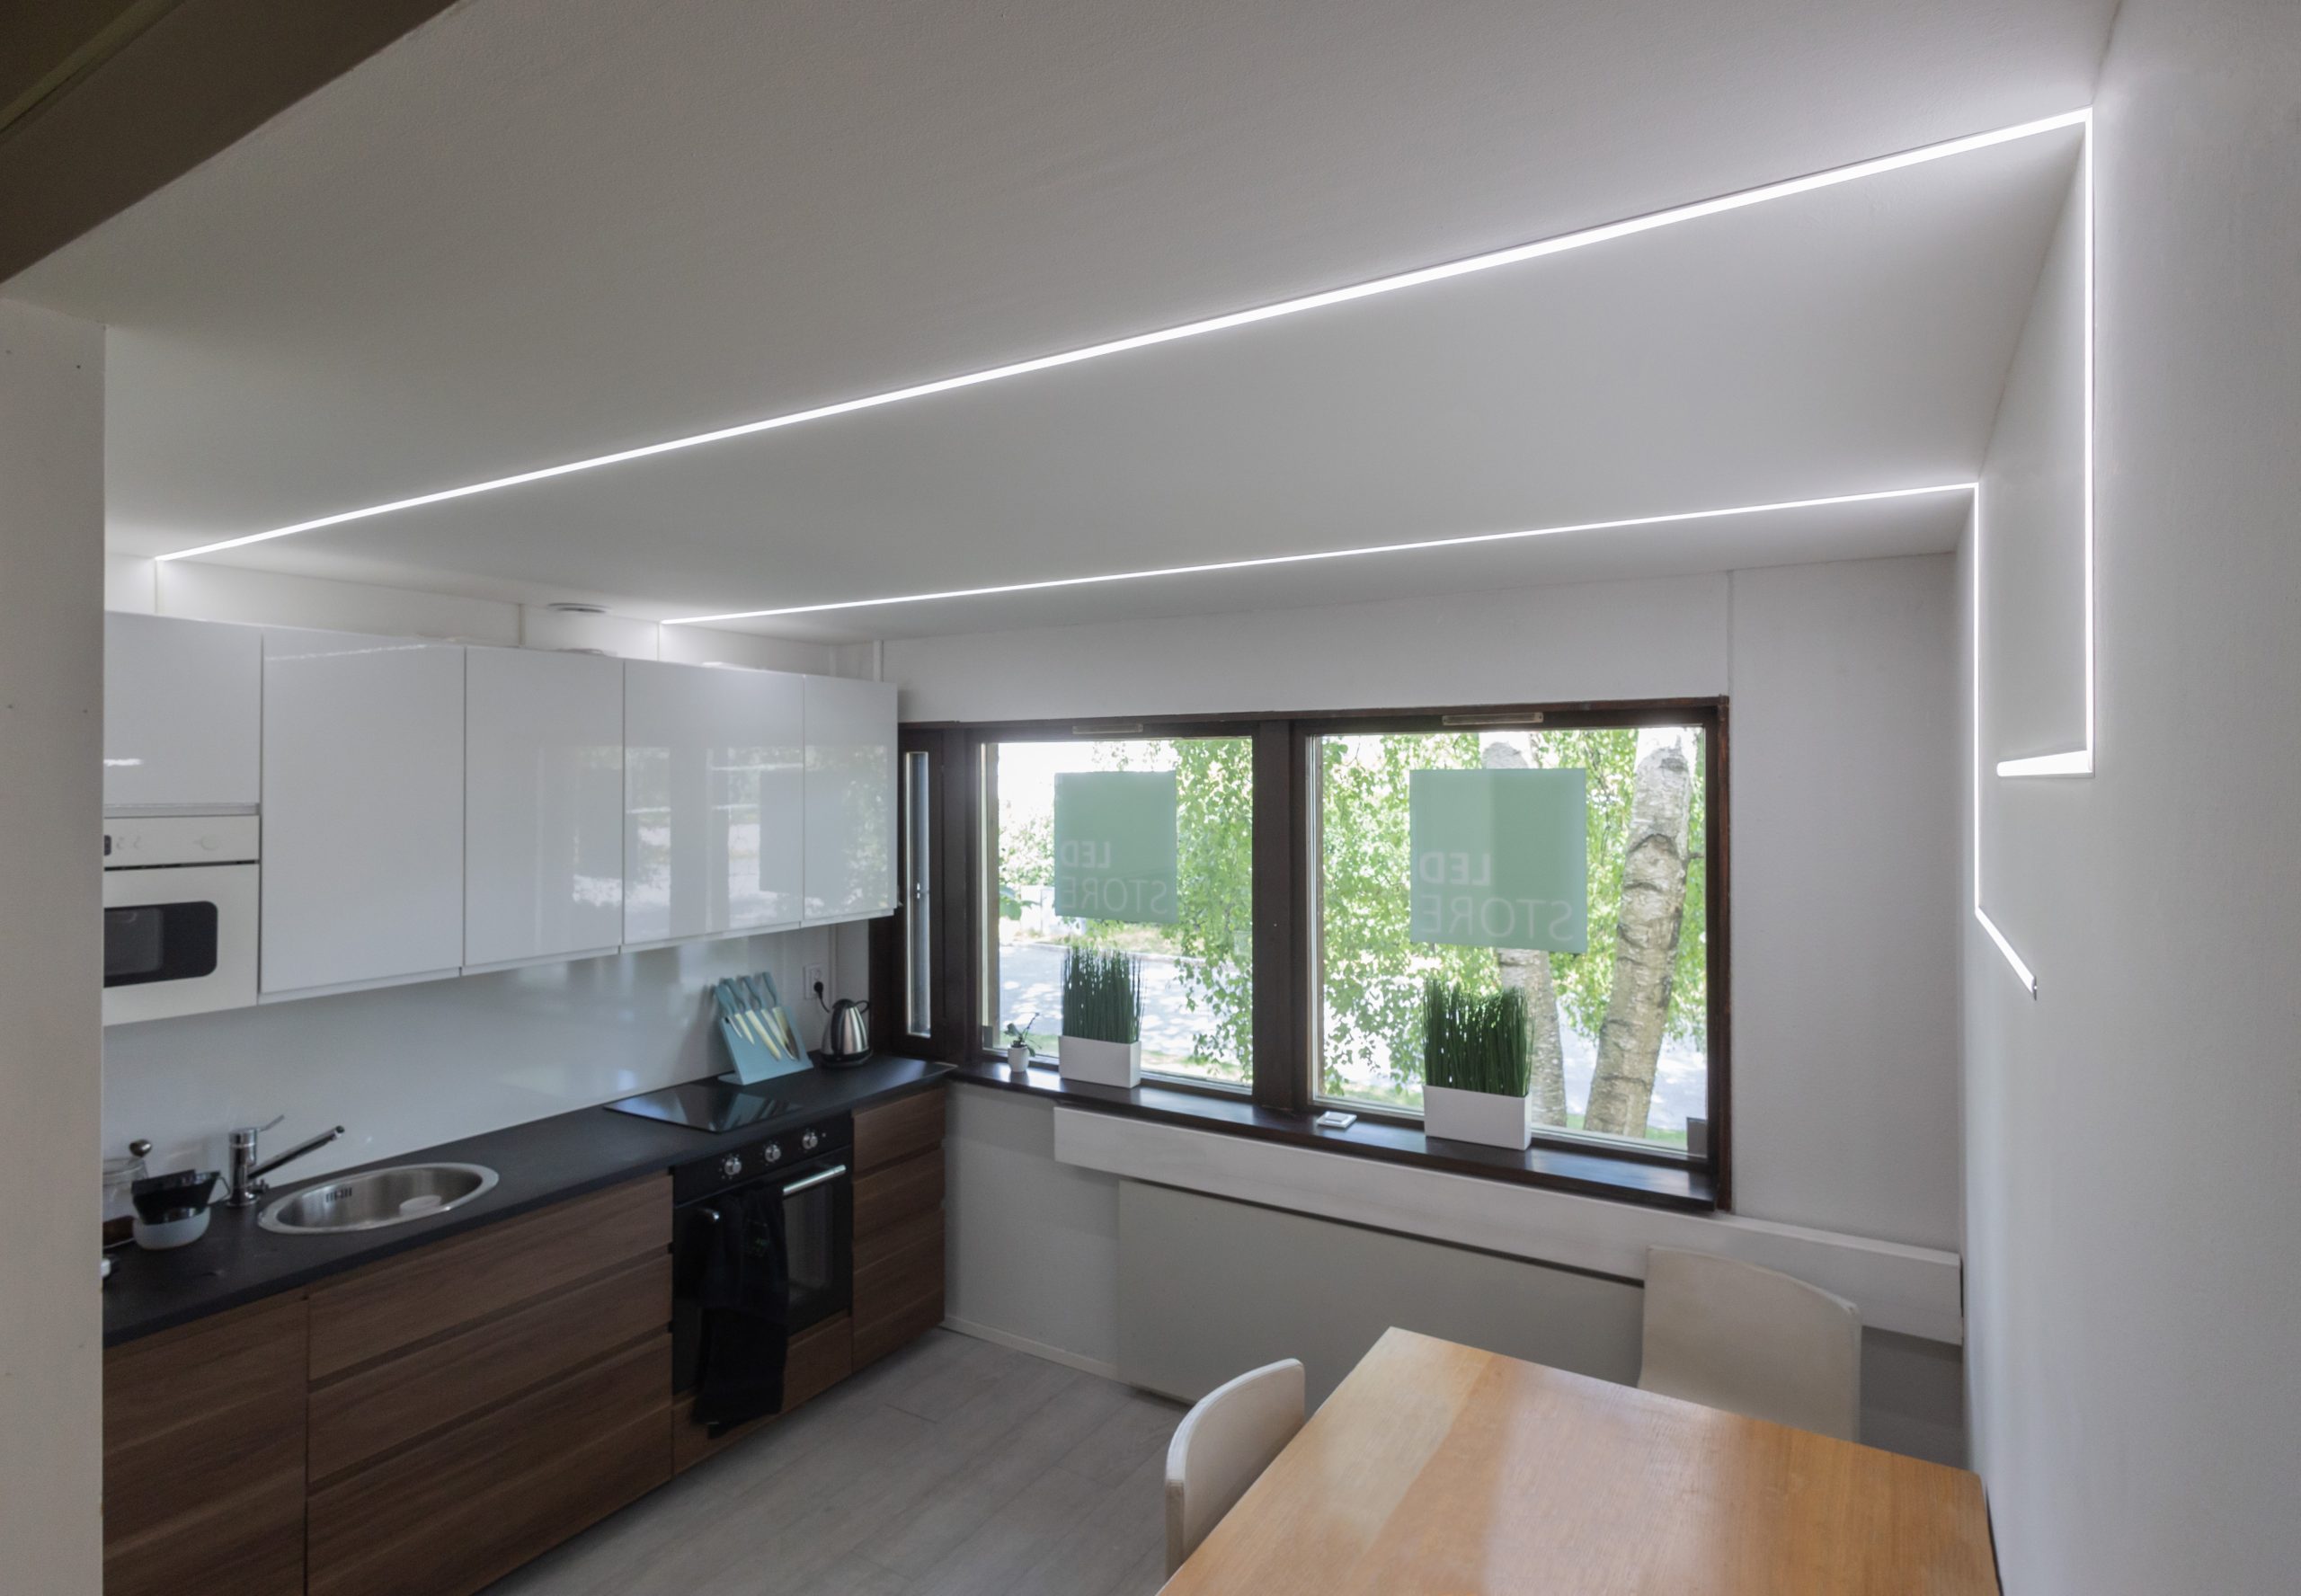
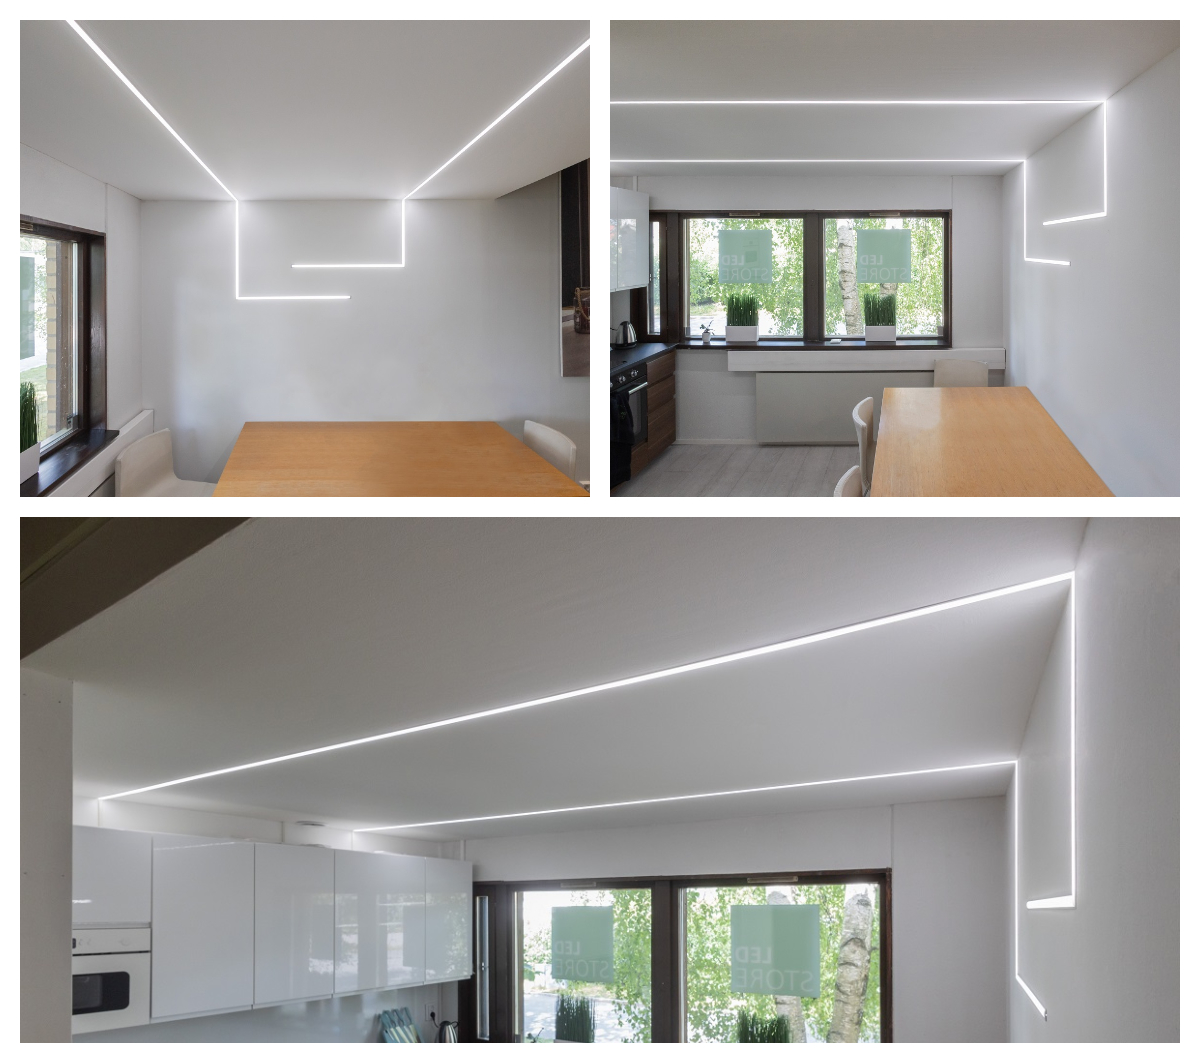
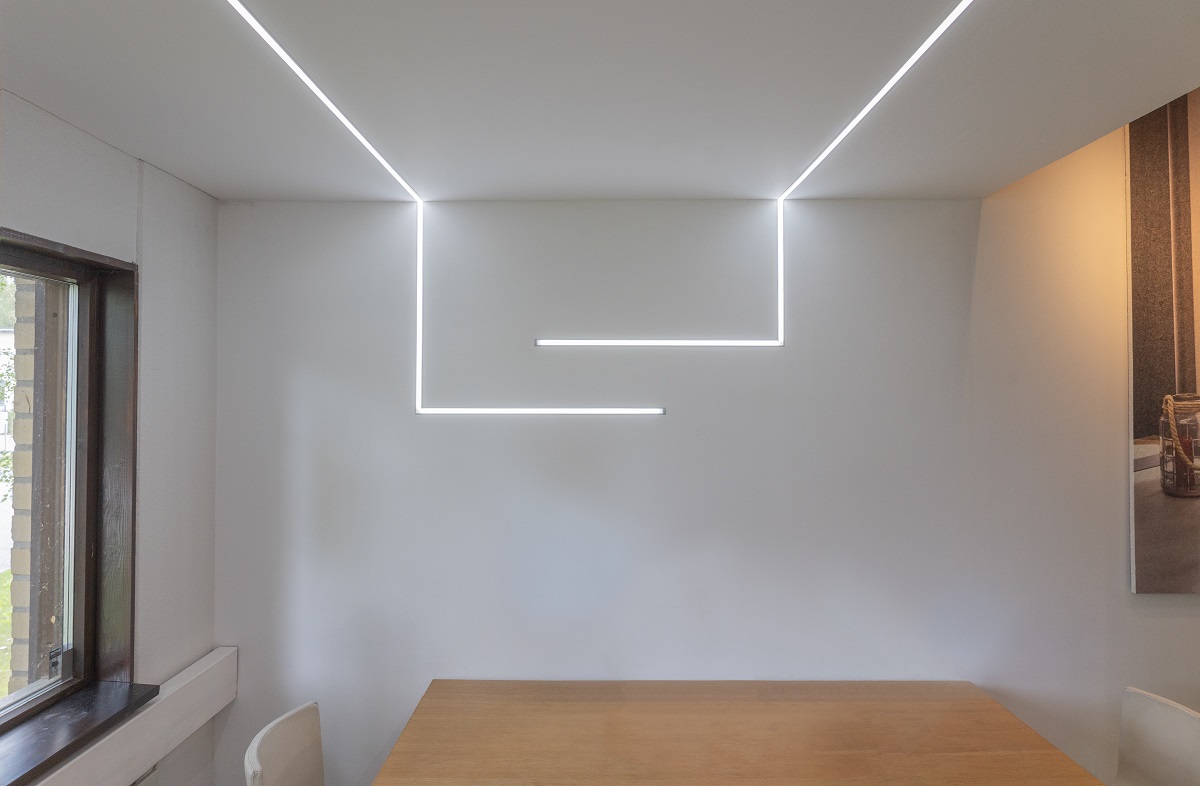
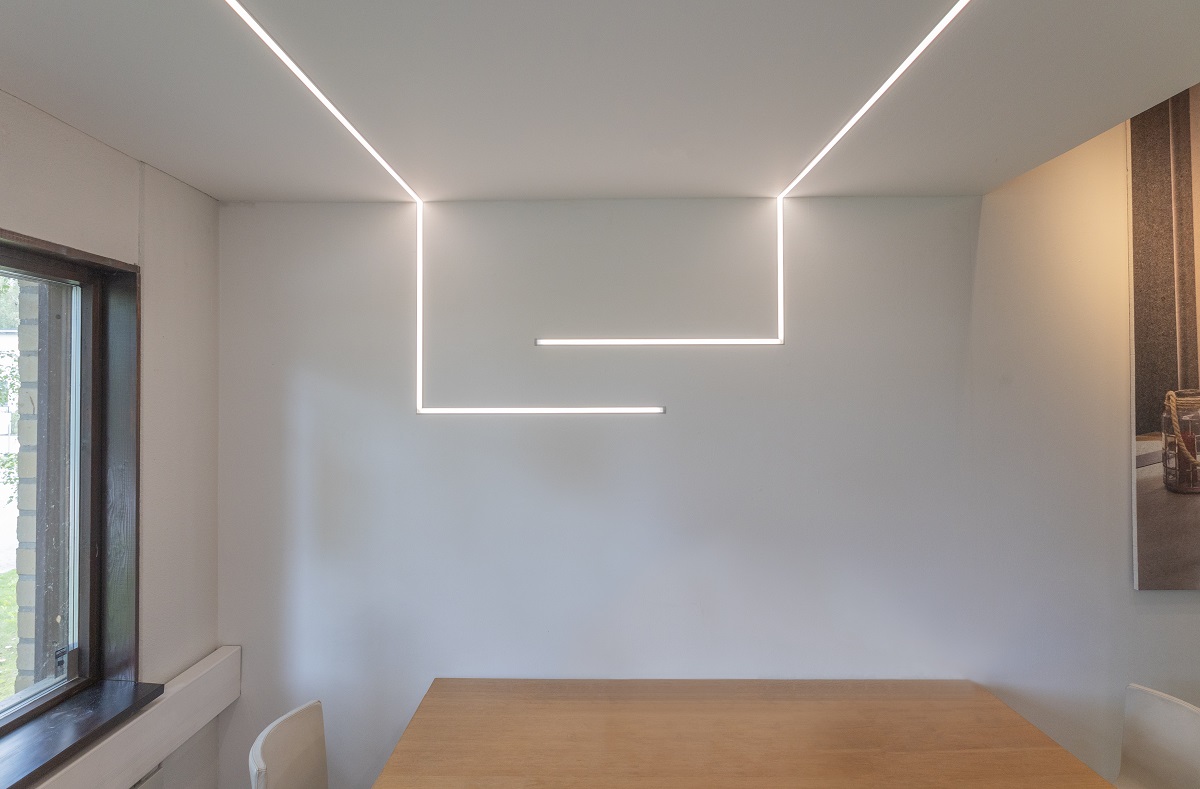
The general lighting on the roof is also an interesting effect lighting
The finished installation result is stylish and functional. The adjacent strips blend in perfectly with the ceiling, as the surface of the flush profile remains flush with the underside of the roof. The patterns are successful and quite easy to make, as the strips have only one corner to punch. In the pictures, the lights are set to a cold colour temperature.
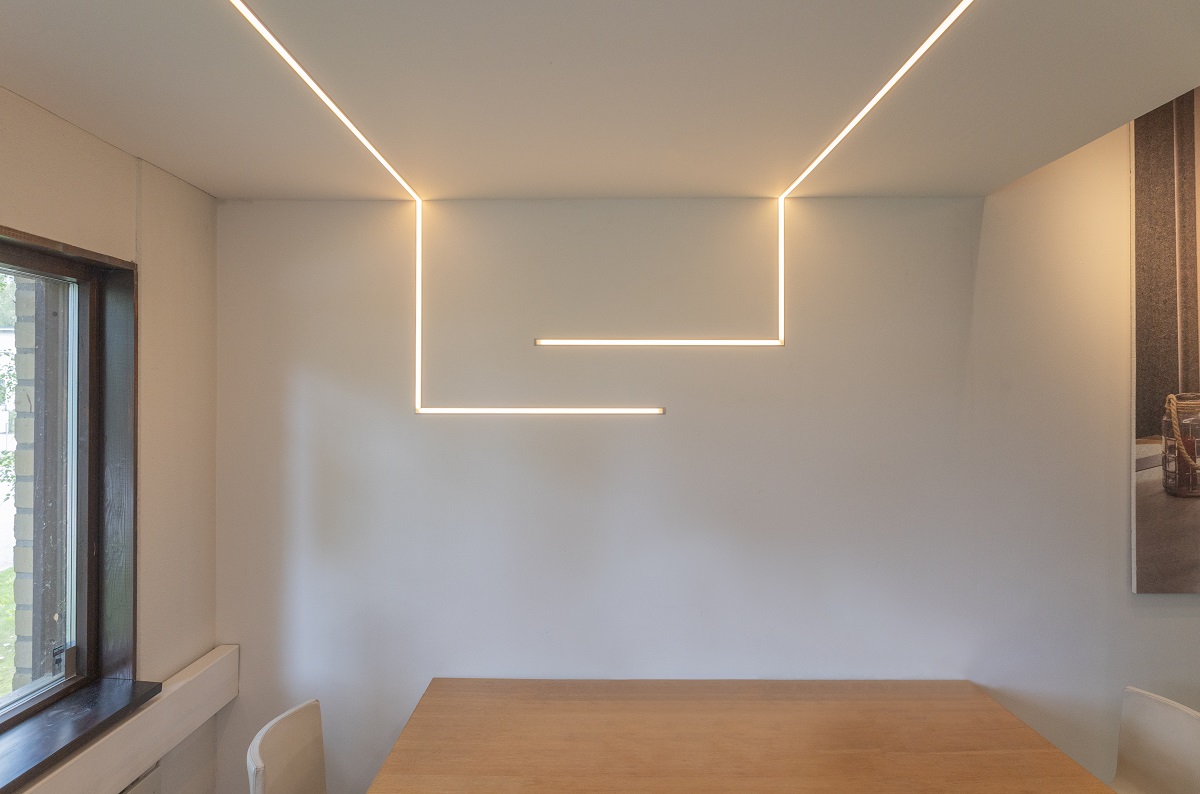
Temperature adjustable LED strip for variable mood lighting
The three-pole wires from the led strip lights were taken to the transformers, one transformer will fit two led strip light wires just fine. If colour temperature control is desired, it should be taken into account at the design stage, as the feature must be present in the LED strip, the LED strip transformer and the controller.
The colour temperature control gives a nice change of mood to the room. For example, a warmer shade of light can be used in the evening and a cooler one during the day.
The brightness and colour temperature of the light can be easily adjusted to the desired Kelvin level with a wireless controller. For example, warm dimmed light just to create a mood, or a slightly more neutral and brighter light for reading a book or socialising in the living room. The controller is a wireless Zigbee controller paired with a Zigbee receiver/transformer.
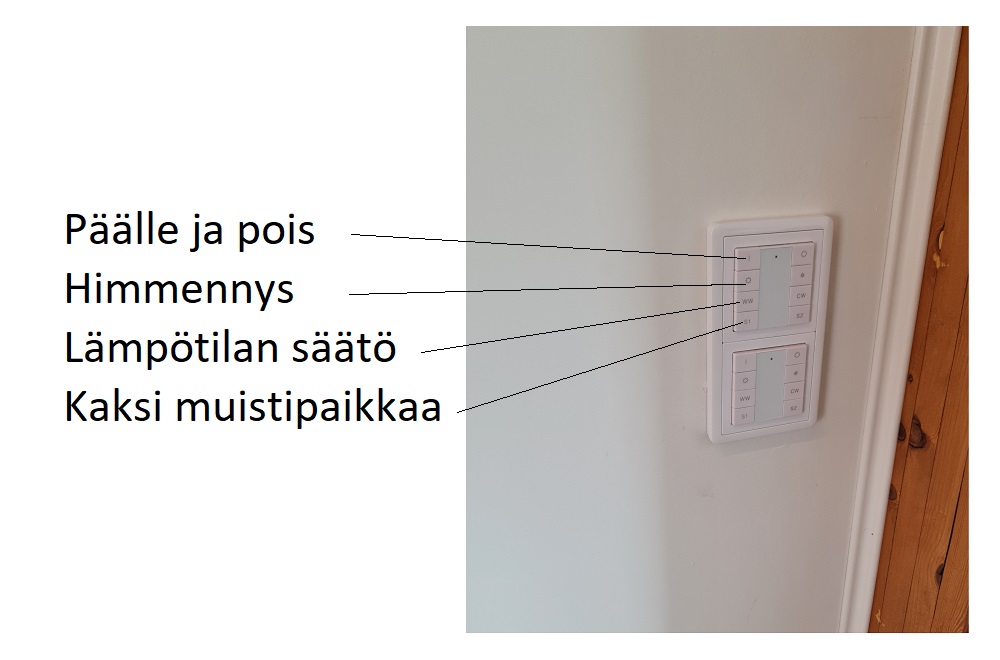
The controller, a wall button, works with a pair of batteries and the signal works on radio frequencies from up to 20 metres away. Separate buttons were fitted for the top and bottom lights, and both were mounted in a Schneider EXXACT 2-piece frame set. Convenient and neat. The buttons are also available in black. The button acts as an easy control and has two memory slots for easy storage and use of your favourite settings. Just hold the button down and save the situation. One press brings up the saved situation.
If you want to time and program the light to behave according to the sun’s daily rhythm, for example, you also need a Zigbee bridge or a hub, such as LedStore’s own bridge. All the most common smart controls also use the Zigbee protocol, such as Philips Hue, Samsung Smart Things or Homey.
Other renovation projects
The combination of LED strip and aluminium profile creates a huge variety of lighting options. For example, in this article: indirect light ceiling retrofit profile is installed with a led strip on the ceiling border. The profile can also be easily installed lower on the wall without modifying the wall or ceiling.
The flexible LED strip NEON also allows you to create curved shapes on the ceiling or wall. Read the blog Curved shapes with LED – NEON LED ribbon to find out how we did this project.
You can also make lowered elements in the ceiling to create a graphic and elegant look, as in this twin renovation.
Led lighting expert
LedStore has been an expert in LED lighting since 2010. We have our own product design, so our products are technologically state-of-the-art. We focus on colour temperature adjustable and high colour rendering luminaires. We do around 500 lighting designs for our clients’ sites, so we have our finger on the pulse of current lighting needs.
We offer a service of custom made led strips, i.e. custom made led light strips in profile. Also installed.
We are ready to support you with your projects along the way by email(myynti@ledstore.fi) and by phone (045 251 4510). Feel free to share photos of your own projects on social media #ledstorefi on IG and ledstore.fi on FB. We love to see the cool things our LEDs do, and it helps to provide inspiration for those who aren’t quite sure about the awesomeness of LEDs! Did you know that we already have over 3 500 pictures of our LED installations in our gallery!
Links to photo galleries of led lights:
Product gallery: Pictures of products in different installation locations
Indirect light: Indirect light in different spaces
Room-specific: Light in different rooms
References: Complete houses that have been photographed